GRE tunneling can be configured to bridge Ethernet packets between WLANs and a remote WLAN gateway over an IPv4 GRE tunnel. The tunneling of 802.3 packets using GRE is an alternative to MiNT or L2TPv3. Related features like ACLs for extended VLANs are still available using layer 2 tunneling over GRE.
Using GRE, access points map one or more VLANs to a tunnel. The remote endpoint is a user-configured WLAN gateway IP address, with an optional secondary IP address should connectivity to the primary GRE peer be lost. VLAN traffic is expected in both directions in the GRE tunnel. A WLAN mapped to these VLANs can be either open or secure. Secure WLANs require authentication to a remote RADIUS server available within your deployment using standard RADIUS protocols. access points can reach both the GRE peer as well as the RADIUS server using IPv4.
The maximum limits on GRE tunnel configuration for each platform are as follows:
| Platform | Maximum GRE Tunnels Supported |
|---|---|
| NX5500 | 512 |
| NX7500 | 1000 |
| NX9610 | 1024 |
| CX9000 | Not suppported |
| VX9000 | 1024 |
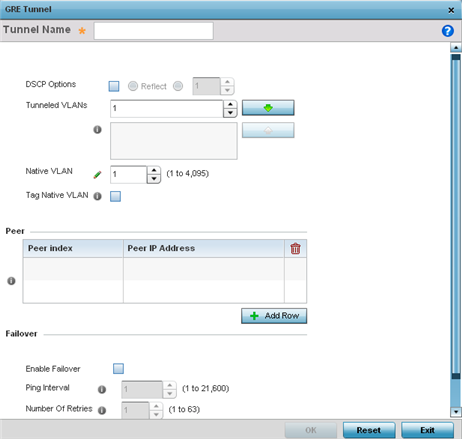
To define a GRE tunnel configuration:
The Profile screen displays. This screen lists access point profiles.
The selected profile's configuration menu displays.
The screen displays existing GRE configurations.