Installing the RPS Shelf into the Rack
To install an STK-RPS-150CH2 or STK-RPS-150CH8 into a 19-inch (48.3 cm)
rack, you need the following:
- For the STK-RPS-150CH2: four customer-supplied screws to fasten the
shelf to the rack rails.
- For the STK-RPS-150CH8: ten customer-supplied screws to fasten the
shelf to the rack rails.
After installing the power supplies as described in
Installing an STK-RPS-150PS in an RPS Shelf, rack mount the RPS
shelf as follows:
Guidelines for Rack Mount Installation
The installation site must be within reach of the network cabling and meet
the requirements listed below:
- Shelf placement must be close enough to connect the 6.6-foot (2-meter)
AC power cords from the power supplies to the AC power source.
- One or two three-pronged power receptacles
capable of delivering the current and voltage specified in STK-RPS-150PS and RPS Shelves Technical Specifications.
One or two AC outlets on independently-fused circuits must be within 6 feet (1.8 meters) from
the installation site. If there is an AC power source failure, this will prevent the powering
down of redundant power supplies due to a single source power failure.
- Power cords and type of outlet are dependent on the country. In the
United States, one power cord with an NEMA 5-15P plug is provided with each STK-RPS-150PS.
- An ambient temperature of between 32°F (0°C) and 122°F (50°C) must be
maintained at the installation site with fluctuations of less than 18°F (10°C) per hour.

Caution
To ensure proper ventilation and prevent overheating,
leave a minimum clearance space of 3 inches (7.6 cm) at the front and rear of the
unit.

Warning
Before installing the shelf into a
rack, ensure that the rack can support the device(s) without compromising the stability of the
rack. Otherwise, personal injury and/or equipment damage may result.
Rack Mounting the RPS Shelf
To install the RPS shelf into a 19-inch (48.3 cm) rack:
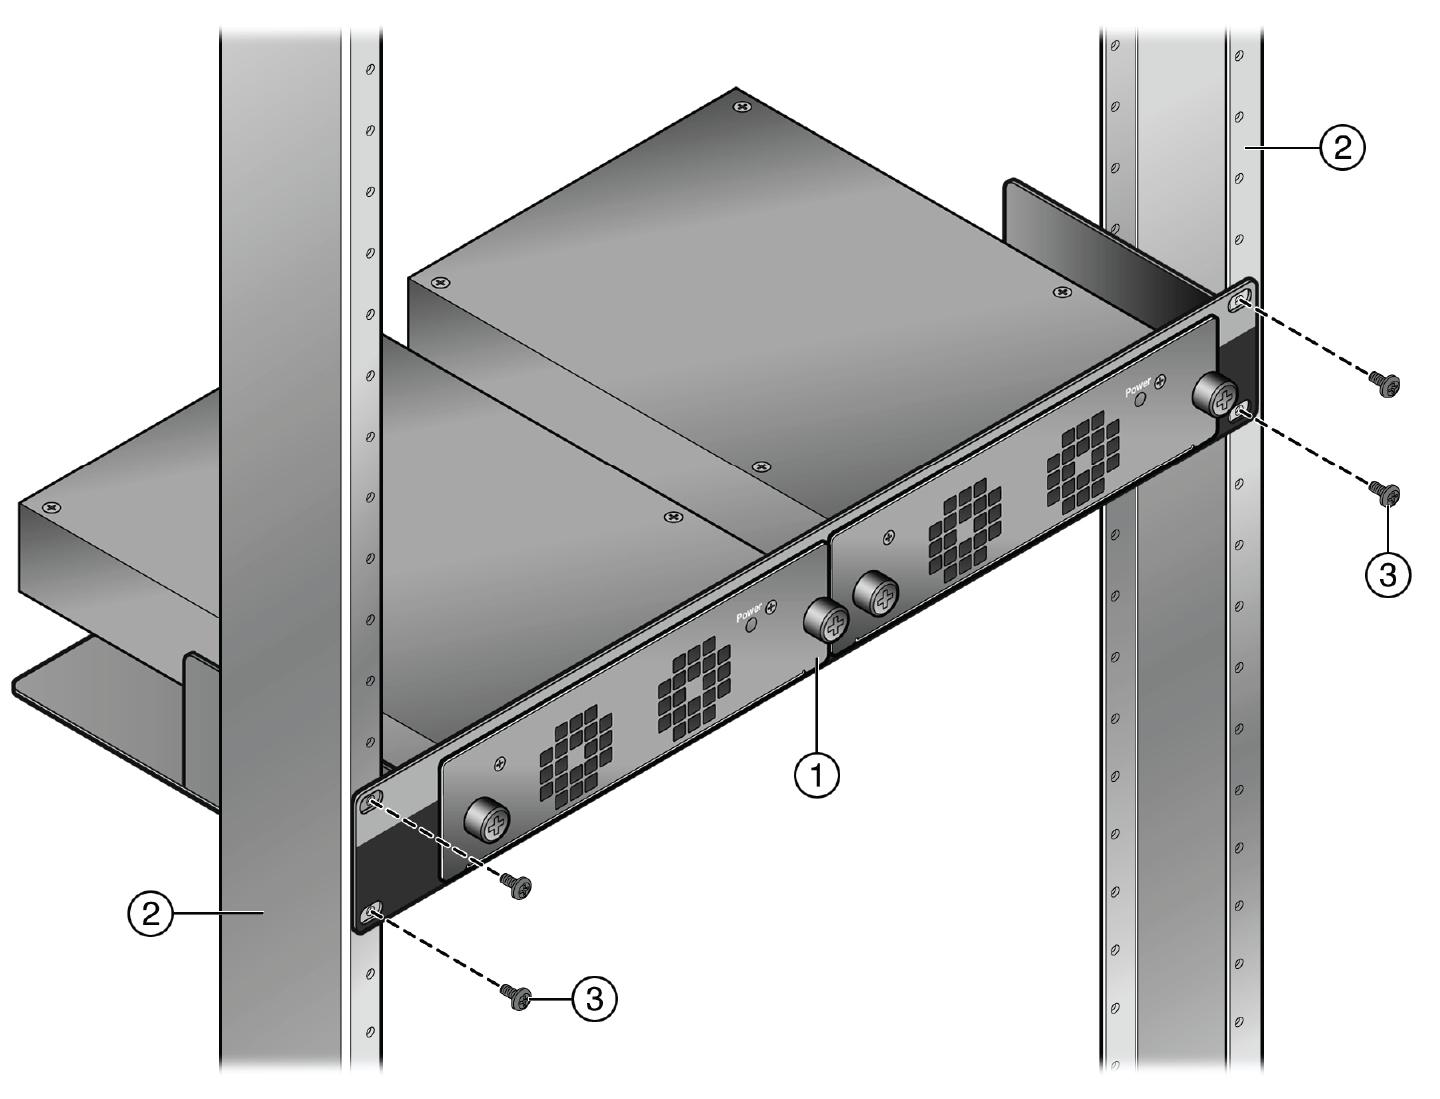
- Position the RPS shelf between the vertical rails and align the mounting
holes in the RPS shelf brackets with those in the rack frame.
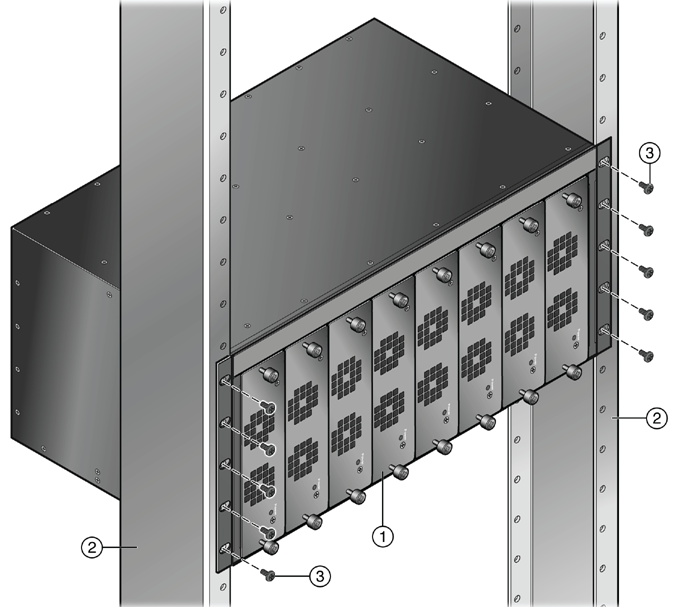
- Fasten the RPS shelf securely to the rails using the customer-supplied
mounting screws (four for the STK-RPS-150CH2, ten for the STK-RPS-150CH8).
Fastening the STK-RPS-150CH2 to the Rack
| 1 = STK-RPS-150CH2 shelf |
3 = Mounting screws |
| 2 = Rails of rack |
|
Fastening the STK-RPS-150CH8 to the Rack
| 1 = STK-RPS-150CH8 shelf |
3 = Mounting screws |
| 2 = Rails of rack |
|
 Print
this page
Print
this page Email this topic
 Feedback
 View PDF
 Download EPUB