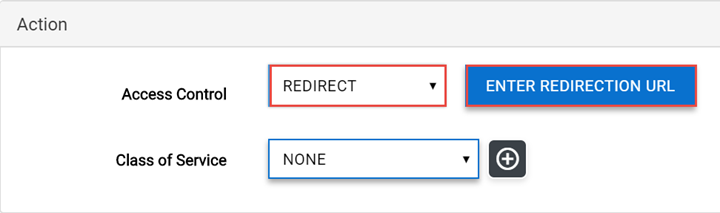
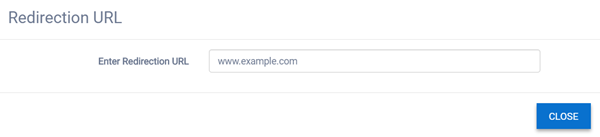
To configure external captive portal redirection:
 (next
to the new rule).
(next
to the new rule).
| From User | Specify Destination (dest) as the value. |
| To User | Specify None as the value. |
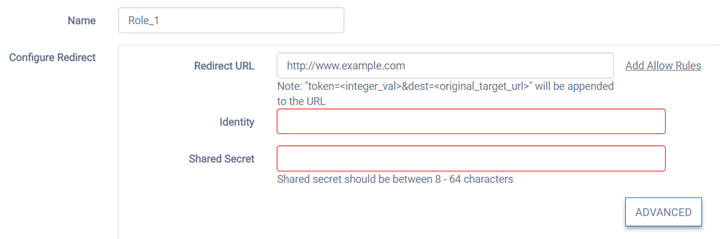
| Identity | Specify the name common to both the AP and the external web server to encrypt the information passed between the AP and the external web server. The identity also tells the receiver which shared secret to use to validate the message signature. If you do not configure the identity, the redirector on the AP drops the traffic. |
| Shared Secret | Specify the password that will be used to validate the connection between the AP and the external server. Limits: 16 - 225 characters. |
 Print
this page
Print
this page Email this topic
 Feedback
 View PDF
 Download EPUB