Configure L2, L3, and L4 Rules
Customized network rules can be configured from the
Roles page. Rules
can also be configured for the default role from the Network page.

Note
ExtremeWireless WiNG APs always apply L2
rules before trying any other rules.
For information about configuring Layer 7 application rules, see Configure L7 Application Rules.
To configure network rules for Layer 2, 3, or 4:
-
Select from the menu.
The Roles list
displays.
-
Select Add to add a new
role. Alternatively, select an existing role to open the
Configuration page.
-
To configure a Layer 2 or Layer 3 rule, expand the
corresponding arrow for the rule type you want to configure. To create a new
rule, select New. Edit
the fields in the new row that appears. The editable fields that display for a
rule depend on the rule type.
Note
The rules are applied from top to bottom.
Edit and Set Order for Layer 2 Rules
| Name |
Specify a name for the rule. |
| Action |
Specify the action that the rule will take
(Allow, Deny, Contain to VLAN or Redirect). A redirect rule requires
a URL to redirect to. |
| CoS |
Specify a class of service (None, No CoS,
Scavenger, Best Effort, Bulk Data, Critical Data, Network Control,
Network Management, High Priority). |
| MAC Address |
Specify the destination MAC address for the selected policy
rule. |
| Mask |
(Layer 2/3) Works with the hexadecimal value
being used for the ToS/DSCP value. For example, if the mask is 0xF0,
then only the four most significant bits of the ToS of the received
packets are marked. So, if the received ToS is 0x33 and the ToS
marking is set to 0x2A, then the resulting ToS is 0x23. |
| Protocol |
Specify the protocol to be used to send error
messages and operational information, such as when a requested
service is not available or a host cannot be reached. |
| Subnet |
If left blank, the rule will use all subnets. The
FQDN option allows filtering on fully qualified domain names.
This can be used with the captive portal option (Cloud or
Other when configuring the network service and allows the
creation of a walled garden. |
| Port |
Specify the port to use. |
-
To further edit the rule details,
select
 . The editable fields that display for a rule depend
on the rule type (Layer 2 or 3).
. The editable fields that display for a rule depend
on the rule type (Layer 2 or 3).
Note
If you create a Deny rule for any subnet as the top
rule, the policy will drop all traffic.
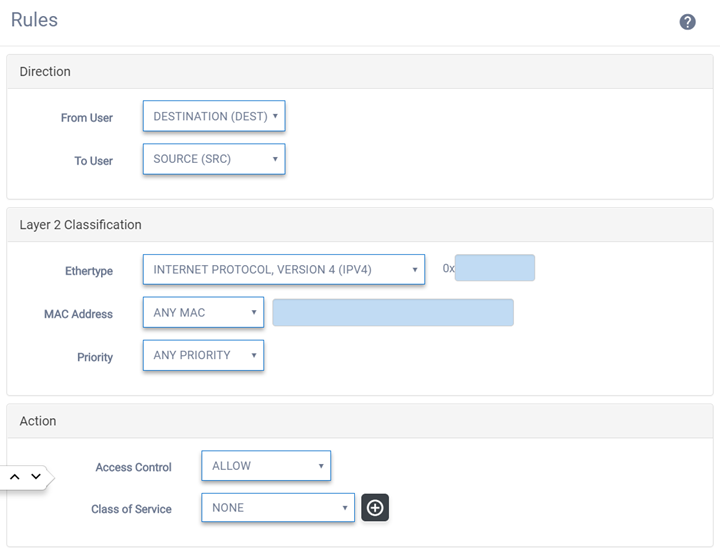
Layer 2 Rules Configuration
| From User |
Select which IPv4 or IPv6 addresses in the IP header to match for
traffic flowing from the client to the network. Options include: None; Source;
Destination |
| To User |
(Advanced) Specify which IPv4 or IPv6 addresses in the IP header
to match for traffic flowing from the network to the client. Options include: None;
Source; Destination |
| Ethertype |
(Layer 2) The rule filters based on any Ethertype or a specified
Ethertype (IPv4, IPv6, ARP). |
| Priority |
Specify the priority. Priority 1 is the highest priority. |
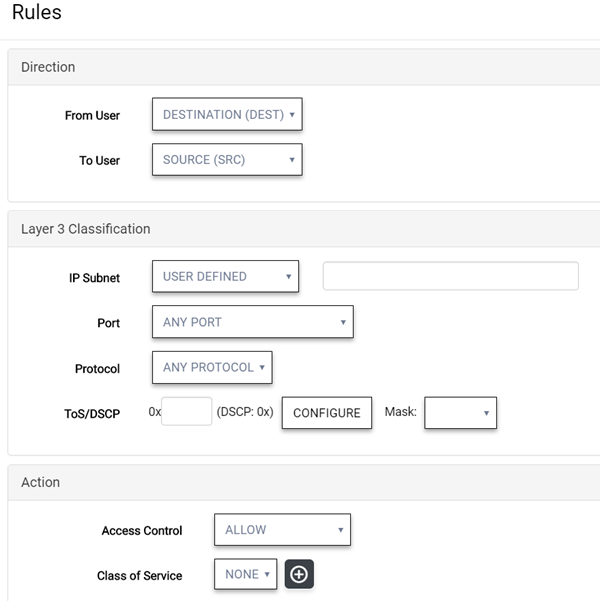
Layer 3 Rules Configuration
| IP Subnet |
(Layer 3/4) Enter a valid IP subnet. To filter
on a fully qualified domain name (FQDN), select FQDN from the
drop-down list and enter the FQDN name in the text box. Filters are
supported for full names (www.companyname.com) or partial names
(companyname.com). |
| Port |
(Layer 3/4) Specify the port that will be
used. |
| Protocol |
(Layer 3/4) Specify the protocol that will be
used. |
| ToS/DSCP |
(Layer 3/4) Enter a hexadecimal value in the
0x
(DSCP:) field, or select Configure to open
the ToS/DSCP dialog. |
| Mask |
Works with the hexadecimal value being used for the ToS/DSCP
value. For example, if the mask is 0xF0, then only the four most significant bits of the ToS
of the received packets are marked. So, if the received ToS is 0x33 and the ToS marking is
set to 0x2A, then the resulting ToS is 0x23. |
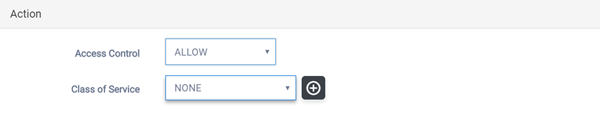
-
Set the Access Control and the Class of
Service.
| Access Control |
Specify the access control.
| None |
No role is defined. |
| Allow |
Packets will be contained to the role's default action
VLAN. |
| Deny |
Any packet not matching a rule in the policy is
dropped. |
| Contain to VLAN |
Specifies that traffic not matching any of the role's rules
will be forwarded on the VLAN specified in the Contain to VLAN
ID field. |
| Redirect |
Indicates redirect action and requires a URL to redirect to.
Rules-based redirection occurs upon a deny action when Redirect is enabled and a rule is defined for redirection. |
|
| Class of Service |
Displays when you select Contain to VLAN.
Assign a class of service. |
-
Select Close.
You return to the Configure Role
page.
-
Select Save.
All rule types are applied to
the policy in top to bottom order. The policy is installed on the enforced
APs.

 Print
this page
Print
this page Email this topic
 Feedback
 View PDF
 Download EPUB