Roles are assigned to clients, and the assigned role follows the client as they roam around the network. The default non-authenticated role is assigned to a client automatically when it accesses the network. If MBA or WPA2 Enterprise w/ RADIUS is configured for the network, then the RADIUS server performing the authentication can assign the client to a different role that is not the default role.
Rules are one or more actions to take on a packet matching criteria. A role can contain a maximum of 64 rules. Any combination of rules are supported. Only the policy rules assigned to a client are applied to a client's traffic. If no rule is defined, the role's default action is taken. Allowed traffic can also be assigned a Class of Service. For more information, see Matching Policy Rules Criteria.
To define roles that the RADIUS server can assign to clients, but which are not necessarily used as the default role for a service:
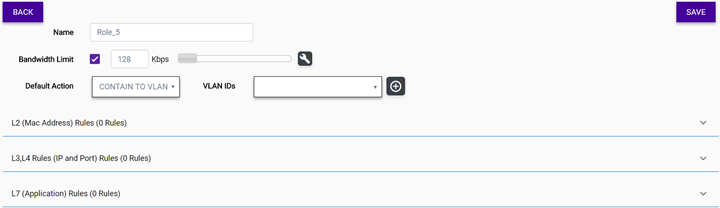
| Name | Roles are usually named for a type of user, such as Student, Doctor, Guest, or Staff. If RADIUS servers are used, the role name should match the filter ID values set up on the RADIUS servers. | ||||||
| Bandwidth Limit | When this
option is selected, a slider displays that lets you set the limit.
Optionally, select  to either edit the CoS under the
bandwidth limit or select a pre-defined CoS and modify it. (Using a
pre-defined CoS does not require using the bandwidth slider.) to either edit the CoS under the
bandwidth limit or select a pre-defined CoS and modify it. (Using a
pre-defined CoS does not require using the bandwidth slider.)
| ||||||
| Default Action | The default action is applied
when the current packet does not match any of the role's rules.
|
| VLAN IDs | Specify the VLAN ID. This only applies
if the role's default action is Contain to VLAN. Note Including multiple VLANs in the VLAN ID field causes ExtremeWireless WiNG APs to load balance traffic across all of the listed VLANs. This is an advanced option and should only be enabled in special cases. APs use the lowest numbered VLAN in the list and do not load balance across the VLANs. |
 Print
this page
Print
this page Email this topic
 Feedback
 View PDF
 Download EPUB