Configure Captive Portal Preferences

You can configure captive portal preferences, such as the content to display for the Terms and Conditions,and to globally configure application IDs and application secrets used for authenticating with social media applications.
Note

Note

The Terms and Conditions link displays on the Splash and Success panes.

To configure captive portal preferences:
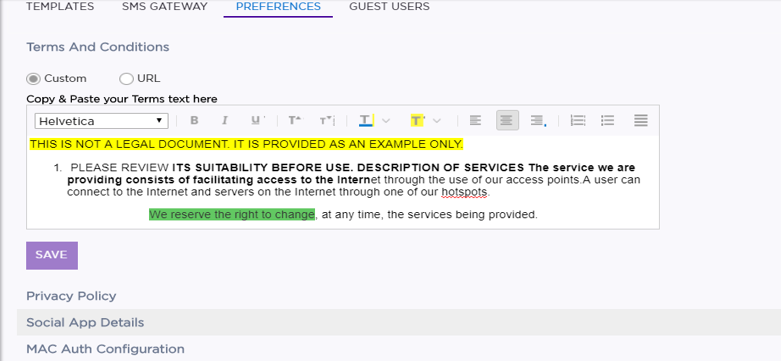
  1. From the left menu, select Configure > Policy > Captive Portal. Select the Preferences tab.
    The Terms and Conditions section opens by default.
  2. Edit the fields.
    Click to expand in new window
    Preferences Tab
    GUID-CDC91C38-BC62-46E2-8C1D-6FE177E4D1EF-low.png
    Custom Enables a custom Terms and Conditions message that displays when a user logs in to the captive portal. HTML terms are editable and can be formatted.
    URL Enables an external URL that displays a Privacy Policy when a user logs in to the captive portal.
    Copy and paste your text here Enter the terms and conditions that you want to display when a user selects the Terms and Conditions link. A default Terms and Conditions message is displayed. Change the content and edit the formatting to meet your requirements. HTML terms are editable and can be formatted using the standard editing tools, such as Bold, Underline, Font Color, Highlighting, Text Placement, Bulleted List, and so on.
    External URL This field displays only when URL is selected. Enter the complete path to the external web page that contains the privacy policy that displays when a user logs in to the captive portal.
  3. Select Save.
  4. From the right of the Privacy Policy option, select the arrow to expand the section. Edit the fields.
    Custom Enables a custom Terms and Conditions message that displays when a user logs in to the captive portal. HTML terms are editable and can be formatted.
    URL Enables an external URL that displays a Privacy Policy when a user logs in to the captive portal.
    Copy and paste your text here Enter the terms and conditions that you want to display when a user selects the Terms and Conditions link. A default Terms and Conditions message is displayed. Change the content and edit the formatting to meet your requirements. HTML terms are editable and can be formatted using the standard editing tools, such as Bold, Underline, Font Color, Highlighting, Text Placement, Bulleted List, and so on.
    External URL This field displays only when URL is selected. Enter the complete path to the external web page that contains the privacy policy that displays when a user logs in to the captive portal.
  5. From the right of the Social App Details option, select the arrow to expand the section. Enter the application IDs and application secrets you received from your social media service providers when you registered your captive portal with them. Facebook™, Twitter™, and Google Plus™ are supported. Enabling these options lets your users log in to the captive portal using their credentials from their social media accounts.
    Click to expand in new window
    Social Apps Details Configuration
    GUID-47BC3401-6317-4D10-B925-A590AC691B6A-low.png
  6. On the social media site that you are configuring, you must set a redirect/callback URL as follows:
    Facebook -
    • Under Client OAuth Settings:
      • Enable Client OAuth login
      • Enable Web OAuth login
      • Enable Embedded Browser OAuth login
      • Set the Valid OAuth redirect URI to https://cp.ezcloudx.com/auth/facebook/callback
    • Under Advanced Settings, enable Native or Desktop App
    GooglePlus -
    • Set the Authorized JavaScript origins to https://cp.ezcloudx.com
    • Set the Authorized redirect URI‘s to https://cp.ezcloudx.com/auth/google/callback
    • Enable Google Plus API access

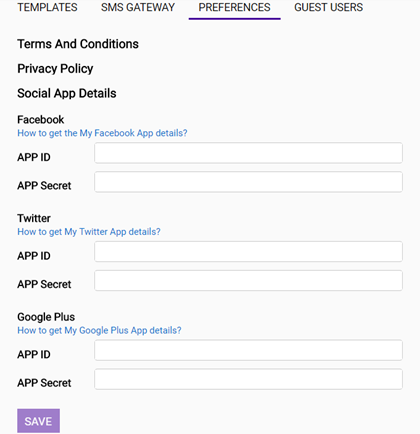
    Twitter - Set the Callback URL to https://cp.ezcloudx.com/auth/twitter/callback

  7. From the right of the MAC Auth Configuration, select the arrow to expand the section. Enabling this option lets you set the number of days that the MAC address of a device (which is used during authentication) is retained in the ExtremeCloud database. This lets the user be authenticated automatically and granted immediate access. Maximum Limit: 30 days.
    Click to expand in new window
    MAC Authorization Configuration
    GUID-4ADF5906-6890-4DE0-8096-D2861460F600-low.png
  8. Select Save.