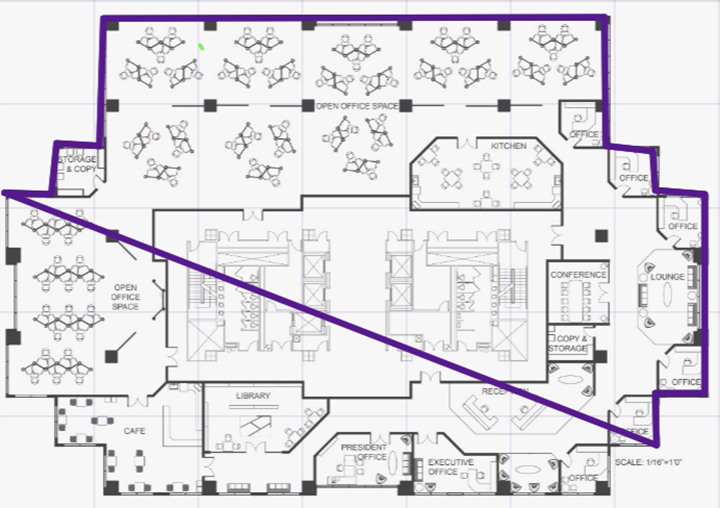
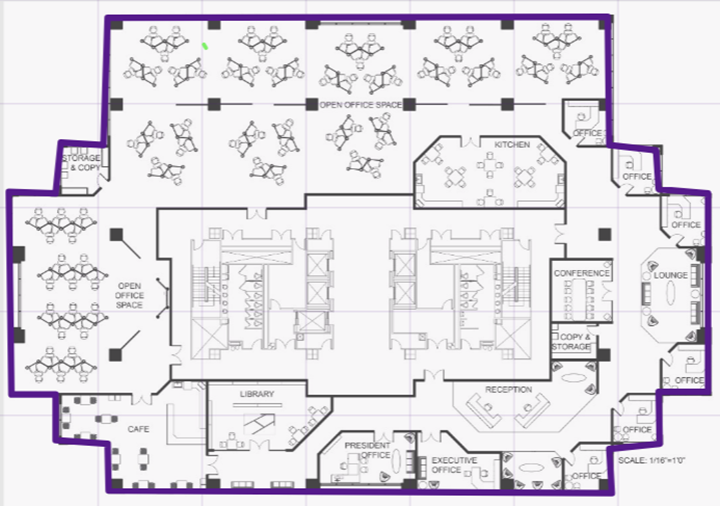
Draw the Boundary Walls
You must draw the outside boundary of the building.
The area within the boundary is used to determine device location and coverage. The
area outside the boundary is ignored.
To draw the boundary walls:
-
To access the floor plan
feature, select . Alternatively, you can select a site from the list to edit and
select .
-
Choose the floor map you want to
edit. From the Draw
Tools menu, under Draw Boundary,
select
 .
.
The pen tool is
enabled.
-
To anchor the beginning of the
boundary line, select a corner of the outside boundary.
-
Select each corner to anchor the
line. The drawing line zigzags across the image as you anchor each corner.

Note
If you make a
mistake, you can select

and edit the boundary by selecting and dragging sections of it.
Alternatively, select

to remove the entire boundary and start over.
-
When you reach the last corner (which is also your
starting point), double-click the last corner to disable the pen tool.
 Print
this page
Print
this page Email this topic
 Feedback
 View PDF
 Download EPUB