The Port Manager feature lets you configure all of your switch ports as if they were one switch, similar to virtual stacking. The same configuration can be pushed to a large number of ports on the same or multiple switches. The switches can be in any physical location and can be of different model types.
One advantage of Port Manager is that it clearly differentiates port usage. For example, controlling bridges with MLAGs can have multiple copies of a port. Port Manager flattens out the view so that instead of looking like several copies of a port, the port displays as differentiated ports with aliases.
AP ports cannot have VLANs removed if they are required by AP services.
To configure multiple ports with the same configuration:
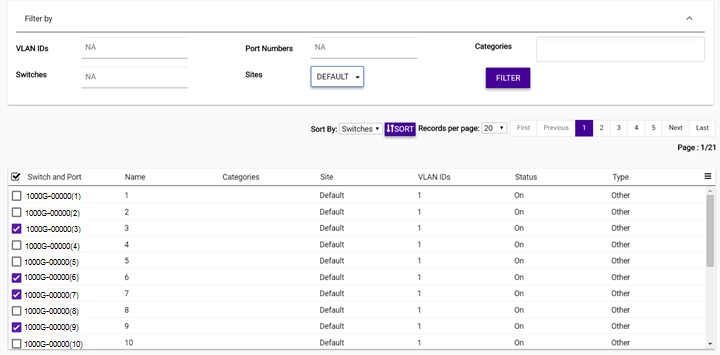
 display the options menu for exporting the data or to managing which columns
display.
display the options menu for exporting the data or to managing which columns
display.
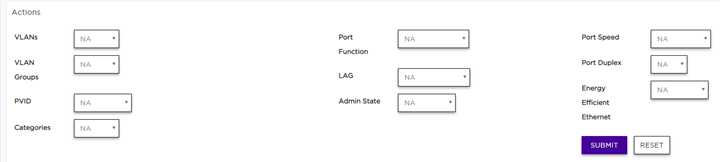
| VLANs | (Optional) Select either Assign or Delete to assign a VLAN topology. When you select one of these options, a secondary drop-down list displays a list of available VLANs. Select one or more VLANs to assign or delete. A VLAN can be used in more than one VLAN group. |
| VLAN Groups | (Optional) VLAN Groups are topology groups that contain one or more VLAN IDs. VLAN groups can be assigned to a port or a group of ports, and each port can have more than one VLAN group assigned to it. Each VLAN group is treated as one entity. A VLAN group can also contain VLANs that have more than one VLAN ID assigned to it. |
| PVID | (Optional) Specify the Port VLAN ID (PVID) that will be assigned to the access ports by default. Use caution with this setting as it can isolate your port. |
| Categories | Select Assign or Delete. From the drop-down list the displays, select the categories you want to add or remove from the selected ports. |
| Port Function | (Optional) Assign a function for the port (Interswitch, Host, AP, Other). We do not recommend changing AP ports to another function, however it can be changed to Other if needed. |
| LAG | (Optional) Select Combine to display the Master Port drop-down list. Select a port from the list to assign the selected switches to a master port. |
| Admin State | (Optional) Select On or Off to enable reporting on the state of the ports. |
| Port Speed | Set the port speed to Auto, 1G, 10M, or 100M. 1G is typically a small form factor pluggable (SFP) fiber port. 10M and 100M are copper ports. Auto specifies that the port will automatically negotiate the port speed. |
| Port Duplex | Set the port duplex setting to Full or Half. Half duplex means that frames can only flow in one direction at a time. Full duplex allows frames to flow in both directions at the same time. |
| Energy Efficient Ethernet | When enabled, this setting reduces power consumption during periods of low data activity. |
 Print
this page
Print
this page Email this topic
 Feedback
 View PDF
 Download EPUB