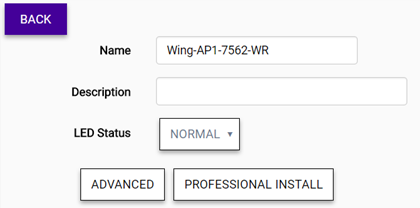
This procedure is used for configuring an individual access point. (Advanced settings can also be configured at the site level and applied to all access points assigned to the site.)
To configure the advanced settings:

Note
The Advanced Settings dialog for access points varies, depending on what type of access point is being configured.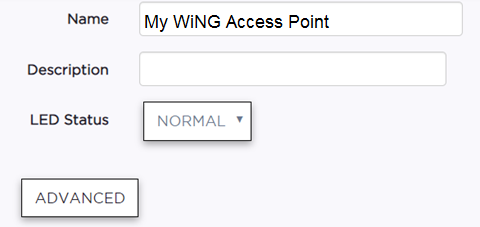
| Link Aggregation | Enable or disable the
AP's L2 port association with a LAG (peer-to-peer) group. Important When configuring a LAG port for use by an ExtremeCloud-enabled access point, enable link aggregation on the access point first. If you do not do this, the AP can become isolated from the network. If the AP becomes isolated by the switch LAG port configuration, disable link aggregation on the switch ports used by the AP to allow the AP to join the network again. LAG can then be enabled on the AP, which takes one minute to update the configuration. Approximately two minutes later, LAG can be enabled on the corresponding switch ports. |
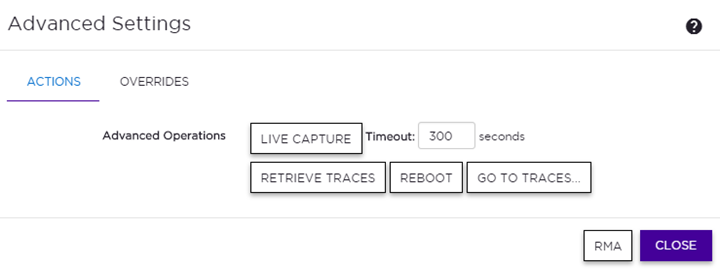
| Live Capture | Lets an AP capture wired and wireless traffic and forward them to a remote Wireshark application. |
| Retrieve Traces | Downloads trace files. |
| Reboot | Restarts the device at the next synchronization interval, within five minutes. |
| Go to Traces | Select this option to go directly to the downloaded log files for the device. |
Note
For AP5XX, see the following step.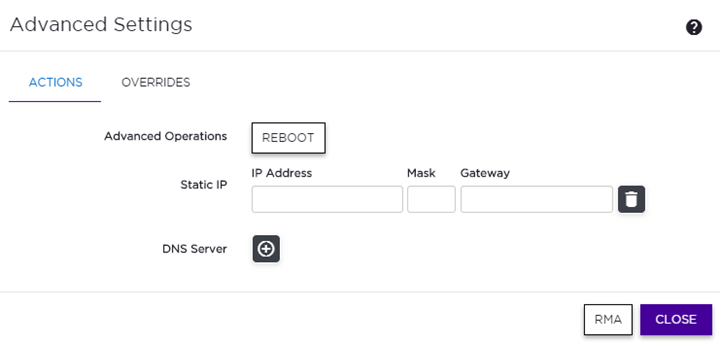
| Reboot | Restarts the device at the next synchronization interval, within five minutes. | ||||||||
| Configure Static IP | Configure the VLAN mapping for this AP.
|
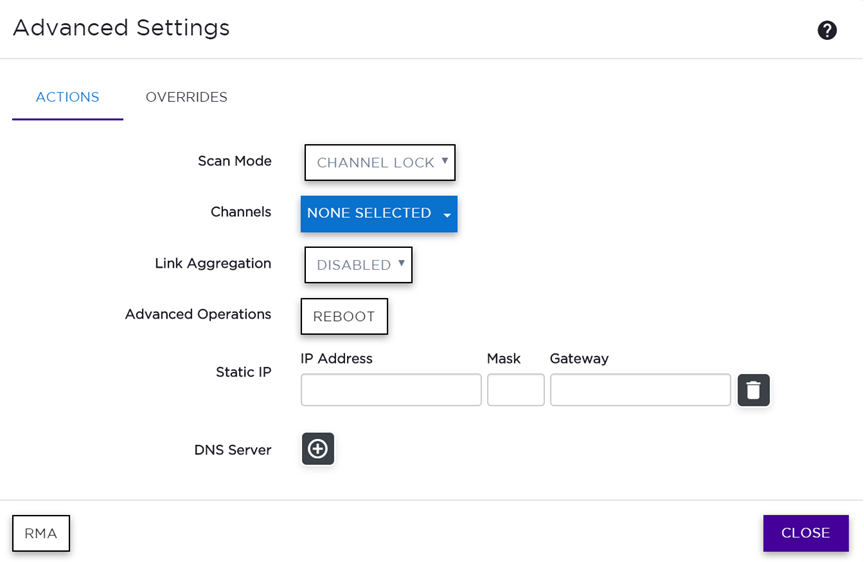
| Scan Mode | Specify a scan
mode
| ||||||||
| Channels | This field displays only when Channel Lock or Custom Scan is selected as the scan mode. Specify which channel the scan will be performed on, or specify Auto for automatic channel selection. | ||||||||
| Link Aggregation | Enable or disable the
AP's L2 port association with a LAG (peer-to-peer) group. Important When configuring a LAG port for use by an ExtremeCloud-enabled access point, enable link aggregation on the access point first. If you do not do this, the AP can become isolated from the network. If the AP becomes isolated by the switch LAG port configuration, disable link aggregation on the switch ports used by the AP to allow the AP to join the network again. LAG can then be enabled on the AP, which takes one minute to update the configuration. Approximately two minutes later, LAG can be enabled on the corresponding switch ports. | ||||||||
| Reboot | Restarts the device at the next synchronization interval, within five minutes. | ||||||||
| Configure Static IP | Configure the VLAN mapping for this AP.
|
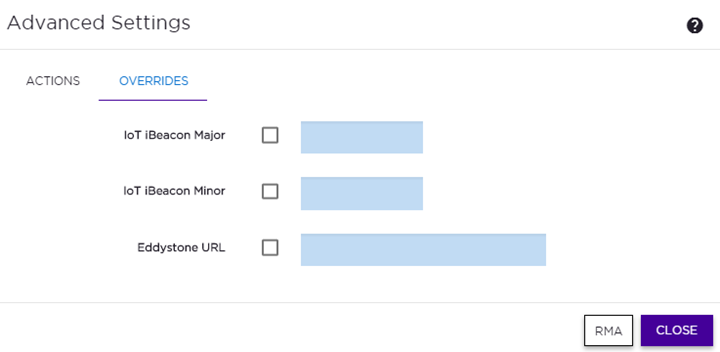
| IoT iBeacon Major | Specify a subset of beacons within the larger UUID set. This value can represent a venue specific attribute, such as a specific store or a wing in a building. Values: 0 to 65635 |
| IoT iBeacon Minor | Specify an individual beacon whose location you want to more precisely pinpoint. This value complements the UUID and Major values to provide more granular identification of a specific location, such as a particular shelf, door-way, or item. Values: 0 to 65635 |
| Eddystone URL | Specify the URL that is included with the Eddystone-url beacon. Limit: 17 characters. The 17 characters does not include the protocol, but it does include the domain name. The URL is compressed, effectively allowing more than a 17 character input. See https://github.com/google/eddystone/tree/master/eddystone-url for the Eddystone-url compression rules to more accurately judge the length of your URL. If necessary, search for third-party URL shortening services available on the Internet. |
 Print
this page
Print
this page Email this topic
 Feedback
 View PDF
 Download EPUB