You can modify settings for an ExtremeWireless access point (AP) and its radio attributes.
If your are using APs that have external antennas, the external antennas must be configured in the cloud user interface using the Professional Install dialog. The AP's LED status will default to Identify until the antennas are configured, and then you can change the LED status.
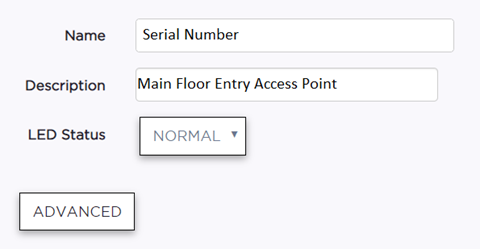
| LED Status | Defines the type of LED behavior you want to use to
follow the devices progress in registration.
|
Important
Only a professional wireless installer should configure the settings on this page.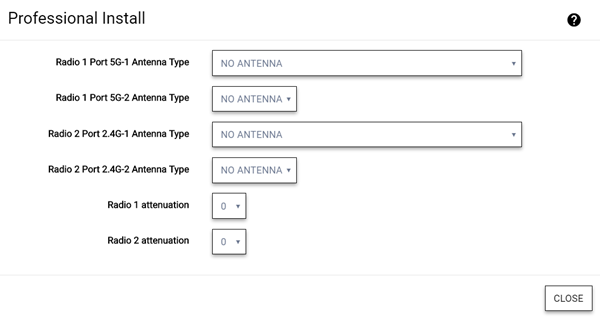
| Antenna Type | For each radio port, specify the antenna type. If the AP supports IoT, then you can set the IoT antenna type. An external antenna can be Indoor/Outdoor or Indoor only. (The antenna type is listed in the AP model's specifications.) |
| Radio Attenuation | Specify the distance between access points in terms of signal attenuation, measured in decibels. (Attenuation is the reduction of signal strength during transmission. If the signal attenuates too much, it becomes unintelligible.) This value is used during channel assignment to minimize interference. |

Note
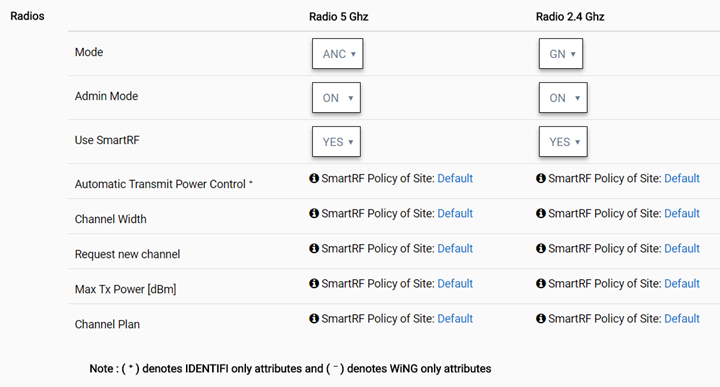
Switching the mode or band causes the AP to reboot.| Mode | Specify the radio mode for each radio. In Sensor mode, the radio does not service clients. Instead, the radio functions as a sensor for ExtremeLocation, which enables reporting form the AP to ExtremeLocation. For some AP models, Sensor mode can co-exist with other radio modes. The available modes depend on the AP model. Mode can include: GN, ANC, BG, BGN, ANCX, SENSOR, GNX | ||||||||
| Admin Mode | Select On to enable or Off to disable this radio. | ||||||||
| Use Smart RF | Provides ongoing optimization of radio performance by allowing the APs to dynamically respond to changing radio frequency (RF) conditions in real-time. Select On to enable or Off to disable Smart RF. Smart RF is configured at the site level and applied to all APs that have been configured at the device level to use Smart RF. | ||||||||
| Automatic Transmit Power Control | Enable ATPC to provide a stable RF environment for a LAN by automatically adapting transmission power signals according to the coverage provided by the APs. | ||||||||
| Channel Width | Channel width helps to
improve the effective throughput of the wireless LAN. Pick the channel mode that best
suits the density of the deployment to avoid co-channel interference.
Note The 160 MHz channel width is not supported for AP505 and AP510.
| ||||||||
| Request New Channel | Specify the primary channel of the wireless AP. (If Auto is selected, the
Auto-Channel Selection feature selects the primary channel.) Depending on the primary
channel that is selected, channel bonding may be allowed upstream or downstream with an
adjacent channel to increase throughput between devices. Note Channel plans are configured at the site level. | ||||||||
| Max Tx Power | Specify the maximum transmission power. The values are in dBm and vary by AP. The Max Tx Power should be set at a higher power level than the Min Tx Power. |
| Channel Plan | If Smart RF is enabled on either radio, you can define a channel
plan for the AP that limits which channels are available for use during an Smart RF scan.
For example, you may want to avoid using specific channels because of low power,
regulatory requirements, or radar interference.
|
 Print
this page
Print
this page Email this topic
 Feedback
 View PDF
 Download EPUB