 AP3916 LED Indicators
The following features are on the front of the AP:
| Item | Description |
|---|---|
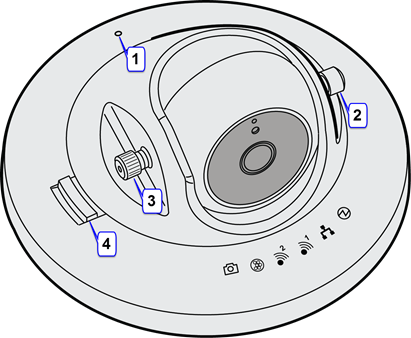
| 1 - Reset Button | The power reset button is recessed and located on the top of the AP. Use a tool to press the reset button. |
| 2 - Cap | Remove the caps to access the thumbscrews. |
| 3 - Thumbscrew | The thumbscrews let you adjust and set the tilt angle of the camera. |
| 4 - Locking Pin | The locking pin lets you adjust and set the rotational position of the camera. |
The following LEDs are located on the top cover of the AP:
LEDs
| Symbol | Description |
|---|---|
|
|
Camera |
|
|
IoT (BLE or 802.15.4) |
|
|
Radio 2 (2.4 GHz) |
|
|
Radio 1 (5 GHz) |
|
|
LAN 1 (Ethernet 1) |
|
|
Status |
 Print
this page
Print
this page Email this topic
 Feedback
 View PDF
 Download EPUB