Viewing Routing Protocol Reports
The following reports are
available in the Extreme Networks
ExtremeWireless
system:
-
From the top menu, click
Reports.
-
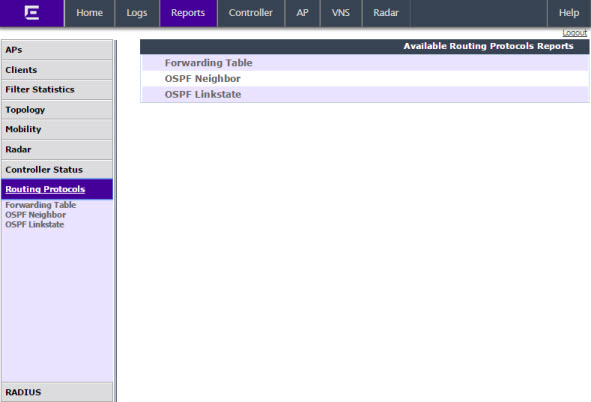
In the left pane, click
Routing Protocols. The Available Routing Protocols
Reports screen displays.
-
Click the Forwarding Table option. The Forwarding Table displays in a new browser
window.

Note
If you open only automatically refreshed reports, the Web
management session timer will not be updated or reset. Your session will
eventually time out.
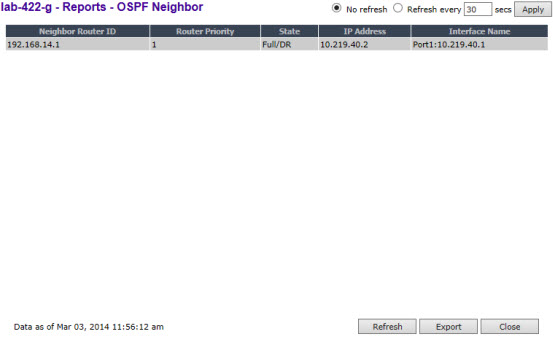
To view the
OSPF Neighbor Table:
-
From the top menu, click
Reports.
-
In the left pane, click Routing Protocols.
-
Click the OSPF Neighbor option. The OSPF Neighbor displays in a new browser
window.
To View the
OSPF Linkstate Table:
-
From the top menu, click Reports. The Available AP Reports screen displays.
-
In the left pane, click Routing Protocols.
-
Click the OSPF Linkstate option. The OSPF Linkstate displays in a new browser window.
To Export
and Save a Report in XML:
-
On the report screen, click
Export. A Windows File Download dialog is
displayed.
-
Click Save. A Windows Save As dialog is displayed.
Note
If your default XML viewer is Internet Explorer or Netscape,
clicking Open will open the exported data to your display screen. You must
right-click to go back to the export display. The XML data file will not be saved
to your local drive.
-
Browse to the location where you want to save the exported XML data file, and in the File name box enter an appropriate name for the file.
-
Click Save. The XML data file is saved in the specified location.


 Print
this page
Print
this page Email this topic
 Feedback
 View PDF
 Download EPUB