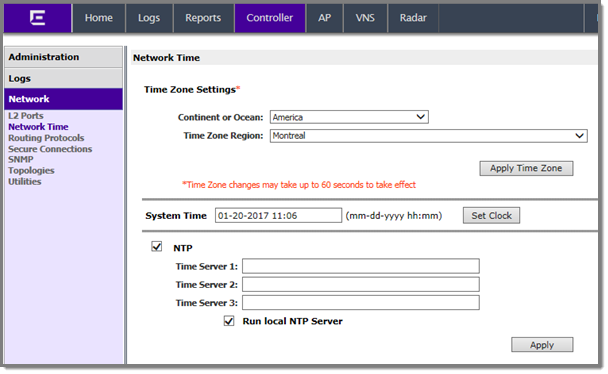
Configuring the Network Time Using an NTP Server
To configure the network time using an NTP server:
-
From the top menu, click
Controller.
-
In the left pane, click
. The Network
Time screen displays.
-
From the Continent or Ocean drop-down list, click the appropriate large-scale geographic grouping for the time zone.
-
From the Time Zone Region drop-down list, click the appropriate time zone region for the selected country.
-
Click Apply Time Zone.
-
In the System Time box, type the system time.
-
Select the Use NTP checkbox.

Note
If you want
to use the controller as the NTP Server, select the
Run local NTP Server checkbox,
and click
Apply.
-
In the Time Server 1 text box, type the IP address or FQDN (Full Qualified Domain Name) of an NTP time server that is accessible on the enterprise network.
Note
The Time Server fields supports both IPv4 and IPv6 addresses.
-
Repeat for Time Server2 and Time Server3 text boxes.
If the system is not able to connect to the Time Server 1, it will attempt to connect to the additional servers that have been specified in Time Server 2 and Time Server 3 text boxes.
-
Click Apply. The WLAN (Wireless Local Area Network) network time is
synchronized in accordance with the specified time server.
 Print
this page
Print
this page Email this topic
 Feedback
 View PDF
 Download EPUB