Creating a VNS Manually
To create a VNS manually:
-
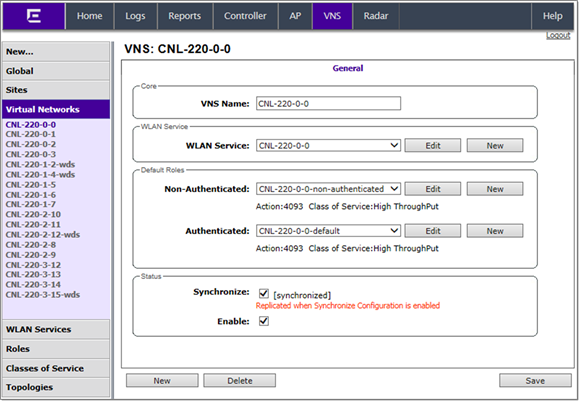
From the top menu, click VNS. The
Virtual Network
Configuration screen displays.
-
In
the left pane, expand the Virtual
Networks pane and select an existing VNS to edit, or click
New.
-
Enter a name for the VNS.
-
Select an existing WLAN (Wireless Local Area Network) Service for the VNS, or
create a new WLAN Service, or edit an existing one.
-
Configure the Default Roles for the VNS. Select existing roles, or create new
roles, or edit existing ones.
-
Configure the Status parameters for the VNS:
- Enabled —
Check to enable the VNS.
-
Click Save to save your
changes.
Also, as with creating a new VNS, you can:
- Configure a
topology for the VNS
- Configure a
role for the VNS
- Configure
WLAN services for the VNS
- Configure
additional roles for the VNS
 Print
this page
Print
this page Email this topic
 Feedback
 View PDF
 Download EPUB