To configure a WLAN (Wireless Local Area Network) service:
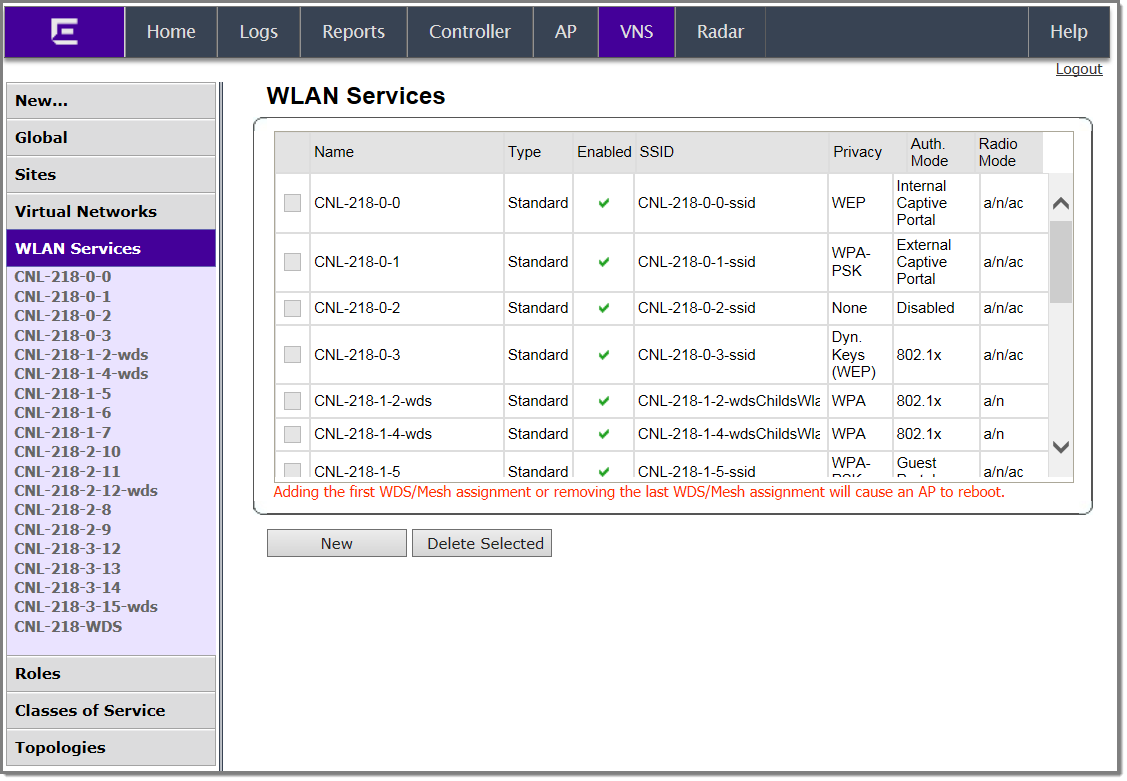
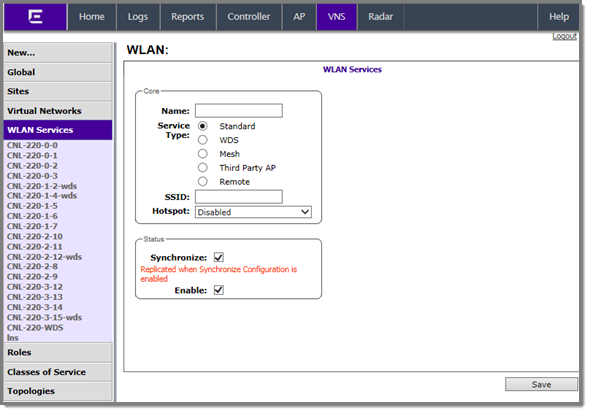
WLAN Services Configuration Page
| Field/Button | Description |
|---|---|
| Core | |
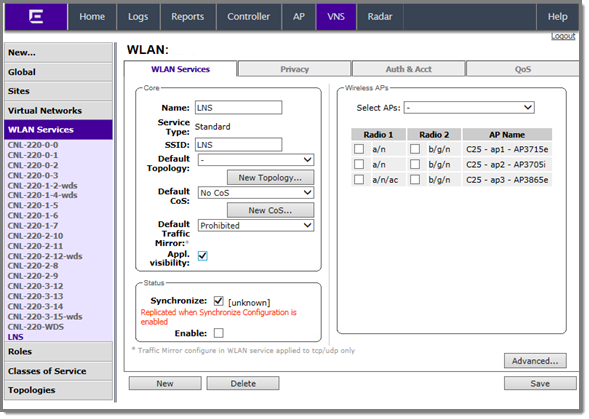
| Name | Enter a name for this WLAN service |
| Service Type | Select the type of service to apply to this
WLAN service. Options include:
If you selected Remote as the Service Type, select the Privacy type. If you set Service Type as either Standard or Remote, select Synchronize, in the Status area, if desired. Enabling this feature allows availability pairs to be synchronized automatically |
| SSID | The software automatically populates this field with the WLAN service name that you supply. Optionally, you can change this. If you are creating a remote WLAN service, select the SSID of the remoteable service that this remote service will be paired with. |
| Default Topology | From the drop-down list, select a
preconfigured topology, topology group, or click New Topology to
create a new one. Refer to Configuring a Basic Data Port Topology for information about how to create a
new topology. A WLAN service uses the topology of the role assigned to the VNS, if such a topology is defined. If the role doesn't define a topology, you can assign an existing topology as the default topology to the WLAN service. If you choose not to assign a default topology to the WLAN service, the WLAN service will use the topology of the global default policy (by default, Bridged at AP Untagged). Note: You
cannot assign a default topology to a WDS, 3rd party, or remote
WLAN service.
|
| Default CoS (Class of Service) | From the drop-down list, select a
preconfigured CoS or click New CoS to create
a new one. Refer to Configuring Classes of Service for information on how to create a new
CoS. A WLAN service uses the CoS of the role assigned to the VNS, if such a CoS is defined. If the role doesn't define a CoS, you can assign an existing CoS as the default CoS to the WLAN service. If you choose not to assign a default CoS to the WLAN service, the WLAN service will use the CoS of the global default policy (by default, Bridged at AP Untagged). Note: You
cannot assign a default CoS to a WDS, 3rd party, or remote WLAN
service.
|
| Default Traffic Mirror | When enabled, this option sends a copy of the
network packets to a mirroring L2 port for analysis, in an effort to monitor network
traffic. The Purview Engine analyses the traffic. The assigned port can only be used for
traffic analysis. You can enable traffic mirroring from the WLAN Service, from the Role, or from the Filter Rule. Setting traffic mirroring at the Filter Rule takes precedence over settings for the Role and WLAN Service. The order of precedence for the traffic mirror setting is: Filter Rule, Role, WLAN Service. To set the L2 port, go to . Valid values for the WLAN Service are:
Note: Traffic Mirror configured in WLAN service
applies to TCP/UDP only.
|
| App Visibility | Check this option to enable Application Visibility and Application Enforcement on the specific WLAN. Application Visibility allows the controller to capture throughput and byte statistics for 31 pre-selected application groups per client. The data is refreshed every 2 minutes. Enabling this option increases CPU load. Clear this option when Application Visibility and Application Enforcement is not required. |
| Status | |
| Synchronize |
Synchronize — Enable automatic synchronization with its availability peer. Refer to Using the Sync Summary for information about viewing synchronization status. If this VNS is part of an availability pair, Extreme Networks recommends that you enable this feature. |
| Enable | The WLAN service is enabled by default, unless the number of supported enabled WLAN services has been reached. To disable the WLAN service, clear the checkbox. |
| Wireless APs | |
| Select APs | Select APs and their radios by grouping.
Options include:
|
| Radio 1 | Assign the APs‘ Radios to the service by selecting the individual radios‘ checkboxes. Alternatively, you can use the Select APs list. |
| Radio 2 | Assign the APs‘ Radios to the service by selecting the individual radios‘ checkboxes. Alternatively, you can use the Select APs list. |
| Ports | Supported on the AP3912 . Select
one or more client ports for each WLAN Service.
|
| AP Name | Displays the AP name that you assigned on the AP Properties screen. |
| Advanced | Click to access the WLAN service advanced configuration options. The Advanced configuration page options are described in Advanced WLAN Service Configuration. |
| New | Click to create a new WLAN service. |
| Delete | Click to delete this WLAN service. |
| Save | Click to save the changes to this WLAN service. If you are creating a new service, the WLAN Services configuration window is displayed, allowing you to assign APs to the service. |

Note
If two controllers have been paired for availability each controller's registered wireless APs are displayed as foreign in the list of available APs on the other controller. For more information, see Availability.After you have assigned an AP Radio to eight WLAN Services, it will not appear in the list for another WLAN Service setup. Each Radio can support up to eight SSIDs (16 per AP). Each AP can be assigned to any of the VNSs defined within the system.
The controller can support the following active VNSs:
Note
You can assign the Radios of all three AP variants — ExtremeWireless Appliance, Outdoor AP, and Wireless 802.11n AP — to any VNS. Print
this page
Print
this page Email this topic
 Feedback
 View PDF
 Download EPUB