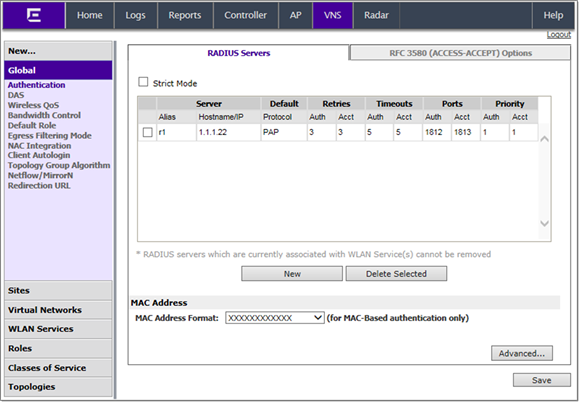
Defining RFC 3580 Mapping Mode for VNS
Global Settings
To define RFC 3580 for VNS
global settings:
-
From the top menu, click
VNS. The Virtual Network
Configuration screen displays.
-
In the left pane, click
.
-
Click the RFC 3580 (ACCESS-ACCEPT)
Options tab.
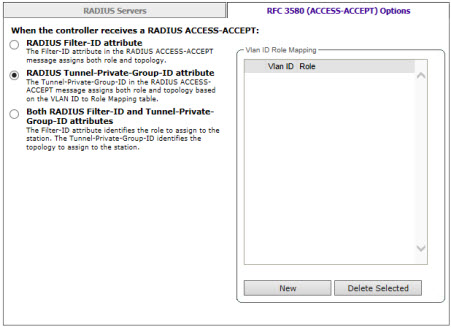
-
Select RADIUS Filter - ID attribute to assign both role and topology when
the controller receives a RADIUS ACCESS-ACCEPT message. To save your changes, click
Save.
-
Select RADIUS Tunnel-Private-Group-ID attribute to assign both role and
topology (based on the VLAN (Virtual LAN) ID to Role Mapping table
selection) when the controller receives a RADIUS ACCESS-ACCEPT message.
- In the VLAN ID Role
Mapping table, select an existing VLAN ID and Role.
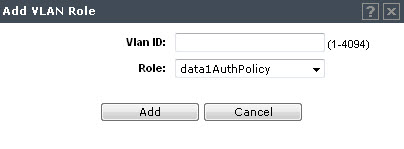
- Click New to create a new mapping
entry. In the Add VLAN
Role dialog, enter a VLAN ID, and select a Role from the drop-down
list.
- Click Add.
- To save your changes, click Save.
-
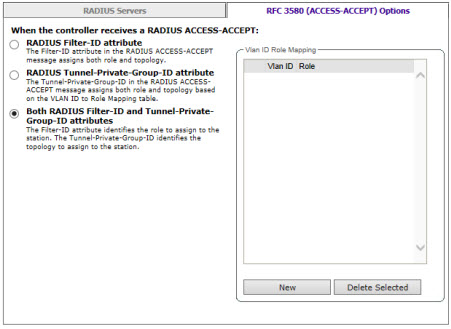
Select Both RADIUS Filter-ID and Tunnel-Private-Group-ID attributes to
identify the role to assign to the station and the topology to assign to the station
(based on the VLAN ID to Role Mapping table selection), when the controller receives
a RADIUS ACCESS-ACCEPT message.
- In the VLAN ID Role Mapping table, select an
existing VLAN ID and Role.
- Click New to create a new
mapping entry. In the Add VLAN Role dialog, enter a VLAN ID,
and select a Role from the drop-down list.
- Click Add.
- To save your changes, click Save.
 Print
this page
Print
this page Email this topic
 Feedback
 View PDF
 Download EPUB