The local login authentication mode is enabled by default. You can change the local login authentication mode to RADIUS-based authentication.

Note
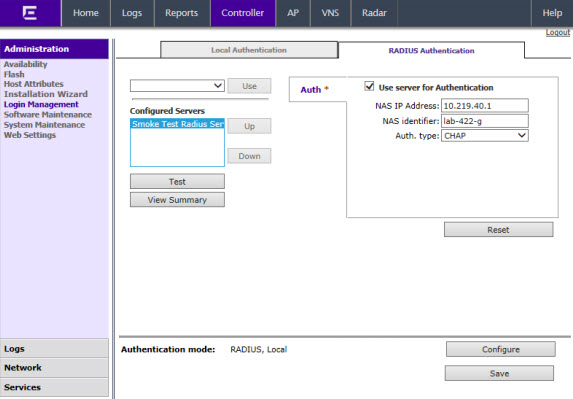
Before you change the default local login authentication to RADIUS-based authentication, you must configure the RADIUS Server on the Global Settings screen. For more information, see VNS Global Settings.RADIUS is a client/server authentication and authorization access protocol used by a network access server (NAS) to authenticate users attempting to connect to a network device. The NAS functions as a client, passing user information to one or more RADIUS servers. The NAS permits or denies network access to a user based on the response it receives from one or more RADIUS servers. RADIUS uses User Datagram Protocol (UDP) for sending the packets between the RADIUS client and server.
You can configure a RADIUS key on the client and server. If you configure a key on the client, it must be the same as the one configured on the RADIUS servers. The RADIUS clients and servers use the key to encrypt all RADIUS packets transmitted. If you do not configure a RADIUS key, packets are not encrypted. The key itself is never transmitted over the network.
Note
Before you configure the system to use RADIUS-based login authentication, you must configure the Service-Type RADIUS attribute on the RADIUS server.To configure the RADIUS login authentication mode:
The Login Authentication Mode Configuration window is displayed.
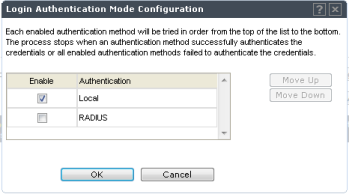
If the Local checkbox is selected, deselect it.
Note
The RADIUS Servers displayed in the list located against the Use button are defined on Global Settings screen. For more information, see VNS Global Settings.The following values can be edited:
Note
You can add up to three RADIUS servers to the list of login authentication servers. When you add two or more RADIUS servers to the list, you must designate one of them as the Primary server. The controller first attempts to connect to the Primary server. If the Primary Server is not available, it tries to connect to the second and third server according to their order in the Configured Servers box. You can change the order of RADIUS servers in the Configured Servers box by clicking on the Up and Down buttons.Note
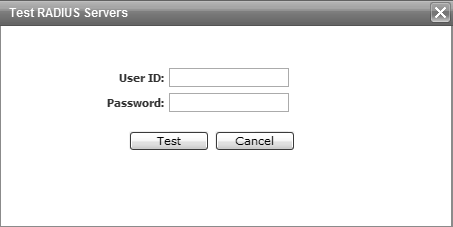
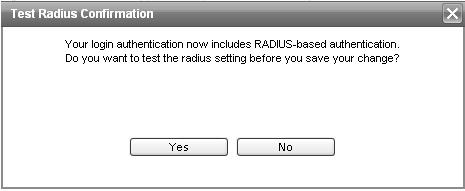
You can also test the connectivity to the RADIUS server after you save the configuration. If you do not test the RADIUS server connectivity, and you have made an error in configuring the RADIUS-based login authentication mode, you will be locked out of the controller when you switch the login mode to the RADIUS login authentication mode. If you are locked out, access Rescue mode via the console port to reset the authentication method to local.The following window is displayed.
Note
To learn how to configure the User ID and the Password on the RADIUS server, refer to your RADIUS server‘s user guide.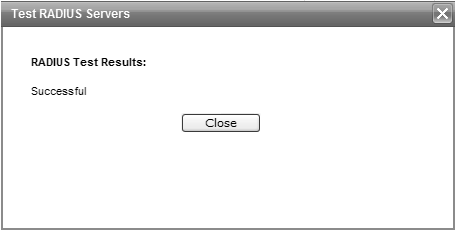
If the test is not successful, the following message will be displayed:

The following window is displayed:
You will be logged out of the controller immediately. You must use the RADIUS login user name and password to log on the controller.
To cancel the authentication mode changes, click Cancel.
 Print
this page
Print
this page Email this topic
 Feedback
 View PDF
 Download EPUB