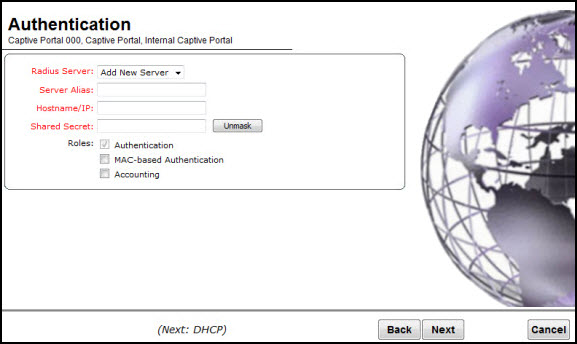
The Authentication screen displays:
Captive Portal Authentication Page - Fields and Buttons
| Field/Button | Description |
|---|---|
| Radius Server | Click the RADIUS server you want to assign to the new Captive Portal VNS, or click Add New Server and then do the following |
| Server Alias | Type a name you want to assign to the new RADIUS server. |
| Hostname/IP | Type either the RADIUS server‘s FQDN (fully qualified domain name) or IP address. |
| Shared Secret | Type the password that will be used to validate the connection between the controller and the RADIUS server. |
| Mask/Unmask | Click to display or hide your shared secret key. |
| Roles | Select the authentication role options for
the RADIUS server:
|
Click Next. The DHCP screen displays.
 Print
this page
Print
this page Email this topic
 Feedback
 View PDF
 Download EPUB