Defining RADIUS
Servers for VNS Global Settings
To define RADIUS servers for
VNS global settings:
-
From the top menu, click
VNS.
-
In the left pane, click
.
-
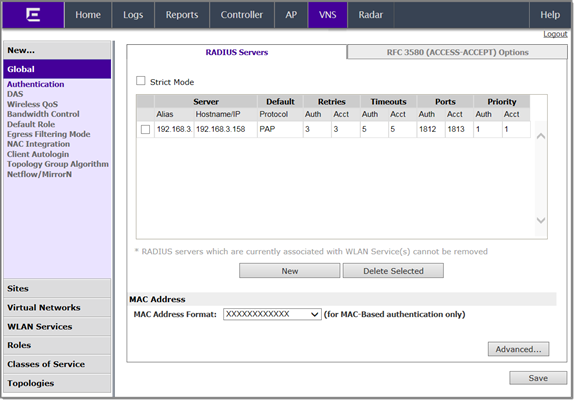
Select Strict Mode to force the top three Radius servers in priority order
for each WLAN (Wireless Local Area Network) where applicable. Clearing this check box,
allows individual Radius change per WLAN.
Global Authentication Settings
-
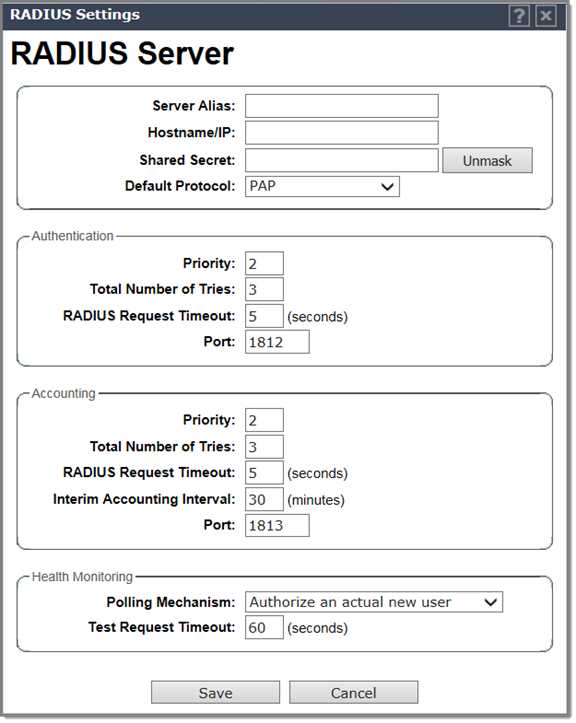
To define a new RADIUS
server available on the network, click New. The
RADIUS
Settings dialog displays.
-
In the Server Alias field, type a name that you want to assign to the RADIUS
server.

Note
You can also type the RADIUS server‘s IP address in the
Server Alias box in place of a
nickname. The RADIUS server will identify itself by the value typed in the
Server Alias box in the RADIUS
Servers drop down list on the
RADIUS Authentication tab of the
Login Management screen (). For more information, see
Configuring the Login Authentication Mode.
-
In the Hostname/IP field, type either the RADIUS server‘s FQDN (fully
qualified domain name) or IP address.
-
In the Shared Secret field, type the password that will be used to validate
the connection between the controller and the RADIUS server.
To proofread
your shared secret key, click Unmask. The password is displayed.
Note
You should always proofread your Shared Secret key to avoid
any problems later when the controller attempts to communicate with the RADIUS
server.
-
If desired, change the
Default Protocol using the drop
down list. Choices are PAP, CHAP, MS-CHAP, or MS-CHAP2.
-
If desired, change the
pre-defined default values for Authentication and Accounting operations:
-
Priority — default is 4.
-
Total number of tries — default is 3.
-
RADIUS Request timeout — default is 5 seconds.
-
For Accounting operations, the Interim Accounting Interval — default is 30
minutes. Setting the Interim Accounting Interval value to 0 results in no
interims being sent.
-
Port — default Authentication port is 1812. Default Accounting port is
1813.
-
If desired, setup Health
Monitoring by selecting a Polling Mechanism from the
drop-down menu, and enter a Test Request Timeout
(shown in seconds).
-
To save your changes, click
Save. The new server is displayed
in the RADIUS Servers list.
Note
The RADIUS server is identified by its Server Alias.
-
To edit an existing server,
click the row containing the server. The RADIUS Settings window
displays, containing the server‘s configuration values.
-
To remove a server from the
list, select the checkbox next to the server, and then click Delete Selected. You cannot remove a server that is used by any
VNS.
 Print
this page
Print
this page Email this topic
 Feedback
 View PDF
 Download EPUB