
Note
You must configure a Guest Portal before Guest Portal appears as a Captive Portal option. Only one WLAN Service can be configured for Guest Portal on a VNS.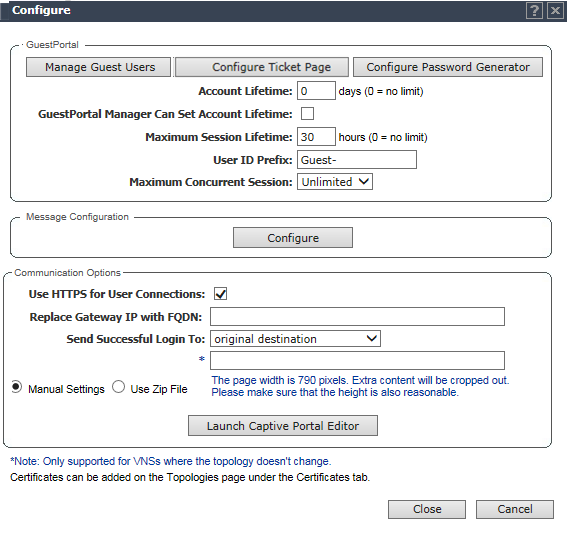
Configure Internal Captive Portal Page - Fields and Buttons
| Field/Button | Description |
|---|---|
| Guest Portal - this section becomes available only when configuring a Guest Portal. | |
| Manage Guest Users | Click to add and configure guest user accounts. The Manage Guest Users page displays. For information about adding and managing guest users, see Working with GuestPortal Administration. |
| Configure Ticket Page | Click to configure the guest portal ticket. The Configure
ticket page displays. For information about how to configure and activate guest portal ticket pages, see Working with GuestPortal Administration. |
| Configure Password Generator | Click to
configure the guest password. The Configure Password Generator page displays. For information about how to configure and activate guest passwords, see Configuring Guest Password Patterns |
| Account Lifetime | Type the account lifetime, in days, for the guest account. A value of 0 specifies no limit to the account lifetime. |
| Guest Admin Can Set Account Lifetime | Select to enable the guest administrator to set the amount of time for which this account will be active. |
| Maximum Session Lifetime | Type the maximum session lifetime, in hours, for the guest account. The default 0 value does not limit a session lifetime. The session lifetime is the allowed cumulative total in hours spent on the network during the account lifetime. |
| User ID Prefix | Type a prefix that will be added to all guest account user IDs. The default is Guest. |
| Minimum Password Length | Type a minimum password length that will be applied to all guest accounts. |
| Message Configuration | |
| Configure | Click to configure error messages that may display on the internal captive portal page. The Message Configuration page displays. See (Configuring Error Messages). |
| Communication Options | |
| Use HTTPS for Users Connections | Select this option to use HTTPS instead of HTTP. The default state will be set for HTTPS. This applies to both new WLAN (Wireless Local Area Network) Services and WLAN Services that existed prior to upgrading to V9.01 and later. |
| Replace Gateway IP with FDQN | Type the appropriate name if a Fully Qualified Domain Name (FQDN) is used as the gateway address. |
| Send Successful Login To: | |
| Manual Settings | Select this option if you want to manually define the elements on the Captive Portal page. When you select this option, you enable the Launch Captive Portal Editor button. |
| Use Zip File | Select this option to upload a zip file that contains custom
Captive Portal content. The zip file you upload must have a flat structure — it cannot contain any sub-directories. The contents of the zip must adhere to the following file formats:
|
| Upload Zip File | Click the Browse button and navigate to the zip file to use for setting up the captive portal. |
| View Sample Login Page | Click to view the sample login page for this captive portal. |
| View Sample Index Page | Click to view the sample index page for this captive portal. |
| Download | Click to download the specified zip file. The File Download page displays. |
| Launch Captive Portal Editor | Click to launch the Captive Portal Editor. Using the Captive
Portal Editor, you can configure the elements on the captive portal page. This button becomes available when you select the Manual Setting radio button. |
| Close | Click to save your changes and close this page. |
| Cancel | Click to discard your configuration changes and close this page. |
 Print
this page
Print
this page Email this topic
 Feedback
 View PDF
 Download EPUB