Backing Up and Copying CDR Files to a Remote Server
To Back Up and Copy the CDR Files to a Remote Server:
-
From the top menu, click
Controller.
-
In the left pane, click
.
-
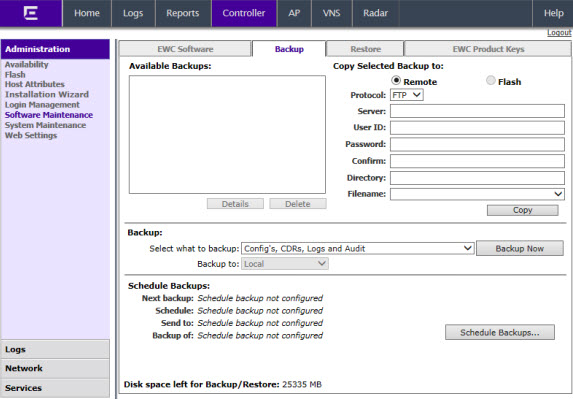
Click the Backup tab.
-
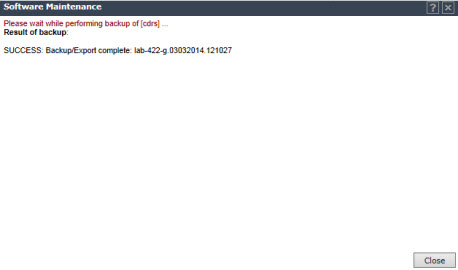
From the Select what to backup drop-down menu, click CDRs only, and then click Backup Now. The following window displays the backup status.
-
To close the window, click Close. The backed up file is displayed in the Available Backups box.

Note
The
.work and
.dat files are zipped
into a single file.
-
To upload a backup to a Remote, in the section, select Remote, then do the following:
- Protocol — Select the file
transfer protocol you want to use to upload the backup file, SCP or FTP.
- Server — Type the IP
address of the server where the backup will be stored.
Note
The Server Address
field supports both IPv4 and IPv6 addresses.
- User ID — Type the user ID
to log in to the server.
- Password — The password to
log in to the server.
- Confirm — The password to
confirm the password.
- Directory — The directory
in which you want to upload the CDR file.
- Filename — Select the
zipped CDR file name.
-
To upload a backup to Flash, in the section, select Flash, then do the following:
- Filename — Select the
zipped CDR file name.
-
In the Copy
Selected Backup to section, click Copy. The
.zip file is uploaded on to the server.
-
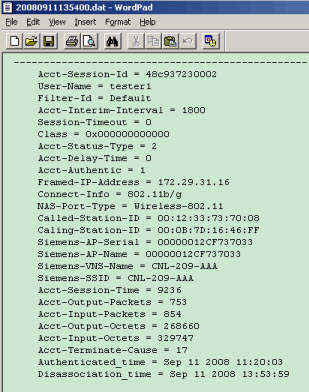
Unzip the file. The two CDR files — .work and .dat — are visible on the server.
-
To view CDRs, download the files.
 Print
this page
Print
this page Email this topic
 Feedback
 View PDF
 Download EPUB