This section describes how to install a Solid-state Drive (SSD) module in the rear
slot of a switch.
You need the following tools and materials to install an SSD module:

Warning
To prevent damage to
the switch or VIM, the switch must be powered OFF when removing or installing SSD
modules.
To install an SSD module, follow these steps:
-
Attach the ESD wrist strap to
your wrist and connect the metal end to an appropriate ground point on the rack.
-
Ensure that the switch is
completely powered down.
-
Remove the cover plate from the
SSD slot (#2 Phillips screwdriver required).
Switch with SSD Rear
Panel
-
Remove the SSD module from its
packaging.
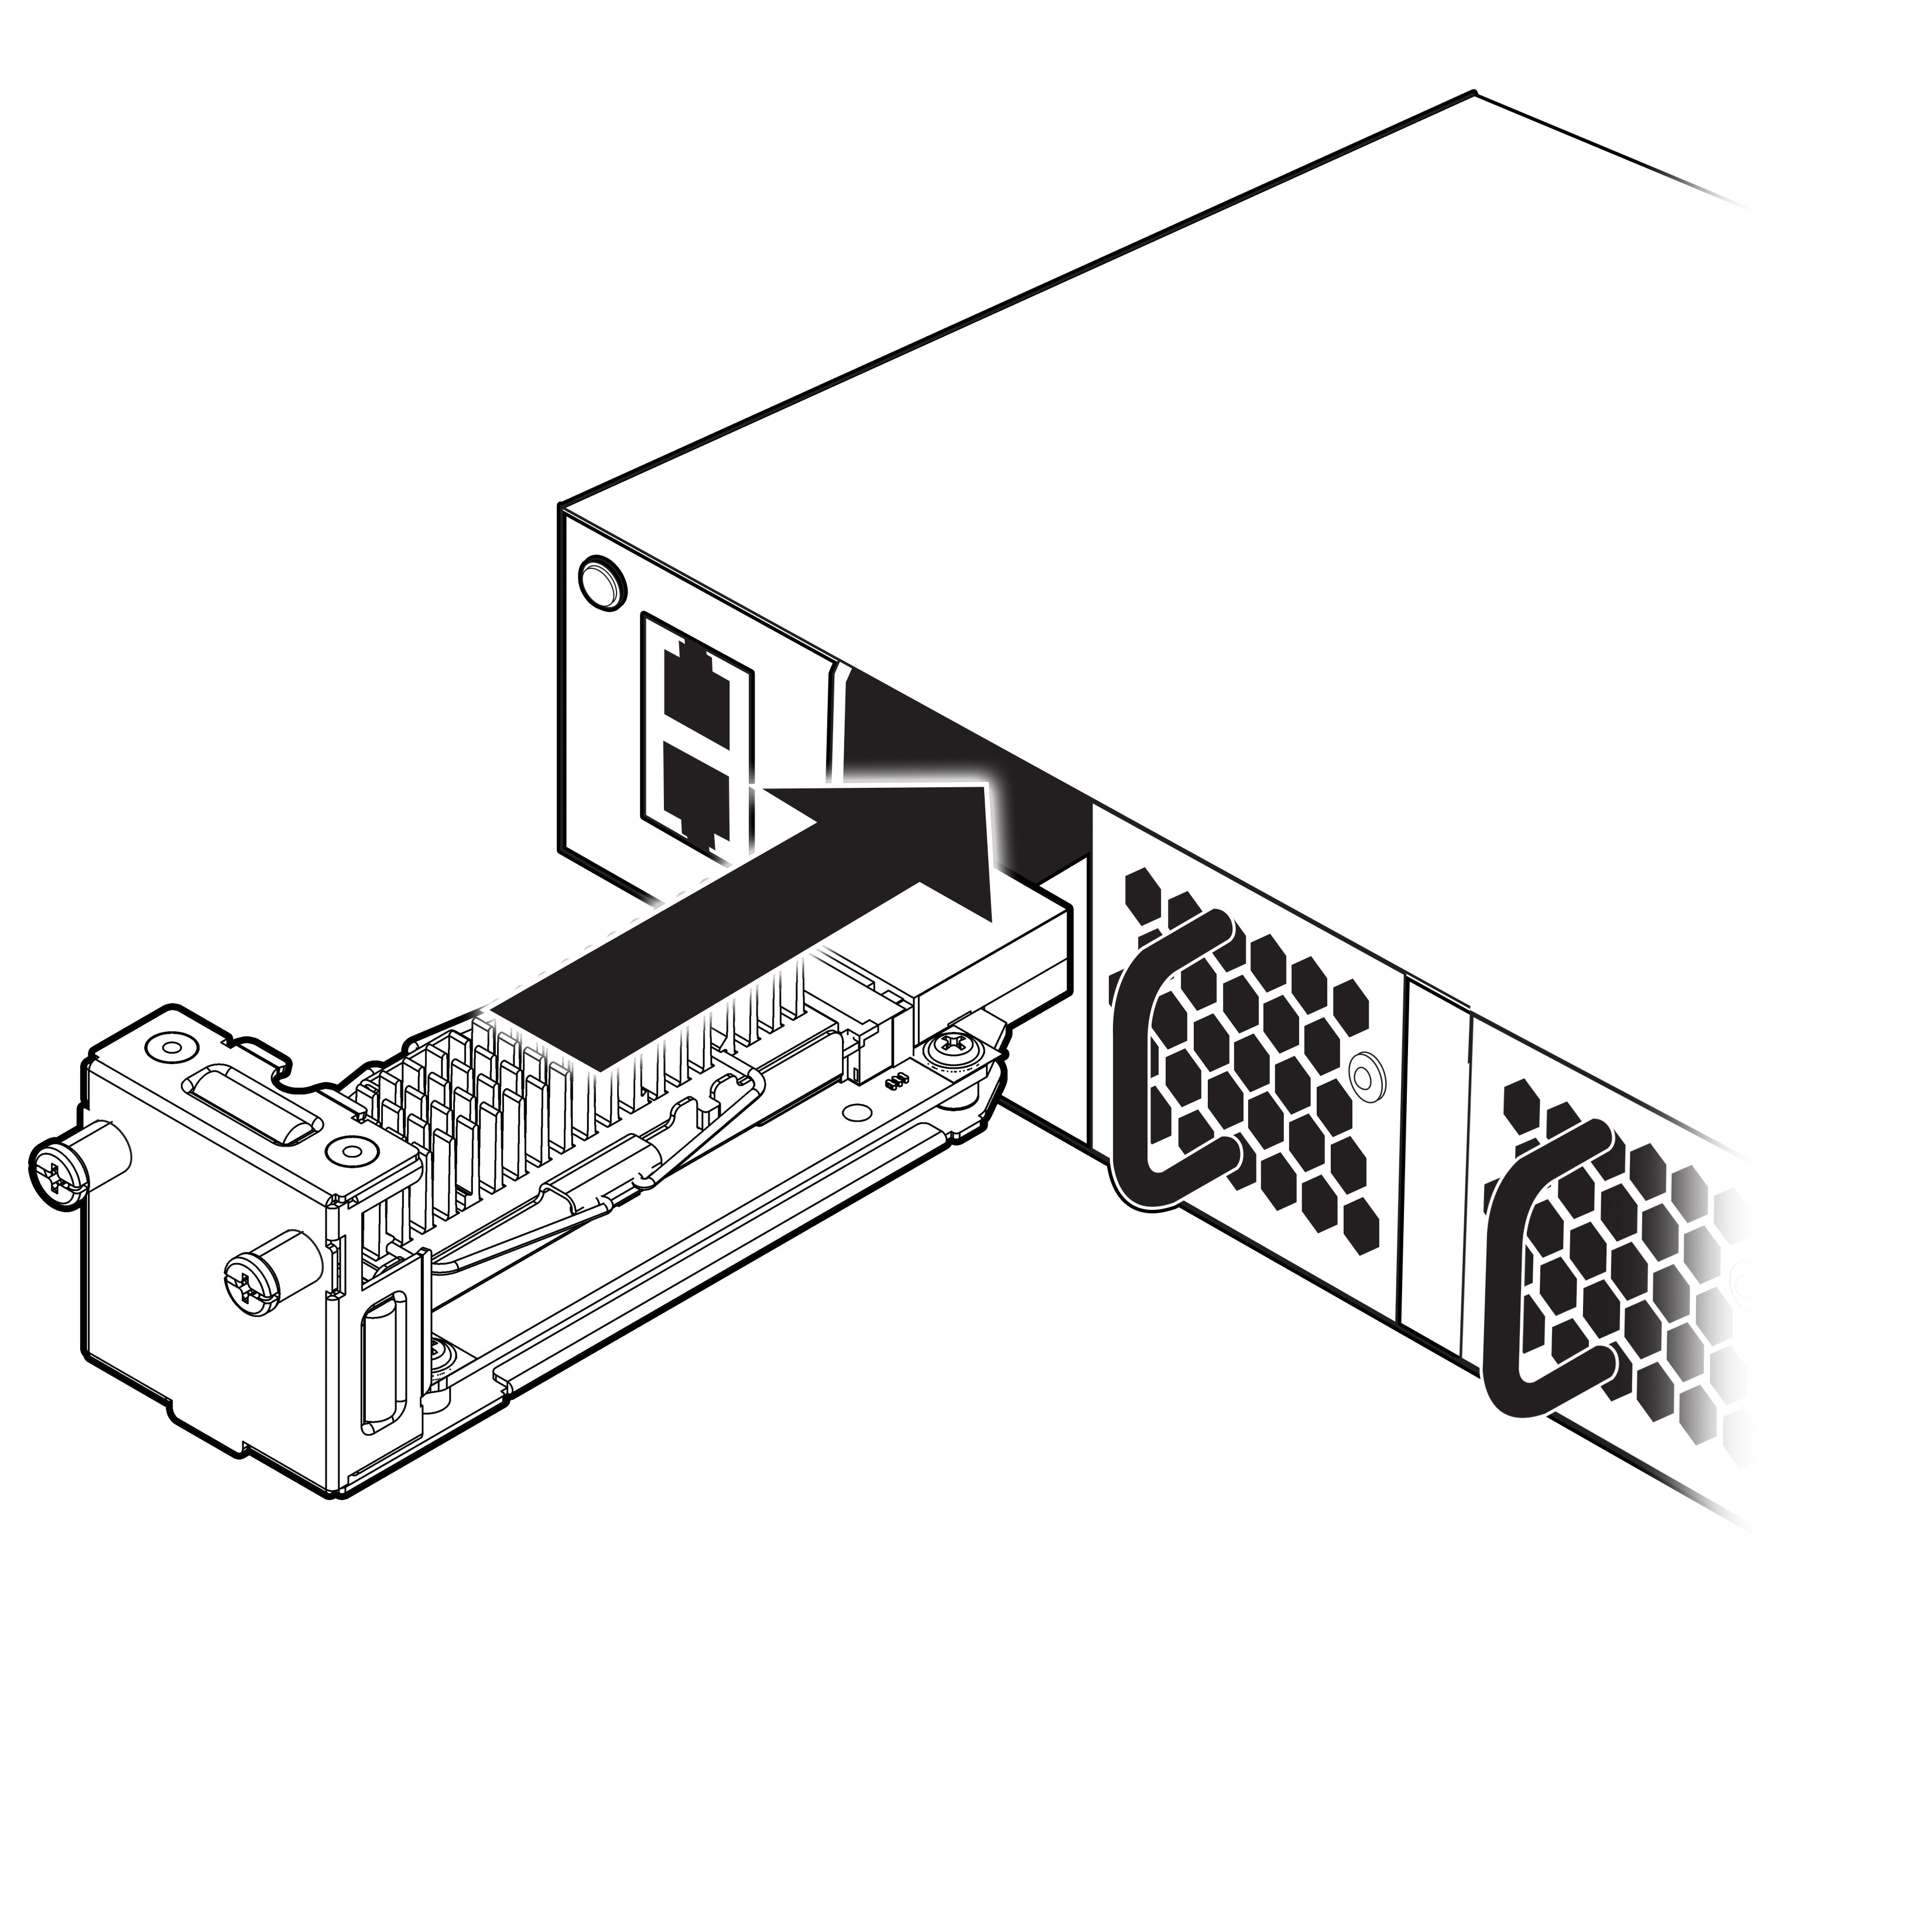
-
Carefully slide the SSD module
into the slot on the rear panel until it is firmly in place.
-
Secure the SSD module using the
screws provided.