Bulk 'Rev: AA'
AP505/AP510 Upgrade through Virtual Controller
This section describes how to do a bulk upgrade of 'Rev: AA'
AP505 and AP510 access points in the absence of a WiNG
Controller or ExtremeCloud Appliance.
If you have multiple 'Rev: AA' AP505 and AP510 access points and
no WiNG Controller or ExtremeCloud Appliance deployed in your
network, configure one of the AP as a Virtual
Controller (VC). Use this virtual controller AP to
perform a bulk upgrade of the other APs.
The steps below describe how to perform this task:
-
Set the AP's
'operational-mode' to 'standalone/distributed'. You can
either use the AP's CLI or GUI to set the AP's operational
mode.

Note
The WiNG 7.1.X AP505 and AP510 model access points
have the capability of operating in the following two
modes:
Distributed and
Centralized. For a newly-manufactured,
out-of-the-box AP505 and AP510 access point the mode of
operation is
not
specified. The
Centralized mode of operation is ideally suited
for dense localized deployments, while the
Distributed mode supports scaled-out
deployments.
-
Access the AP's CLI through the console or SSH.
For
SSH, use the AP's Primary or Secondary IP
address.
Primary IP address - This is the DHCP provided IP
address.
Secondary IP address - This is the ZEROCONF IP
address printed on the box.
You will be prompted to provide the login
credentials. Since, this is a fresh, out-of-box
device, you will have to enter the default
credentials.
-
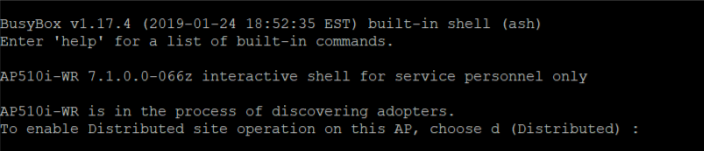
Enter the default credentials admin/admin123.
You
will be prompted: '
To enable distributed site operation on this
AP, choose d (Distributed):'
-
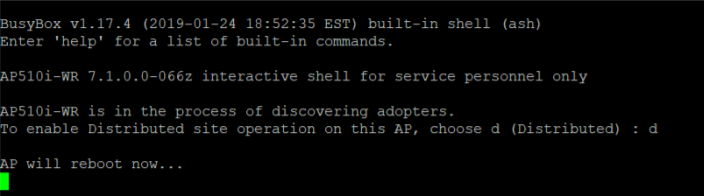
Type
'd'.
The
following message is displayed:
Note
The AP will reboot in the
standalone/distributed operational
mode.
-
Alternately, access the AP's GUI by pointing the
Web browser to the AP's Primary or Secondary IP
address. (http://<AP-IP-ADDRESS>)
Primary IP address - This is the DHCP provided IP
address.
Secondary IP address - This is the ZEROCONF IP
address printed on the box.
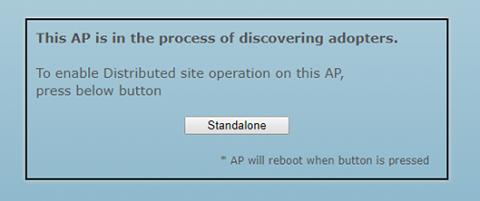
The
following message is displayed:
-
Click on the “Standalone” button.
The
following message is displayed:
Note
The AP will reboot in the
standalone/distributed operational
mode.
-
After the AP's operational-mode is set to 'standalone/distributed', upgrade it
to the 7.1.0.0-138R firmware version.
-
Access the AP's CLI through the console or SSH.
-
Enter admin/admin123 as username/password.
The AP's CLI opens in the user executable
mode.
ap5xx-xxxxxx>
-
Enter 'enable' to move into the privileged mode.
ap5xx-xxxxxx>enable
ap5xx-xxxxxx#
-
Use following command to upgrade AP to the latest firmware:
ap5xx-xxxxxx#upgrade tftp://<hostname|IP>path/filename
Note
Ensure that the latest 7.1.0.0-138R image file
is availabe at the specified location.
-
Reload the AP, after the upgrade.
-
Add the
other 'Rev: AA' AP5XXs to the network, in the same VLAN as
the first AP that is being configured as a VC.
The
APs will reload twice and boot up in the 'Distributed'
operational mode.
-
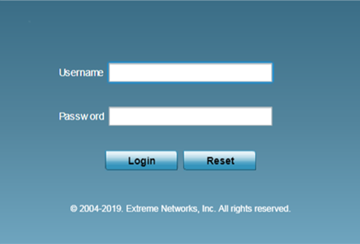
Access the first upgraded AP's GUI, by pointing the Web browser to the AP's
Primary (DHCP-provided) or Secondary (ZEROCONF) IP address.
The
login page is displayed.
-
Enter credentials admin/admin123.
-
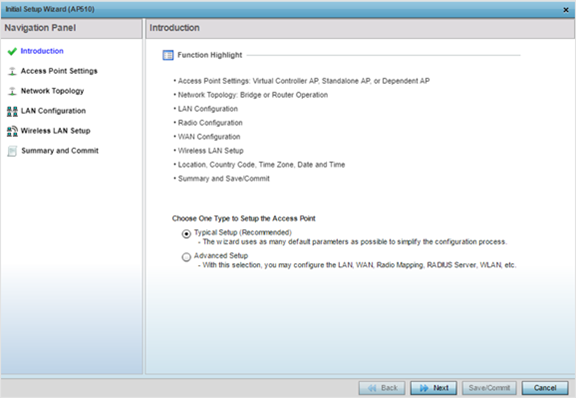
Use the Initial Setup Wizard to configure the AP as a
Virtual Controller.
-
Click
Next.
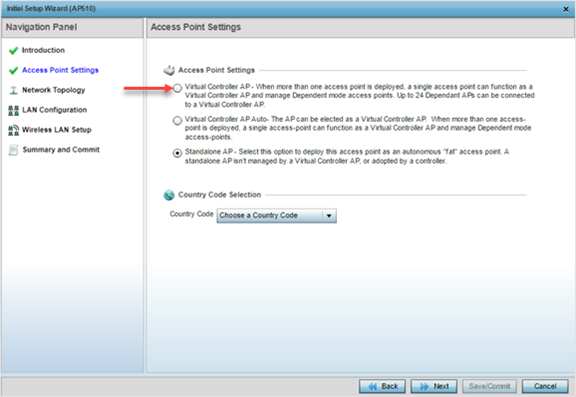
-
On the
Access Point Settings screen,
select the Virtual
Controller AP radio button.
The
AP is now configured as a VC. At this point, the other 'Rev:
AA' APs in the VLAN will adopt to the virtual controller
AP.
-
Use the following CLI command to load the AP image file on to the VC.
ap5xx-xxxxxx#device-upgrade load-image ap5XX tftp://<hostname|IP>/path/file
Note
Once the AP image file upload is complete, the other adopted APs will be
upgraded by the VC AP.

 Print
this page
Print
this page Email this topic
 Feedback
 View PDF
 Download EPUB