Dynamic Host Configuration Protocol (DHCP) allows hosts on an IP network to request and be assigned IP addresses and discover information about the network where they reside. Each subnet can be configured with its own address pool. Whenever a DHCP client requests an IP address, the DHCP server assigns an IP address from that subnet's address pool. When the onboard DHCP server allocates an address for a DHCP client, the client is assigned a lease, which expires after an pre-determined interval. Before a lease expires, wireless clients (to which leases are assigned) are expected to renew them to continue to use the addresses. Once the lease expires, the client is no longer permitted to use the leased IP address. The DHCP server ensures all IP addresses are unique, and no IP address is assigned to a second client while the first client's assignment is valid (its lease has not yet expired). Therefore, IP address management is conducted by the internal DHCP server, not by an administrator.
The internal DHCP server groups wireless clients based on defined user-class options. Clients with a defined set of user class values are segregated by class. A DHCP server can associate multiple classes to each pool. Each class in a pool is assigned an exclusive range of IP addresses. DHCP clients are compared against classes. If the client matches one of the classes assigned to the pool, it receives an IP address from the range assigned to the class. If the client doesn't match any of the classes in the pool, it receives an IP address from a default pool range (if defined). Multiple IP addresses for a single VLAN allow the configuration of multiple IP addresses, each belonging to different subnet. Class configuration allows a DHCP client to obtain an address from the first pool to which the class is assigned.
Refer to the following sections for more information on configuring DHCP parameters:
To access and review the local DHCP server configuration:
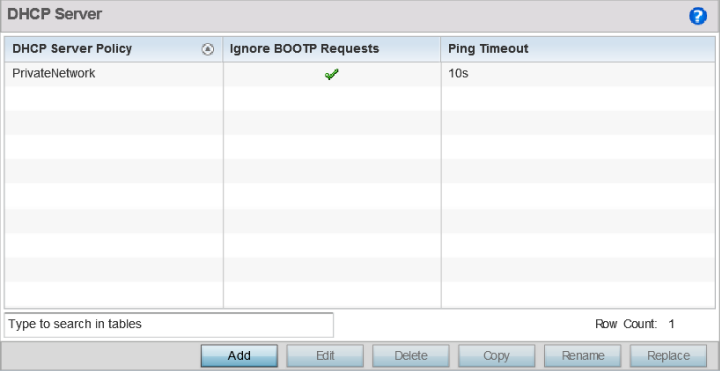
| DHCP Server Policy | Lists the name assigned to each DHCP server policy when it was initially created. The name assigned to a DHCP server policy cannot be modified as part of the policy edit process. However, obsolete policies can be deleted as needed. |
| Ignore BOOTP Requests | A green checkmark within this column means this policy has been set to ignore BOOTP requests. A red “X” defines the policy as accepting BOOTP requests. BOOTP (boot protocol) requests boot remote systems within the controller or service platform managed network. BOOTP messages are encapsulated inside UDP messages and are forwarded by the controller or service platform. This parameter can be changed within the DHCP Server Global Settings screen. |
| Ping Timeout | Lists the interval (from 1 -10 seconds) for a DHCP server ping timeout. The timeout is used to intermittently ping and discover whether a client requested IP address is already in use. This parameter can be changed within the DHCP Server Global Settings screen. |
 Print
this page
Print
this page Email this topic
 Feedback
 View PDF
 Download EPUB