NAT (Network Address Translation) is a technique to modify network address information within IP packet headers in transit. This enables mapping one IP address to another to protect wireless controller, service platform or access point managed network address credentials. With typical deployments, NAT is used as an IP masquerading technique to hide private IP addresses behind a single, public facing, IP address.
Additionally, NAT is a process of modifying network address information in IP packet headers while in transit across a traffic routing device for the purpose of remapping one IP address to another. In most deployments NAT is used in conjunction with IP masquerading which hides RFC1918 private IP addresses behind a single public IP address.
NAT can provide a profile outbound internet access to wired and wireless hosts connected to a controller, service platform or access point. Many-to-one NAT is the most common NAT technique for outbound internet access. Many-to-one NAT allows a controller, service platform or access point to translate one or more internal private IP addresses to a single, public facing, IP address assigned to a 10/100/1000 Ethernet port or 3G card.

Note
The wiNG 7.1 release does not support NAT on AP505 and AP510 model access points. This feature will be supported in future releases.
To override an access point profile's NAT configuration:
The Device Overrides screen displays. This screen lists devices within the managed network.
The selected access point's configuration menu displays.
The NAT Pool screen displays by default. This screen lists the NAT policies that have been created thus far. Any of these policies can be selected and applied to a profile.
Note
A blue override icon (to the left of a parameter) defines the parameter as having an override applied. To remove an override go to the Basic Configuration section of the device and click Clear Overrides. This removes all overrides from the device.
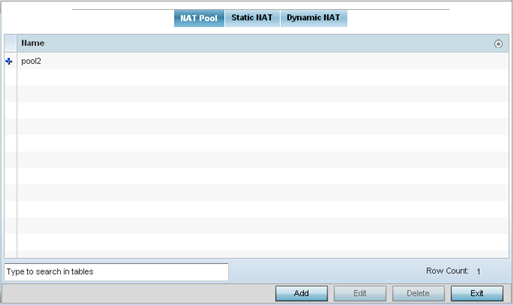
To create a new NAT policy, click Add. To delete an obsolete NAT policy, select it and click Delete.
The NAT Pool window displays.
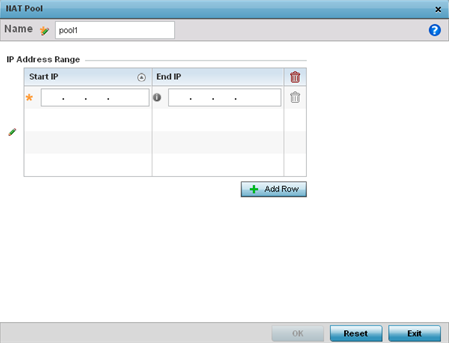
The IP addresses defined here are hidden from the public internet. NAT modifies network address information in the defined IP range while in transit across a traffic routing device. NAT only provides IP address translation and does not provide a firewall. A branch deployment with NAT by itself will not block traffic from potentially being routed through a NAT device. Consequently, NAT should be deployed with a stateful firewall.
|
Start IP |
Enter the first IP address in the range |
|
End IP |
Enter the last IP address in the range. |
Click Reset to revert to the last saved configuration.
 Print
this page
Print
this page Email this topic
 Feedback
 View PDF
 Download EPUB