VPN can be overridden by using either the inbuilt wizards or by manually configuring the required parameters. This section describes how to use the inbuilt wizards to override the VPN parameters. The user interface provides two (2) wizards that provide different levels of configuration.
The Device Overrides screen displays. This screen lists devices within the managed network.
The selected access point's configuration menu displays.
The selected access point's Security configuration screen displays, with the VPN option selected by default.
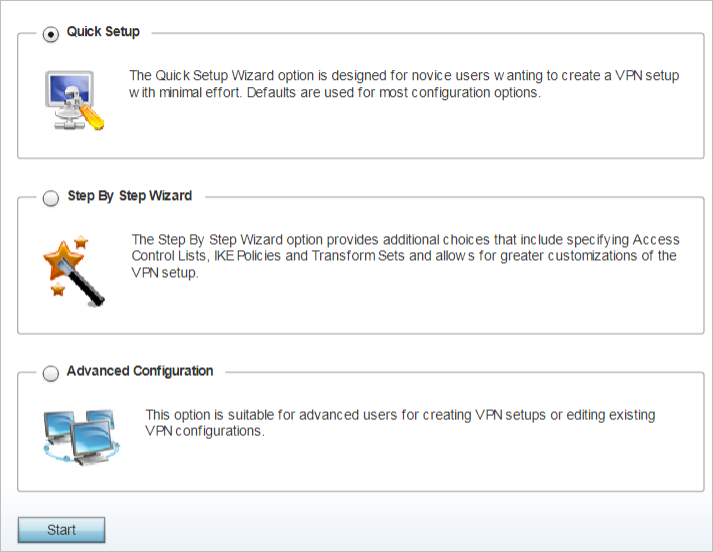
Quick Setup - Use this wizard to setup basic VPN Tunnel on the device. This wizard is aimed at novice users and enables them to setup a basic VPN with minimum effort. This wizard uses default values for most of the parameters.

Note
This option is selected by default. If you wish to use any of the other options on this screen, select the option and click Start.
Step-by-Step wizard - Use this wizard to setup a VPN Tunnel step by step. This wizard is aimed at intermediate users who require the ability to customize some of the parameters.
Advanced Configuration - Use this option to configure the VPN parameters manually.
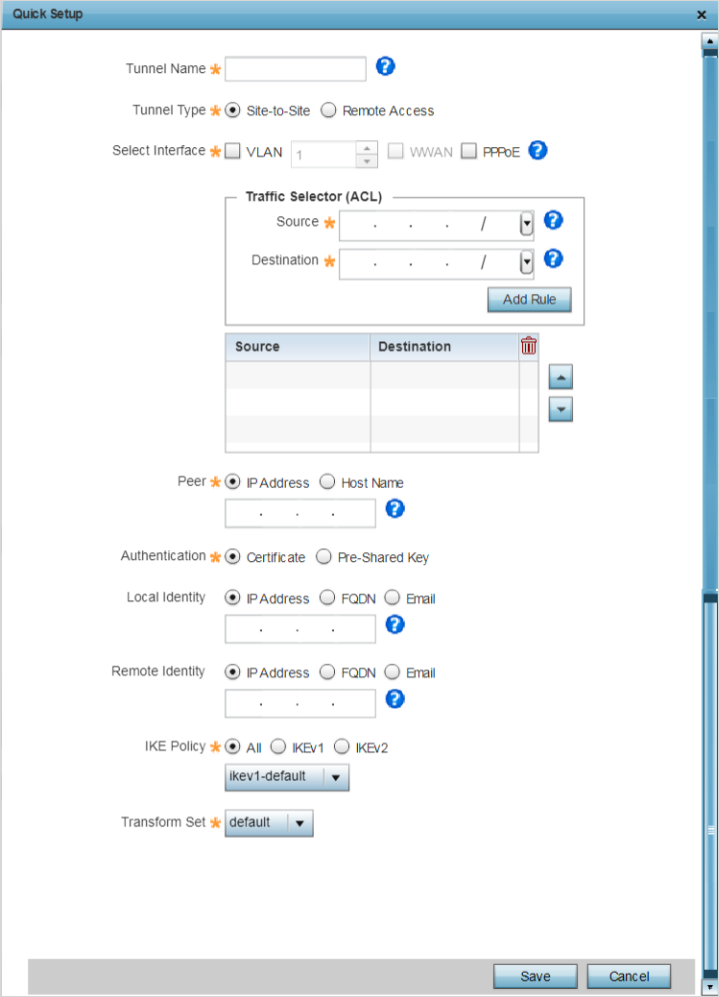
The Quick Setup wizard creates a VPN connection with minimum manual configuration. Default values are retained for most of the parameters.
The quick setup screen displays.
|
Tunnel Name |
Provide a name for the tunnel. Tunnel name must be such that it easily identifies the tunnel uniquely. |
|
Tunnel Type |
Configure the tunnel type as one of the following:
|
|
Select Interface |
Configure the interface for creating the tunnel. The
following options are available:
|
|
Traffic Selector (ACL) |
Configure ACLs that manage the traffic passing through
the VPN Tunnel.
Note:
Click Add Rule to add the rule into the ACL. |
|
Peer |
Configure the peer for this tunnel. The peer device can be specified either by its hostname or IP address. |
|
Authentication |
Configure the authentication used to identify peers. The
options are:
|
|
Local Identity |
Configure the local identity used with peer configuration
for an IKE exchange with the target VPN IPSec peer.
Options include:
|
|
Remote Identity |
Configure the access point remote identifier for an IKE
exchange with the target VPN IPSec peer. The options
include:
|
|
IKE Policy |
Configure the IKE policy to use. IKE is used to exchange
authentication keys. The options are:
|
|
Transform Set |
Configure the transform set used to specify how traffic is protected within the crypto ACL defining the traffic that needs to be protected. Select the appropriate traffic set from the drop-down menu. |
To exit without saving, click Cancel.
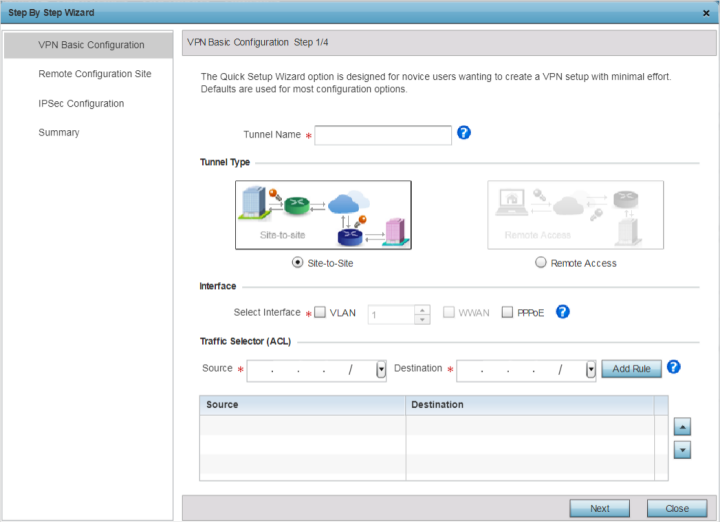
The Step-By-Step wizard creates a VPN connection with more manual configuration than the Quick Setup Wizard. Use this wizard to manually configure Access Control Lists, IKE Policy, and Transform Sets to customize the VPN Tunnel.
The (step 1/4) screen displays by default.
|
Tunnel Name |
Provide a name for the tunnel. Tunnel name must be such that it easily identifies the tunnel uniquely. |
|
Tunnel Type |
Configure the tunnel type as one of the following:
|
|
Interface |
Configure the interface for the tunnel. The options
are:
|
|
Traffic Selector (ACL) |
This field creates the Access Control List (ACL) that is
used to control who uses the network.
Note:
Click Add Rule to add the rule into the ACL. |
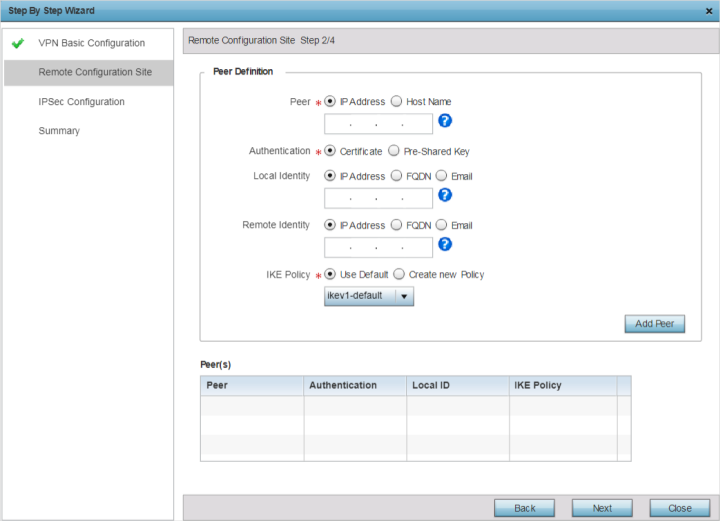
The (step 2/4) screen displays.
|
Peer |
Specify the peer for this device when forming a tunnel.
The peer can be identified by it's IP address or
hostname.
|
|
Authentication |
Configure the mode of authentication used by the tunnel
peers. The options are:
|
|
Local Identity |
Configure the local identity used with peer configuration
for an IKE exchange with the target VPN IPSec peer.
Options include:
|
|
Remote Identity |
Configure the access point remote identifier for an IKE
exchange with the target VPN IPSec peer. The options
include:
|
|
IKE Policy |
Configure the IKE policy to use when creating this VPN
Tunnel. The following options are available:
|
The (step 3/4) screen displays.
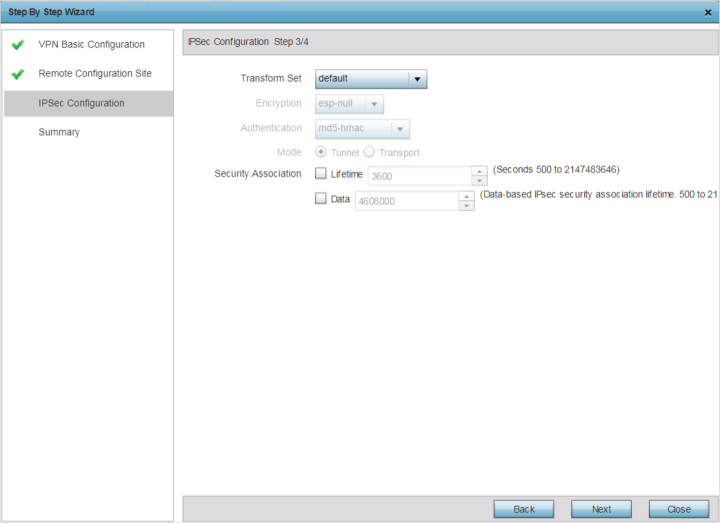
|
Transform Set |
Transform set is a set of configurations exchanged for
creating the VPN tunnel and impose a security policy.
Use the Transform Set drop-down menu and select one of
the following options:
Note:
|
|
Encryption |
Specify the encryption mode used with the tunnel. The
options are:
|
|
Authentication |
Specify the authentication mode used to identify tunnel
peers. the options are:
This is the method peers authenticate with as the source of the packet to other peers after a VPN Tunnel has been created. |
|
Mode |
Configure the mode of transport used to transmit packets
through the tunnel. The options are:
|
|
Security Association |
Configure the lifetime of a SA (security
association). Keys and SAs should be
periodically renewed to maintain security of the
tunnel.
|
The (step 4/4) screen displays.
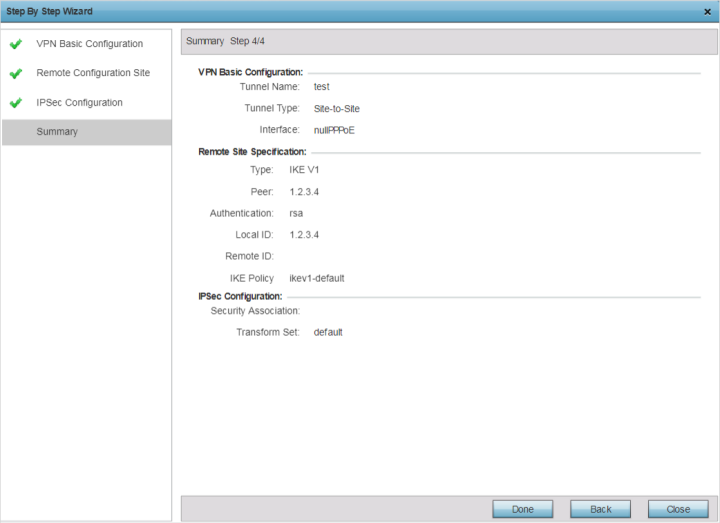
Use the Back button to go back to previous screen for making modifications to the configuration. Click Close to close the wizard without creating a VPN Tunnel.
For detailed information manually configuring the VPN configurations, see Defining Profile VPN Settings.
 Print
this page
Print
this page Email this topic
 Feedback
 View PDF
 Download EPUB