The Login page displays by default
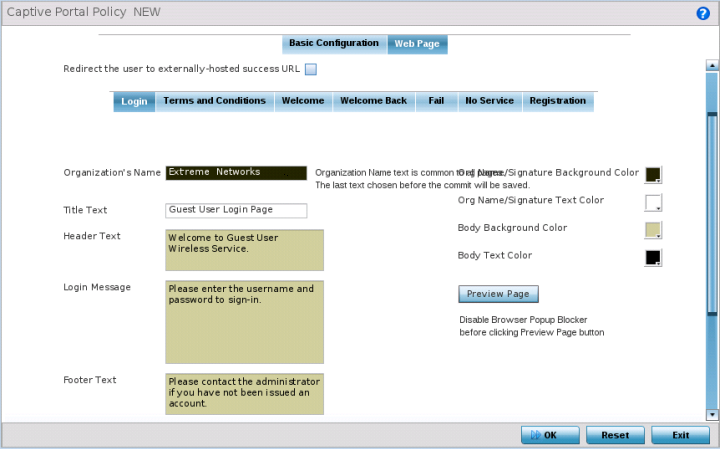
The Login screen prompts the user for a username and password to access the captive portal and proceed to either the Terms and Conditions page (if used) or the Welcome page.
The Terms and Conditions page provides conditions that must be agreed to before captive portal access is permitted.
The Welcome page asserts a user has logged in successfully and can access the captive portal.
The Welcome Back page greets returning users.
The Fail page asserts authentication attempt has failed, the user is not allowed to access the internet (using this captive portal) and must provide the correct login information again to access the internet.
The No Service page asserts the captive portal service is temporarily unavailable for technical reasons. Once the services become available, the captive portal user is automatically connected back to the services available through the captive portal.
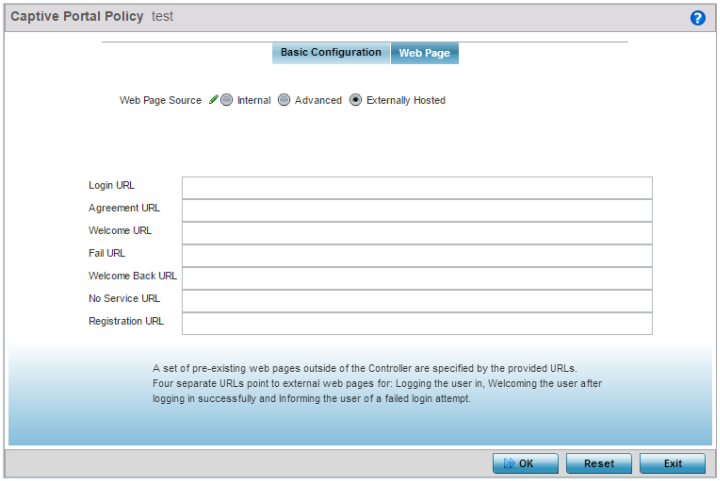
Available sources include Internal, External and Advanced. If Internal is selected, provide the information for each of the screens. If Advanced is selected, follow the on-screen instructions to upload custom Web pages. If Externally hosted is selected, provide the URLs for each of the necessary pages in the fields below.
|
Organization Name |
Set any organizational specific name or identifier which clients see during login. This setting is available only for the Login page. |
|
Title Text |
Set the title text displayed on the pages when wireless clients access captive portal pages. The text should be in the form of a page title describing the respective function of each page and should be unique to each function. |
|
Header Text |
Provide header text unique to the function of each page. |
|
Login Message |
Specify a message containing unique instructions or information for the users who access the Login, Terms and Condition, Welcome, Fail, No Service or Registration pages. In the case of the Terms and Agreement page, the message can be the conditions requiring agreement before captive portal access is permitted. |
|
Footer Text |
Provide a footer message displayed on the bottom of each page. The footer text should be any concluding message unique to each page before accessing the next page in the succession of captive portal Web pages. |
|
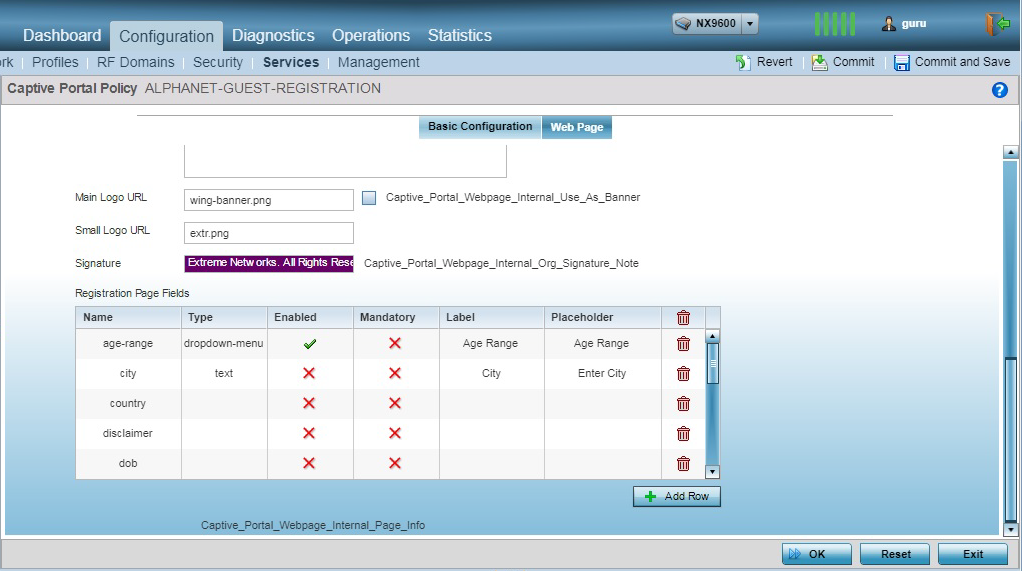
Main Logo URL |
The Main Logo URL is the URL for the main logo image displayed on each of the pages. Use the Browse button to navigate to the location of the target file. Optionally select the Use as banner option to designate the selected main logo as the page‘s banner as well. The banner option is disabled by default. |
|
Small Logo URL |
The Small Logo URL is the URL for a small logo image displayed on the screens. Use the Browse button to navigate to the location of the target file. |
|
Signature |
Provide the copyright and legal signature associated with the usage of the captive portal and the usage of the organization name provided. This setting is available only for the Login page. |
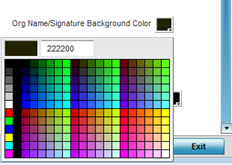
Select the box to the right of each of these four items to launch a color palette where screen colors can be selected uniquely. Select Preview Page to review your color selections before committing the updates to captive portal screens. Each of the Login, Terms and Conditions, Welcome, Fail, No Service and Registration screens can have their background and signature colors set uniquely.
Guest users are redirected to the registration portal on association to the captive portal SSID. Users are displayed an internal (or) externally hosted registration page where the guest user must complete the registration process if not previously registered.
Click Reset to revert to the last saved configuration.
|
Login URL |
Define the complete URL for the location of the Login page. The Login screen prompts the user for a username and password to access the Terms and Conditions or Welcome page. |
|
Agreement URL |
Define the complete URL for the location of the Terms and Conditions page. The Terms and Conditions page provides conditions that must be agreed to before wireless client access is provided. |
|
Welcome URL |
Define the complete URL for the location of the Welcome page. The Welcome page asserts the user has logged in successfully and can access resources via the captive portal. |
|
Fail URL |
Define the complete URL for the location of the Fail page. The Fail page asserts authentication attempt has failed, and the client cannot access the captive portal and the client needs to provide correct login information to regain access. |
|
Welcome Back URL |
Define the complete URL for the location of the Welcome Back page. The Welcome Back page asserts the user has re-logged in successfully and can access resources via the captive portal. |
|
No Service URL |
Define the complete URL to the location of the No Service page. The No Service URL is needed by users encountering difficulties connecting to the external resource used to host the captive portal pages. |
|
Registration URL |
Define the complete URL to the location of the Registration page. The Registration page is displayed to new users to register (provide user information) in order to access the captive portal managed Internet resources. |
Click Reset to revert to the last saved configuration.
Web pages in the directory can be copied to and from the access point, to support the captive portal.
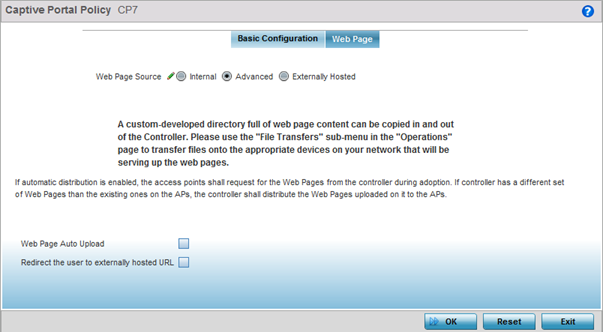
Refer to and use the Source and Target fields to move captive portal pages as needed to managed devices that may be displaying and hosting captive portal connections.
Select the Web Page Auto Upload check box to enable automatic upload of captive portal Web pages.
Select the Redirect the user to externally-hosted success URL check box, if the Welcome page is externally hosted.
Click Reset to revert the screen back to its last saved configuration.
 Print
this page
Print
this page Email this topic
 Feedback
 View PDF
 Download EPUB