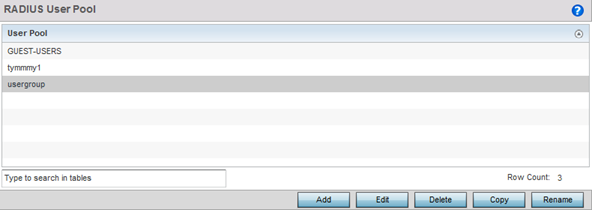
A user pool defines policies for individual user access to local (controller, service platform or Access Point managed) RADIUS resources. User pools are a convenient means of providing RADIUS resources based on the pool's unique permissions (temporary or permanent). A pool can contain a single user or group of users.
To configure a RADIUS user pool and unique user IDs:
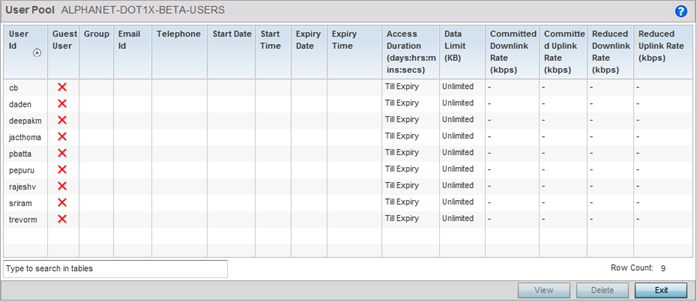
They define when specific user IDs have access to the access point's RADIUS resources.
| User ID | The unique string identifying this user. This is the ID assigned to the user when created and cannot be modified with the rest of the configuration. |
| Guest User | Specifies (with a green check) the user has guest access and temporary permissions to the local RADIUS server. The terms of the guest access can be set uniquely for each user. A red “X” designates the user as having permanent access to the local RADIUS server. |
| Group | The group name each configured user ID is a member. |
| Email ID |
The configured E-mail ID for this user. This is the address used when communicating with users in this pool. |
| Telephone |
The configured telephone number for this user. This is the number used when communicating with users in this pool. |
| Start Date |
The month, day and year the listed user ID can access the access point‘s internal RADIUS server resources. |
| Start Time |
The time the listed user ID can access the internal RADIUS server. The time applies only to the range defined by the start and expiry date. |
| Expiry Date |
The month, day and year the listed user ID can no longer access the internal RADIUS server. |
| Expiry Time |
The time the listed user loses access to internal RADIUS server resources. The time applies only to the range defined by the start and expiry date. |
| Access Duration (days:hrs:mins:secs) | The amount of time a user is allowed access when time-based access privileges are applied. The duration cannot exceed 365 days. |
| Data Limit (KB) | The total amount of bandwidth (in kilobytes) consumable by each guest user. |
| Committed Downlink Rate (kbps) | The download speed (in kilobytes) allocated to the guest user. When bandwidth is available, the user can download data at the specified rate. If a guest user has a bandwidth based policy and exceeds the specified data limit, their speed is throttled to the Reduced Downlink Rate. |
| Committed Uplink Rate (kbps) | The upload speed (in kilobytes) allocated to the guest user. When bandwidth is available, the user can download data at the specified rate. If a guest user has a bandwidth based policy and exceeds the specified data limit, their speed is throttled to the Reduced Uplink Rate. |
| Reduced Downlink Rate (kbps) | The reduced speed the guest utilizes (in kilobytes) when exceeding their specified data limit, if applicable. If a guest user has a bandwidth based policy and exceeds the specified data limit, their speed is throttled to the Reduced Downlink Rate. |
| Reduced Uplink Rate (kbps) | The reduced speed the guest utilizes (in kilobytes) when exceeding their specified data limit, if applicable. If a guest user has a bandwidth based policy and exceeds the specified data limit, their speed is throttled to the Reduced Uplink Rate. |
Select a RADIUS user and click Copy to make a copy of the user to make further modifications or use Rename to rename the existing RADIUS user.

| User ID | Assign a unique character string identifying this user. The ID cannot exceed 64 characters. |
| Password | Provide a password unique to this user ID. The password cannot exceed 32 characters. Select the Show checkbox to expose the password‘s actual character string. Otherwise the password displays as a string of asterisks (*). |
| Guest User | Select the check box to designate this user as a guest with temporary access. The guest user must be assigned unique access times to restrict their access. |
| Group | If the user has been defined as a
guest, use the Group drop-down menu
to assign the user a group with temporary access privileges.
If the user is defined as a permanent user, select a group
from the group list. If no groups are relevant to the user‘s
intended access, select the Create
link (or icon for guests) and create a new group
configuration suitable for the user's membership. For more information, see Creating RADIUS Groups. |
| Email ID |
Set the email ID for this user. |
| Telephone |
Specify the telephone number for this user. Specify the 12-character maximum telephone number of the client user (user ID) requesting authentication validation to the controller or service platform using this user pool. |
| Start Date | Enter a start date, or use the calendar icon to select a starting date for the user's credentials to start working. |
| Start Time | Enter a start time, or use the spinner controls to select a starting time for the user's credentials to start working. Use the AM and PM buttons to apply a morning or afternoon/evening designation. |
| Expiry Date | Enter an end date, or use the calendar icon to define an expiration date for the user's credentials. Selecting this option enables the Till Expiry radio button. |
| Expiry Time | If you are using the Till Expiry option, enter an end time, or use the spinner controls to select an ending time for the user's credentials to expire. Use the AM and PM buttons to apply a morning or afternoon/evening designation. |
| Access Duration | Specify the time a user can access the system when time based access privilege are applied. Select Till Expiry to allow user access until their configured expiry date and time are met. To limit the time a user can access the captive portal during their configured time period, specify the Days, Minutes, and Seconds the user is allowed access. The Access Duration cannot exceed 365 days. |
| Data Limit | Use the spinner control to specify the maximum bandwidth consumable by the guest user. Once a value is configured, select the measurement as either GB (gigabytes) or MB (megabytes). |
| Committed Downlink Rate | Use the spinner control to specify the download speed dedicated to the guest user. When bandwidth is available, the user can download data at the specified rate. Once a value is configured, select the measurement as either MBPS (Megabytes per second) or KBPS (Kilobytes per second). If a guest user has a bandwidth based policy and exceeds the specified data limit, their speed is throttled to the defined Reduced Downlink Rate. |
| Reduced Downlink Rate | Use the spinner control to specify a reduced speed for guest operation when they have exceeded their specified data limit, if applicable. If a guest user has a bandwidth based policy and exceeds the specified data limit, their speed is throttled to the Reduced Downlink Rate. Once a value is configured, select the measurement as either MBPS (Megabytes per second) or KBPS (Kilobytes per second). |
| Committed Uplink Rate | Use the spinner control to specify the upload speed dedicated to the guest user. When bandwidth is available, the user is able to upload data at the specified rate. Once a value is configured, select the measurement as either MBPS (Megabytes per second) or KBPS (Kilobytes per second). If a guest user has a bandwidth based policy and exceeds the specified data limit, their speed is throttled to the Reduced Uplink Rate. |
| Reduced Uplink Rate | Use the spinner control to specify a reduced speed for guest operation when they‘ve exceed their specified data limit, if applicable. If a guest user has a bandwidth based policy and exceeds the specified data limit, their speed is throttled to the Reduced Uplink Rate. Once a value is configured, select the measurement as either MBPS (Megabytes per second) or KBPS (Kilobytes per second). |
 Print
this page
Print
this page Email this topic
 Feedback
 View PDF
 Download EPUB