Select Replace to replace an existing captive portal policy with another captive portal policy.
A Basic Configuration screen displays by default. Define the policy‘s security, access, and whitelist basic configuration before actual HTML pages can be defined for guest user access requests.
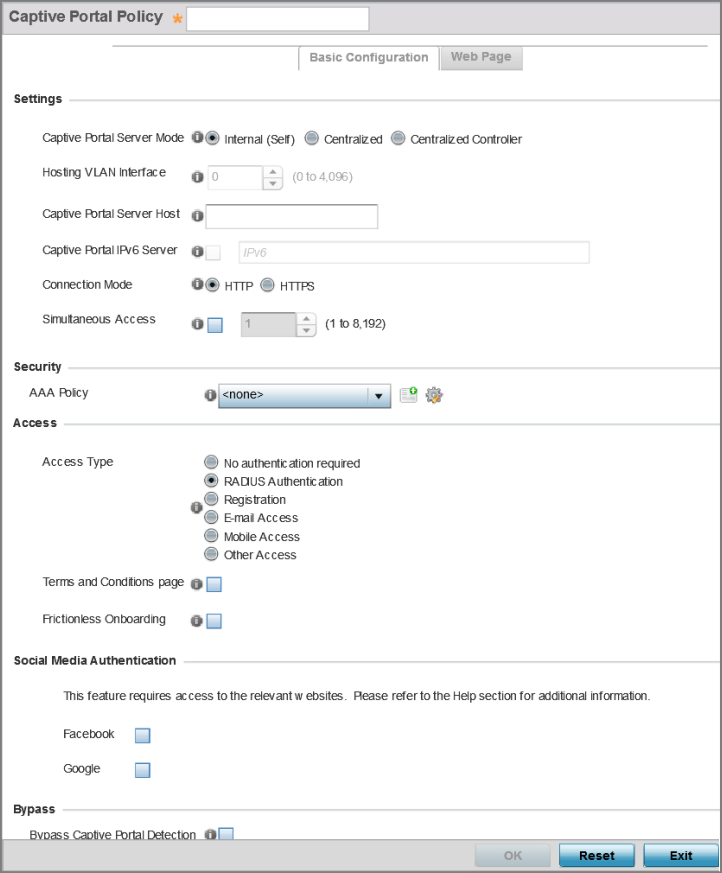
| Captive Portal Policy | If you are creating a new policy, assign a name representative of its access permissions, location or intended wireless client user base. If you are editing an existing captive portal policy, the policy name cannot be modified. The name cannot exceed 32 characters. |
| Captive Portal Server Mode | Set the mode as either Internal (Self), Centralized or Centralized Controller. Select the Internal (Self) radio button to maintain the captive portal configuration (Web pages) internally. Select the Centralized radio button if the captive portal is supported on an external server. Select the Centralized Controller radio button if the captive portal is supported on a centralized controller or service platform. The default value is Internal (Self). |
| Hosting VLAN Interface | When Centralized is selected as the Captive Portal Server Mode, specify the VLAN (between 0 and 4096) for client communication. Select 0 to use the default client VLAN. 0 is the default setting. |
| Captive Portal Server Host | When Centralized is selected as the Captive
Portal Server Mode, set a numeric IP address
(or DNS hostname) for the server validating guest user
permissions for the captive portal policy. When Centralized Controller is selected, use this field to provide the hostname of the controller or controllers acting as the captive portal server host. |
| Captive Portal IPv6 Server |
Set a numeric IP address (non DNS hostname) for the server validating guest user permissions for the captive portal policy. This option is available only if you are hosting the captive portal on an external (Centralized) server resource. |
| Connection Mode | Select either HTTP or HTTPS to define the connection medium to the Web server. We recommend the use of HTTPS because it affords some additional data protection HTTP cannot provide. The default value, however, is HTTP. |
| Simultaneous Access | Select this check box and use the spinner control to set from 1-8192 users (client MAC addresses) allowed simultaneous access to the captive portal and its resources. |
For information on creating a AAA policy, see AAA Policy.
| Access Type | Select the authentication scheme applied to clients
requesting captive portal guest access to the WiNG network.
Within the WiNG UI there are six options. The WiNG CLI uses
five options. User interface options include:
|
| Terms and Conditions page | Select this option (with any access type) to include terms that must be adhered to for clients requesting captive portal access. These terms are included in the Terms and Conditions page when No authentication required is selected as the access type, otherwise the terms appear in the Login page. The default setting is disabled. |
| Frictionless Onboarding | Select this option to enable wireless clients,
associated with guest WLANs, to
self-register with the ExtremeGuest server. In other
words, this feature enables frictionless
on-boarding of guest users to the
ExtremeGuest server. It also provides an integration API, as a means of on-boarding guest users through a loyalty application. In the captive portal, set access-type as ‘Registration‘, enable ‘Frictionless Onboarding‘, and provide the Localization URL to trigger a one-time redirect on demand. The defined URL is triggered from a mobile application to derive location information from the wireless network so an application can be localized to a particular store or region. Note: If enabling this feature, in the WLAN
(using this captive-portal) set the
following parameters:
authentication-type as ‘MAC‘ and
registration-mode as ‘device‘. Enable
the ‘External Controller‘ and ‘Follow
AAA‘ options. Use the AAA Policy
drop-down menu to specify the AAA
policy. In the AAA policy, ensure that
the authentication server configuration
points to the ExtremeGuest
server.
|
| If selected, the requesting client‘s guest user Facebook social media profile (collected from the social media server) is registered on the device. Captive portal authentication then becomes a fallback mechanism to enforce guest registration through social authentication. This option is disabled by default. | |
| If selected, the requesting client‘s guest user Google social media profile (collected from the social media server) is registered on the device. Captive portal authentication then becomes a fallback mechanism to enforce guest registration through social authentication. This option is disabled by default. |
| RADIUS VLAN Assignment |
Select this option to enable the RADIUS server to assign a VLAN post authentication. Once a captive portal user is authenticated, the user is assigned the VLAN as configured in the Post Authentication VLAN field. |
| Post Authentication VLAN | When this option is selected, a specific VLAN is assigned to the client upon successful authentication. The available range is from 1 - 4,096. |
| Client Access Time | Use the spinner control to define the duration wireless clients are allowed access to using the captive portal policy when there is no session time value defined for the RADIUS response. Set an interval from 10 - 10,800 minutes. The default interval is 1,440 minutes. |
| Inactivity Timeout | Use the drop-down menu to specify an interval in either minutes (1 - 1,440) or seconds (60 - 86,400) that, when exceeded, times out the session. The default is 10 minutes. |
| Enable | Select this option to report a captive portal client‘s loyalty application presence and store this information in the captive portal‘s user database. The client‘s loyalty application detection occurs on the access point to which the client is associated and allows a retail administrator to assess whether a captive portal client is using specific retail (loyalty) applications in their captive portal. This setting is enabled by default. |
| App Name | Use the drop-down menu to select an existing application to track for loyalty utilization by captive portal clients. This enables an administrator to assess whether patrons are accessing an application as expected in specific retail environments. To create an application if none exists suiting the specific reporting needs of captive portal clients, see Application. |
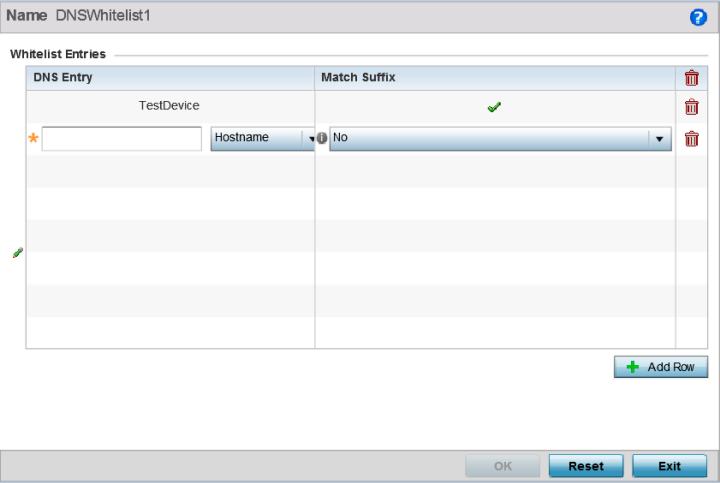
Each supported access point model can support up to 32 whitelists.
To effectively host captive portal pages on an external web server, the IP addresses of the destination web servers should be in the whitelist.
For more information, see Setting the DNS Whitelist Configuration.
| Enable RADIUS Accounting | Select this option to use an external RADIUS resource for AAA accounting. When selected, a AAA Policy field displays. This setting is disabled by default. |
| Enable Syslog Accounting | Select this option to log information about the use of remote access services by users using an external syslog resource. This information is of great assistance in partitioning local versus remote users. Remote user information can be archived to an external location for periodic network and user administration. This feature is disabled by default. |
| Syslog Host | When syslog accounting is enabled, use the drop-down menu to determine whether an IP address or Hostname is used as a syslog host. The IP address or hostname of an external server resource is required to route captive portal syslog events to that destination external resource destination. |
| Syslog Port | When syslog accounting is enabled, define the numerical syslog port the used to route traffic with the external syslog server. The default port is 514. |
| Limit | Select this option to enable data limits for captive portal clients. Specify the maximum amount of data, in megabytes, allowed for each captive portal client. |
| Action | When a captive portal client reaches its data usage
limit, a specified log action is executed. Choose from one
of the following:
|
| FQDN | Provide the FQDN address (for example, local.guestaccess.com) used to obtain localization parameters for a client. |
| Response | Enter a response message (512-character maximum) directed back to the client for localization HTTP requests. |
 Print
this page
Print
this page Email this topic
 Feedback
 View PDF
 Download EPUB