To apply overrides to the profile's adoption related configuration:
The Device Overrides screen displays. This screen lists devices within the managed network.
The selected access point's configuration menu displays.
The adoption screen displays. Specify the adoption related overrides to be applied on the selected access point. These changes override the configurations specified on the profile used by the access point..
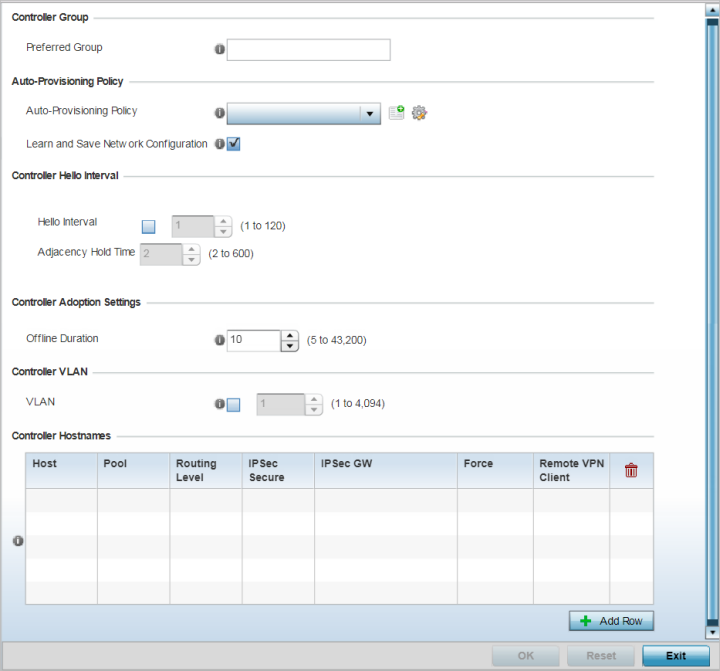
The preferred group is the controller group the access point would prefer to connect upon adoption.
|
Auto-Provisioning Policy |
Select an auto provisioning policy from the drop-down menu. To create a new auto provisioning policy, select the Create icon or modify an existing one by selecting the Edit icon. |
|
Learn and Save Network Configuration |
Select this option to enable allow the controller tor service platform to maintain a local configuration records of devices requesting adoption and provisioning. This feature is enabled by default. |
|
Hello Interval |
Specify the hello interval in seconds. The hello interval is the interval between two consecutive hello keep alive messages exchanged between the access point and the adopting wireless controller. These messages serve as a connection validation mechanism to ensure the availability of the adopting wireless controller. Use the spinner to set a value from 1 - 120 seconds. |
|
Adjacency Hold Time |
Specify the adjacency hold time value in seconds. This value sets the time after which the preferred controller group is considered down and unavailable to provide services. Use the spinner to set a value from 2 - 600 seconds. This option is enabled once the hello interval option is selected. |
This is the duration for which an adopted access point remains unreachable before being declared as offline by the adopting controller.
|
Allow Adoption of Devices |
Select either access points or Controllers (or both) to refine whether this controller or service platform can adopt just networked access points or peer controller devices as well. |
|
Allow Adoption of this Controller |
Select this option to enable this controller or service platform to be capable of adoption by other controllers or service platforms. This setting is disabled by default and must be selected to allow peer adoptions. |
|
Preferred Group |
If Allow Adoption of this Controller is selected, provide the controller group preferred as the adopting entity for this controller or service platform. If utilizing this feature, ensure the appropriate group is provided within the Controller Group field. |
|
Hello Interval |
Select this option to define the hello packet exchange interval (from 1 - 120 seconds) between the controller or service platform and an adoption requesting access point. |
|
Adjacency Hold Time |
Select this option to set a hold time interval (from 2 - 600 seconds) for the transmission of hello packets. |
 Print
this page
Print
this page Email this topic
 Feedback
 View PDF
 Download EPUB