A CSR (certificate signing request) is an application from a requestor to a certificate authority to issue a digitally signed identity certificate. The CSR is composed of a block of encrypted text generated on the server the certificate will be used on. It contains information included in the certificate, including organization name, common name (domain name), locality and country.
A RSA key must be either created or applied to the certificate request before the certificate can be generated. A private key is not included in the CSR, but is used to digitally sign the completed request. The certificate created with a particular CSR only worked with the private key generated with it. If the private key is lost, the certificate is no longer functional. The CSR can be accompanied by other identity credentials required by the certificate authority, and the certificate authority maintains the right to contact the applicant for additional information.
If the request is successful, the CA sends an identity certificate digitally signed with the private key of the CA.
To create a CSR:
The Certificate Management screen displays, with the Manage Certificates tab selected by default. This screen displays all existing trustpoints.
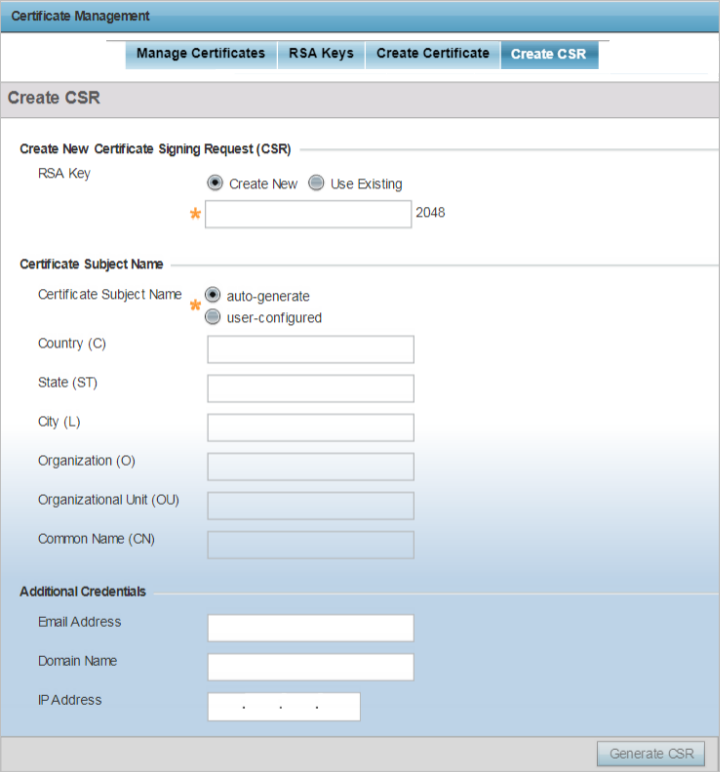
The Create CSR screen displays.
|
Create New |
Select this option to create a new RSA Key. Provide a 32 character name to identify the RSA key. Use the spinner control to set the size of the key (from 2,048 or 4,096 bits). It is recommended leaving this value at the default setting (2048) to ensure optimum functionality. For more information on creating a new RSA key, see RSA Key Management. |
|
Use Existing |
Select this option to use an existing RSA key. Use the drop-down menu to select the existing key used by both the device and the server (or repository) of the target RSA key. |
|
Certificate Subject Name |
Select either the auto-generate radio button to automatically create the certificate's subject credentials or select user-configured to manually enter the credentials of the self signed certificate. The default setting is autogenerate. |
|
Country (C) |
Define the Country used in the CSR. The field can be modified by the user. This is a required field and must not exceed 2 characters. |
|
State (ST) |
Enter a State for the state or province name used in the CSR. This is a required field. |
|
City (L) |
Enter a City to represent the city name used in the CSR. This is a required field. |
|
Organization (O) |
Define an Organization for the organization used in the CSR. This is a required field. |
|
Organizational Unit (OU) |
Enter an Organizational Unit for the name of the organization unit used in the CSR. This is a required field. |
|
Common Name (CN) |
If there is a Common Name (IP address) for the organizational unit issuing the certificate, enter it here. |
|
Email Address |
Provide an E-mail address used as the contact address for issues relating to this CSR. |
|
Domain Name |
Enter a FQDN as an unambiguous domain name that specifies the node's position in the DNS tree hierarchy. To distinguish an FQDN from a regular domain name, a trailing period is added. For example, somehost.example.com. An FQDN differs from a regular domain name by its absoluteness, since a suffix is not added. |
|
IP Address |
Specify the IP address used as the destination for certificate requests. |
 Print
this page
Print
this page Email this topic
 Feedback
 View PDF
 Download EPUB