Configuring a Client's Role Policy

To configure a wireless client‘s role policy and matching criteria:

  1. Go to Configuration → Security → Wireless Client Roles.
    The Wireless Client Roles screen displays the name of those client role policies created thus far.
    Click to expand in new window
    Wireless Client Roles Screen
    GUID-C1635C3E-AD8D-4D73-B94E-639E2BEB69DE-low.png
  2. Select Add to create a new Wireless Client Role policy, Edit to modify an existing policy or Delete to remove a policy.

    The LDAP Settings tab displays by default.
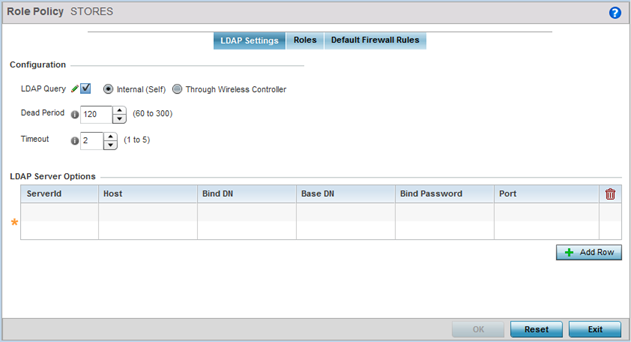
    Click to expand in new window
    Wireless Client Roles - Add/Edit - LDAP Settings Tab
    GUID-B87CAE7C-3211-4B8E-A111-A11FF3531409-low.png
  3. In the Configuration section, define the following LDAP server parameters:
    LDAP Query If LDAP attributes are enabled for the selected wireless client role policy, select an LDAP query mode of either Internal (Self) or Through Wireless Controller. Select Internal (Self) to use local LDAP server resources configured in the LDAP Server Options.
    Dead Period When using an external LDAP server, select the Dead Period between 60 and 300 seconds. The Dead Period is the timeout value before the system will attempt to rebind with the LDAP server.
    Timeout When using an external LDAP server, select a Timeout value to specify how long of a delay between request and responses before LDAP bind and queries will be timed out.
  4. In the LDAP Server Options section, use the + Add Row button to add an LDAP server to the list or double-click on an existing LDAP server entry to edit it.
    When adding or editing the LDAP server options, define the following parameters:
    ServerId When adding or editing an LDAP server entry, enter the LDAP server ID as either 1 or 2.
    Host When adding or editing an LDAP server entry, enter the LDAP server's fully qualified domain name or IP address in the Host field.
    Bind DN When adding or editing an LDAP server entry, enter the LDAP server's bind distinguished name in the Bind DN field.
    Base DN When adding or editing an LDAP server entry, enter the LDAP server's base distinguished name in the Base DN field.
    Bind Password When adding or editing an LDAP server entry, enter the password for bind. Click the Show button to display the password.
    Port When adding or editing an LDAP server entry, enter the LDAP server port number. To select from a list of frequently used services and their corresponding port numbers, use the drop-down menu and select a service.
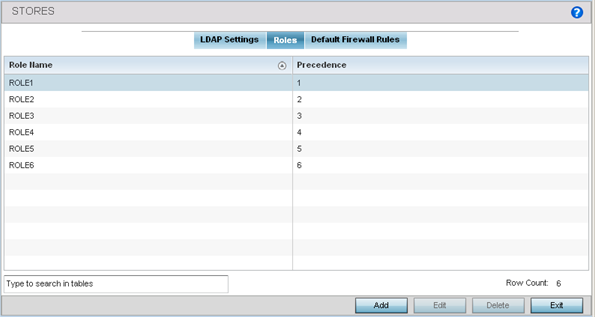
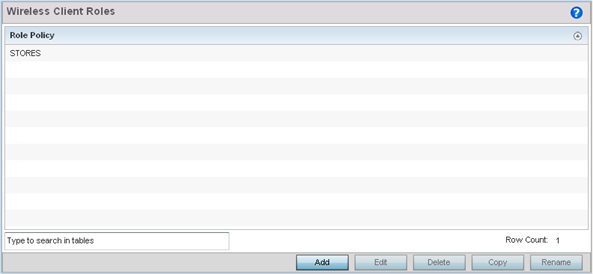
  5. Click on the Roles tab.
    If no policies have been created, a default wireless client role policy can be applied. The Roles screen lists existing policies. Any of these existing policies can be selected and edited or a new role can be added.
    Click to expand in new window
    Wireless Client Roles - Add/Edit - Roles Tab
    GUID-6F3E3626-3E03-42D5-BEA4-357C04A0276E-low.png
  6. Refer to the following configuration data for existing roles:
    Role Name Displays the name assigned to the client role policy when it was initially created.
    Precedence Displays the precedence number associated with each role. Precedence numbers determine the order a role is applied. Roles with lower numbers are applied before those with higher numbers. Precedence numbers are assigned when a role is created or modified, and two or more roles can share the same precedence.
  7. Select Add to create a new wireless client role policy, Edit to modify the attributes of a selected policy or Delete to remove obsolete policies from the list of those available.
    The Role Policy Roles screen displays with the Settings tab displayed by default.
    Click to expand in new window
    Wireless Client Roles - Add/Edit - Roles - Settings Tab
    GUID-365B507E-946F-4666-8802-6B9C824D4ED8-low.png
  8. If you are creating a new role, assign it a Role Name to help differentiate it from others that may have a similar configuration.
    The role policy name cannot exceed 64 characters. The name cannot be modified as part of the edit process.
  9. In the Role Precedence field, use the spinner control to set a numerical precedence value between 1 - 10,000.
    Precedence determines the order a role is applied. Roles with lower numbers are applied before those with higher numbers. While there‘s no default precedence for a role, two or more roles can share the same precedence.
  10. Use the Discovery Policy drop-down menu to specify the Bonjour Gateway.

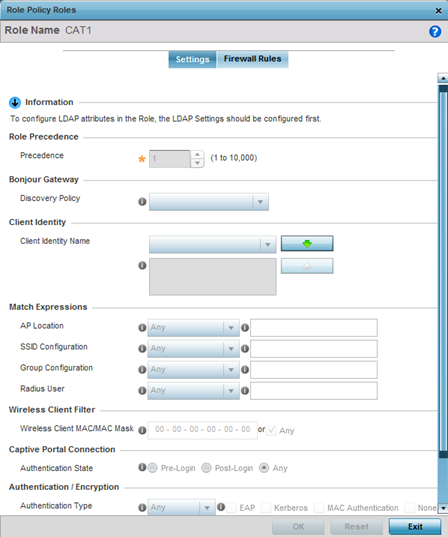
    Bonjour provides a method to discover services on a LAN. Bonjour allows users to set up a network without any configuration. Services such as printers, scanners and file-sharing servers can be found using Bonjour. Bonjour only works within a single broadcast domain. However, with a special DNS configuration, it can be extended to find services across broadcast domains.

    Note

    Note

    The WiNG 7.1 release does not provide support for Bonjour feature on AP505 and AP510 model access points. This feature will be supported in future releases.
  11. In the Client Identity field, define the client type (Android etc.) used as matching criteria within the client role policy.
    Create new client identity types or edit existing ones as required.
  12. Refer to the Match Expressions field to create filter rules based on AP locations, SSIDs and RADIUS group memberships.
    AP Location Use the drop-down menu to specify the location of an access point matched in an RF domain or the access point‘s resident configuration. Select one of the following filter options:
    • Exact - The role is applied only to access points with the exact location string specified in the role.
    • Contains - The role is applied only to access points whose location contains the location string specified in the role.
    • Does Not Contain - The role is applied only to access points whose location does not contain the location string specified in the role.
    • Any - The role is applied to any access point location. This is the default setting.
    SSID Configuration Use the drop-down menu to define a wireless client filter option based on how the SSID is specified in a WLAN. Select one of the following options:
    • Exact - The role is applied only when the exact SSID string is specified in the role..
    • Contains - The role is applied only when the SSID contains the string specified in the role.
    • Does Not Contain - The role is applied when the SSID does not contain the string specified in the role.
    • Any - The role is applied to any SSID Location. This is the default setting.
    Group Configuration Use the drop-down menu to define a wireless client filter option based on how the RADIUS group name matches the provided expression. Select one of the following options:
    • Exact - The role is applied only when the exact RADIUS Group Name string is specified in the role..
    • Contains - The role is applied when the RADIUS Group Name contains the string specified in the role.
    • Does Not Contain - The role is applied when the RADIUS Group Name does not contain the string specified in the role.
    • Any - The role is applied to any RADIUS Group Name. This is the default setting.
    RADIUS User Use the drop-down menu to define a filter option based on how the RADIUS user name (1-255 characters in length) matches the provided expression. Select one of the following options:
    • Exact - The role is applied only when the exact RADIUS user string is specified in the role..
    • Contains - The role is applied when the RADIUS user starts with the string specified in the role.
    • Does Not Contain - The role is applied when the RADIUS user does not contain the string specified in the role.
    • Any - The role is applied to any RADIUS user name. This is the default setting.
  13. Use the Wireless Client Filter parameter to define a wireless client MAC address filter that is applied to each role.
    Select the Any radio button to use any MAC address. The default is Any.
  14. Refer to the Captive Portal Connection parameter to define when wireless clients are authenticated when making a captive portal authentication request.
    Secure guest access is referred to as captive portal. A captive portal is guest access policy for providing temporary and restrictive access to the wireless network. Existing captive portal policies can be applied to a WLAN to provide secure guest access.
  15. Select the Pre-Login check box to conduct captive portal client authentication before the client is logged.
    Select Post-Login to have the client share authentication credentials after it has logged into the network. Selecting Any (the default setting) makes no distinction on whether authentication is conducted before or after the client has logged in.
  16. Use the Authentication / Encryption field to set the authentication and encryption filters applied to this wireless client role.
    The options for both authentication and encryption are:
    Equals The role is applied only when the authentication and encryption type matches the exact method(s) specified by the radio button selections.
    Not Equals The role is applied only when the authentication and encryption type does not match the exact method(s) specified by the radio button selections.
    Any The role is applied to any type. This is the default setting for both authentication and encryption.
  17. Use the + (plus sign) to the left of the LDAP Attributes label to expand it.
    Set the following LDAP Attributes for the role policy: The following filter criteria apply to each LDAP attribute:
    Exact The role is applied only when the exact string is specified in the role.
    Contains The role is applied when the LDAP attribute contains the string specified in the role.
    Does Not Contain The role is applied when the LDAP attribute does not contain the string specified in the role.
    Any The role is applied to any LDAP attribute. This is the default setting.
    City Enter a 2-31 character name of the city filtered in the role.
    Company Enter a 2-31 character name of the organizational company filtered in the role.
    Country Enter a 2-31 character name of the country (co) filtered in the role.
    Department Enter a 2-31 character name of the organizational department filtered in the role.
    Email Enter a 2-31 character name of the Email address filtered in the role.
    Employee Id Enter a 2-31 character name of the employee ID filtered in the role.
    State Enter a 2-31 character name of the state filtered in the role.
    Title Enter a 2-31 character name of the job or organizational title filtered in the role.
    Member Of Provide a 64 character maximum description of the group membership in the role.
  18. Select OK to update the Settings screen.
    Select Reset to revert to the last saved configuration.
  19. Select the Firewall Rules tab to set default Firewall rules for Inbound and Outbound IP and MAC Firewall rules.
    Click to expand in new window
    Wireless Client Roles - Add/Edit - Roles - Firewall Rules Tab
    GUID-F20879A4-2FC1-4132-90A0-A601D443A206-low.png

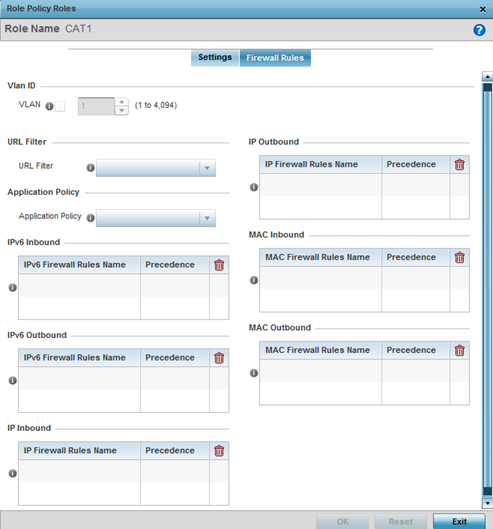
    A firewall is a mechanism enforcing access control, and is considered a first line of defense in protecting proprietary information within the network. The means by which this is accomplished varies, but in principle, a firewall can be thought of as mechanisms both blocking and permitting data traffic based on inbound and outbound IP and MAC rules.

    IP-based firewall rules are specific to source and destination IP addresses and the unique rules and precedence orders assigned. Both IP and non-IP traffic on the same Layer 2 interface can be filtered by applying both an IP ACL and a MAC.

    Additionally, administrators can filter Layer 2 traffic on a physical Layer 2 interface using MAC addresses. A MAC firewall rule uses source and destination MAC addresses for matching operations, where the result is a typical allow, deny, or mark designation to packet traffic.

  20. Set the Vlan ID (from 1 - 4094) for the virtual LAN used by clients matching the IP or MAC inbound and outbound rules of this policy.
  21. Use the drop-down to select the appropriate Application Policy to use with this firewall rule.
    An application policy defines the rules or actions executed on recognized HTTP (Facebook), enterprise (Webex), and peer-to-peer (gaming) applications or application-categories (layer-7 traffic).
    Note

    Note

    The WiNG 7.1.X release does not support third-party DPI engine on the AP5XX model access points. WiNG 7.1.2 supports EAA (Extreme Application Analytics) (Purview™) DPI engine on the WiNG 7.1.X APs. For more information, refer the WiNG 7.1.2 CLI Reference guide, available at https://extremenetworks.com/documentation.
  22. Specify an IPv6 Inbound or IPv6 Outbound firewall rule by selecting a rule from the drop-down menu and use the spinner control to assign the rule Precedence.
    Rules with lower precedence are always applied first to packets. Select the + Add Row button or Delete icon as needed to add or remove IPv6 firewall rules. If no IPv6 Inbound or Outbound firewall ACL exist create the IPv6 firewall ACL and use here.
  23. Specify an IP Inbound or IP Outbound firewall rule by selecting a rule from the drop-down menu and use the spinner control to assign the rule Precedence.
    Rules with lower precedence are always applied first to packets. Select the + Add Row button or Delete icon as needed to add or remove IP firewall rules. If no IP Inbound or Outbound firewall ACL exist create the IP firewall ACL and use here.
  24. Specify an MAC Inbound or MAC Outbound firewall rule by selecting a rule from the drop-down menu and use the spinner control to assign the rule Precedence.
    Rules with lower precedence are always applied first to packets. Select the + Add Row button or Delete icon as needed to add or remove MAC firewall rules. If no MAC Inbound or Outbound firewall ACL exist create the MAC firewall ACL and use here.
  25. Select OK to save the Firewall Rules updates.
    Select Reset to revert to the last saved configuration.