To apply overrides to the profile's general configuration:
The Device Overrides screen displays. This screen lists devices within the managed network.
The selected access point's configuration menu displays.
|
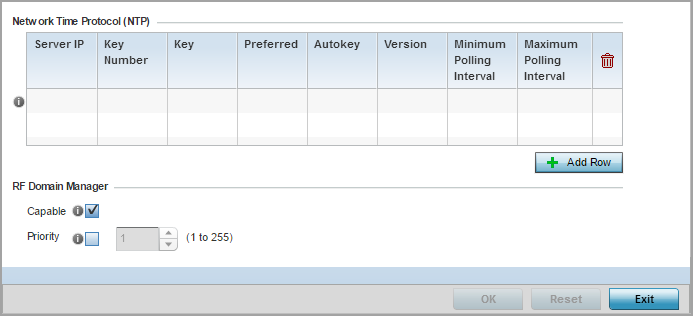
Server IP |
Set the IP address of each server added as a potential NTP resource. |
|
Key Number |
Select the number of the associated authentication peer key for the NTP resource. |
|
Key |
Enter a 64 character maximum key used when the autokey setting is set to false (disabled). Select the Show option to expose the actual character string comprising the key. |
|
Preferred |
Select this option to designate this NTP resource as a preferred NTP resource. This setting is disabled by default. |
|
AutoKey |
Select the check box to enable an autokey configuration for the NTP resource. The default setting is disabled. |
|
Version |
Use the spinner control to specify the version number used by this NTP server resource. The default setting is 0. |
|
Minimum Polling Interval |
Use the drop-down menu to select the minimum polling interval. Once set, the NTP resource is polled no sooner then the defined interval. Options include 64, 128, 256, 512 or 1024 seconds. The default setting is 64 seconds. |
|
Maximum Polling Interval |
Use the drop-down menu to select the maximum polling interval. Once set, the NTP resource is polled no later then the defined interval. Options include 64, 128, 256, 512 or 1024 seconds. The default setting is 1024 seconds. |
|
Capable |
Select to enable this access point to act as a RF Domain Manager in a particular RF Domain. Note:
This option is enabled by default. |
|
Priority |
Select to prioritize this access point in becoming a RF Domain Manager in its; particular RF Domain. The higher the value, the more likely the device becomes the RF Domain Manager for the domain. Note:
This option is disabled by disabled. |
Select Resetto revert to the last saved configuration.
 Print
this page
Print
this page Email this topic
 Feedback
 View PDF
 Download EPUB