Add a Discovery Profile

Discovery profiles configure how devices are discovered or imported into the Extreme AirDefense managed network.

Click to expand in new window

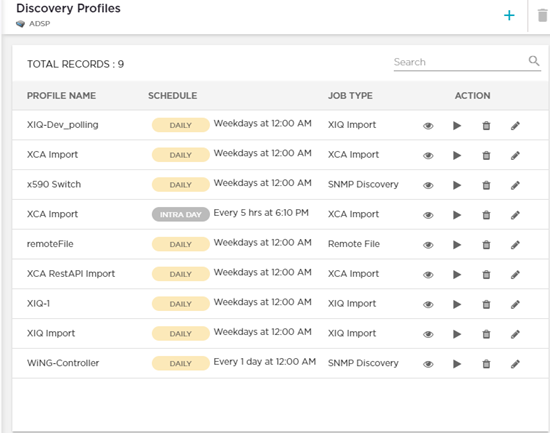
To add a new discovery profile:

  1. From the Discovery Profiles screen, select the icon.

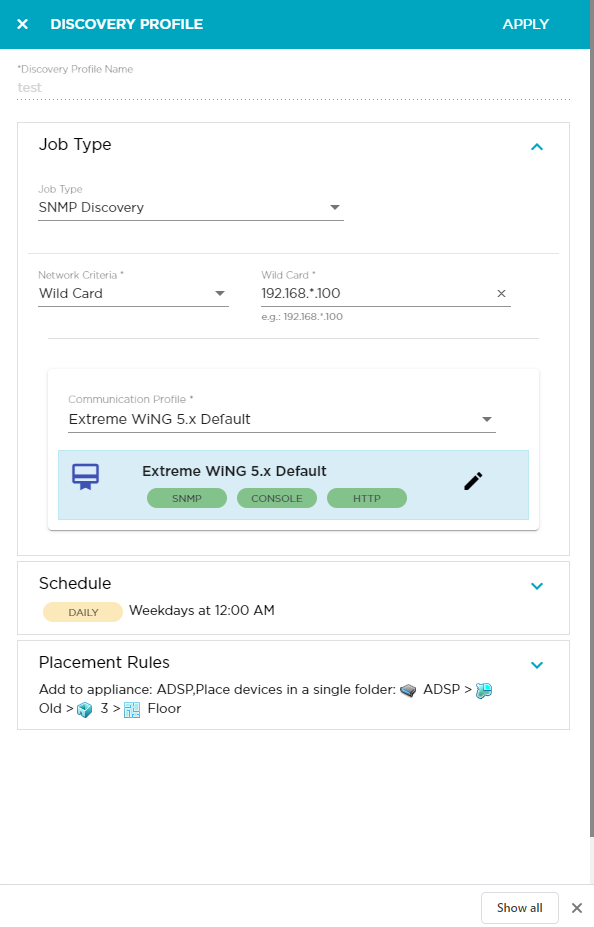
    The Discovery Profile dialog displays.

    Click to expand in new window
  2. In the Discovery Profile Name field, change the default value from New Scheduled Import to a name that describes this discovery profile.
  3. Expand the Job Type field using the icon.
  4. Select the method through which Extreme AirDefense imports device information:
    OptionDescription
    SNMP Discovery Configure device imports through SNMP Discovery.
    Local File Import devices via a local file.
    Remote File Import devices via a remote file.
    XCC Import Import device information from Extreme AirDefense.
    XIQ Import Import device information fromExtremeCloud IQ.

    From the Network Criteria selection drop-down list, select the criteria used to select the device.

    Wild Card
    Enter an IP address including a wild card. For example, 10.9.*.100.
    Single IP
    Enter a single IP address. For example, 192.168.12.23.
    IP Range
    Enter a range of IP addresses. For example, 192.168.10.10-192.168.10.35.
    Network Address
    Enter a Network Address. For example, 192.168.10.0/24.
    FQDN
    Enter a fully qualified domain name. For example, www.example.com.

    Use the Communication Profile field to select an existing communication profile. From the drop-down list, you can select a existing communication profile, or you can create a new profile. You can also select the Manual Entry option from this list to create a communication profile that is unique to this SNMP host.

    Note

    Note

    A communication profile is a set of parameters that enables you to connect to a remote server. For more information on communication profiles, see Communication Profile.
  5. Use the Schedule field to schedule the frequency that discovery of the device occurs. Select Daily, Monthly, One Time, and Intra-Day (which is more than one time per day) from the drop-down list. You can also select the time that the device is discovered.
  6. Use the Placement Rules field to configure the placement of the devices.
  7. To configure device imports through a Remote File, select the Remote File button.

    Provide the following information:

    Field Description
    Host Provide the host name or IP address of the remote server where the import file is located.
    Protocol From the drop-down list, select the protocol to use when communicating with the remote host.
    Path Enter the full path to the import file on the remote host. The path must also include the full name of the import file. For example /home/localadmin/temp/importlist.list
    User Enter the username to be used when connecting to the remote host.
    Password Enter the correct password for the username entered in the User field.
    Verify Server Certificate Select this option to force Extreme AirDefense to verify the remote server's security certificate for validity.
  8. Select the APPLY button located to the top right of this dialog to save the device discovery profile.
  9. Select the small 'x' icon to the top left of the dialog to close it.