A Communication Profile is a set of configurations that enables you to use the same settings for connecting to various devices in your AirDefense managed network.
To add a new communication profile:
The Communication Profile dialog displays.
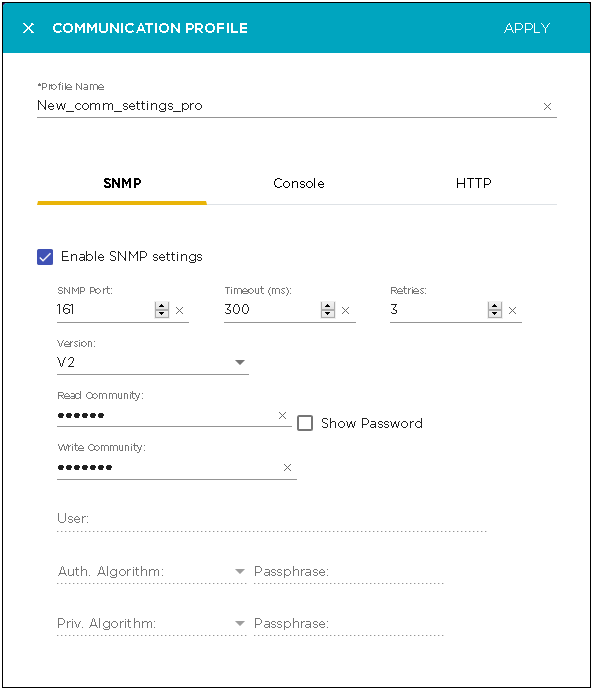
By default, the SNMP configuration tab displays.
| Field | Description |
|---|---|
| Enable SNMP Settings | Select this switch to enable SNMP settings. |
| SNMP Port | Use the spinner to set the SNMP port for the device. The default port number is 161. |
| Timeout (in ms) | Use the spinner to set the timeout value in milliseconds to connect to the device. |
| Retries | Use the spinner to set the maximum number of retires that can be made while attempting to connect to the device. |
| Version | Use the drop-down to select the SNMP version number to use. AirDefense supports SNMP version 1 (V1), version 2 (V2), and version 3 (V3). |
| Read Community | Enter the Read Community string. This string is used for SNMP authentication. You also have an option to display passwords while typing them. |
| Write Community | Enter the Write Community string. This string is used for the SNMP authentication. |
| User | Enter the name of the SNMP V3 user.
This user is configured on the switch
for SNMP V3 access. Note:
This field is only available when SNMP
version is V3.
|
| Auth. Algorithm | Use the drop-down list to select the
authentication algorithm. This selection
must match what is set on the device.
The available algorithms are
MD5,
SHA, and
None. You must supply
a pass-phrase which must also match what
is set on the device. Note:
This field is only available when SNMP
version is V3.
|
| Priv. Algorithm | Use the drop-down list to select the
privacy algorithm. This selection must
match what is set on the device. The
available algorithms are
DES,
3DES,
AES128,
AES192,
AES256, and
none. You
must also supply a pass-phrase which
must also match what is set on the
device. Note: This field is
only available when SNMP version is
V3.
|
Provide the following information:
| Field | Description |
|---|---|
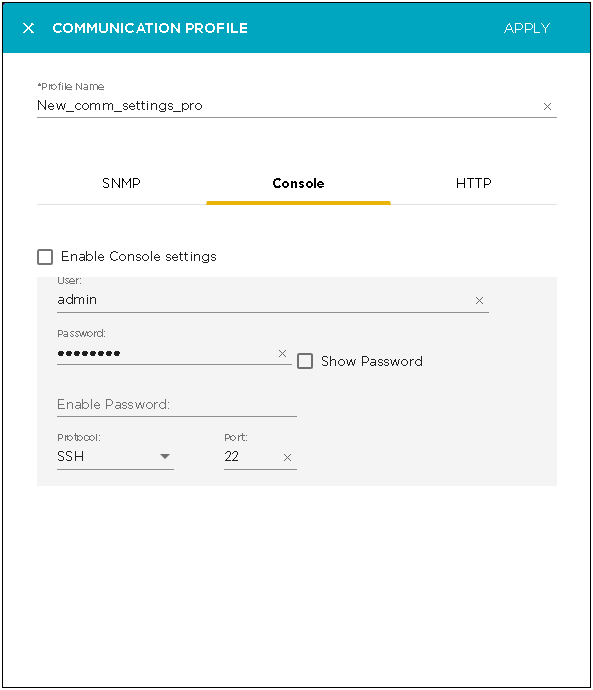
| Enable Console Settings | Select this switch to enable Console settings. |
| User | Use this field to enter the user name used to log in to the device. |
| Password | Use this field to enter the password for the above user name. Use the Show Password checkbox to view the password entered in this field. |
| Enable Password | Use this field to enter the Enable password. This password is required to enter the enable mode on the device. |
| Protocol | Use the drop-down list to select the protocol to use for console access. Select from SSH or Telnet. |
| Port | Use this field to enter the port number that is used for communications. By default port 22 is used used. |
Provide the following information:
| Field | Description |
|---|---|
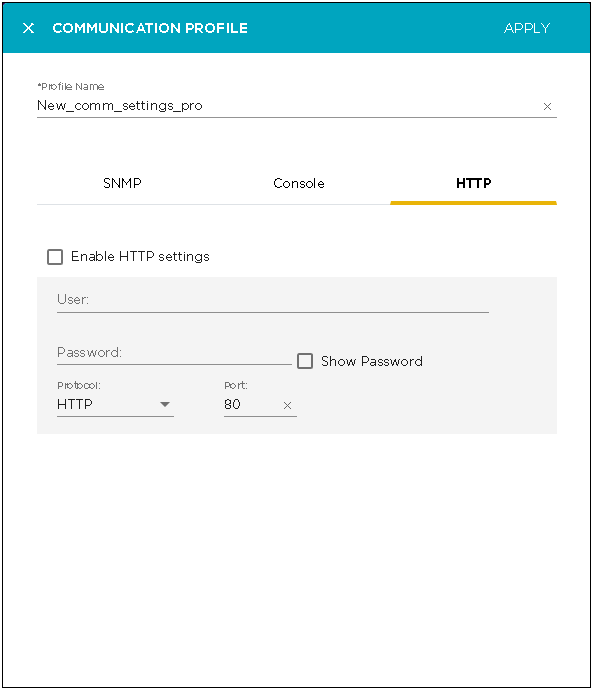
| Enable HTTP Settings | Select this switch to enable HTTP settings. |
| User | Use this field to enter the user name used to log in to the device. |
| Password | Use this field to enter the password for the above user name. |
| Protocol | Use the drop-down list to select the protocol to use for HTTP access. Select from HTTP or HTTPS. |
| Port | Use this field to enter the port number that is used for communications. By default port 80 is used used. |