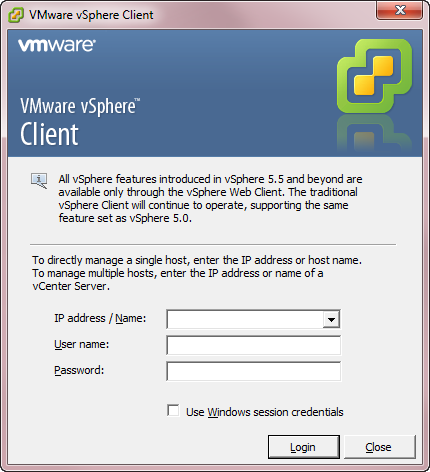
Once VMware
is installed, double-click the VMware
vSphere Client icon on your desktop to
access the VMware vSphere server.
Enter the IP
address of your server, your user name and password; then,
click Login.
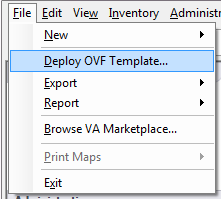
Select
File > Deploy OVF Template.
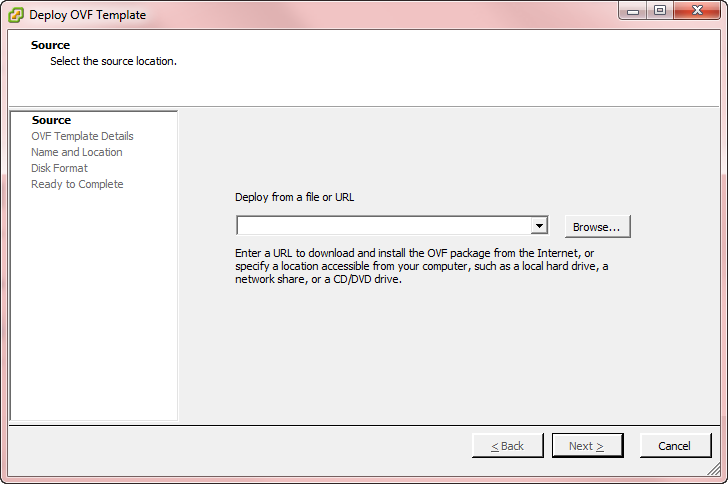
The Deploy OVF Template window is displayed.
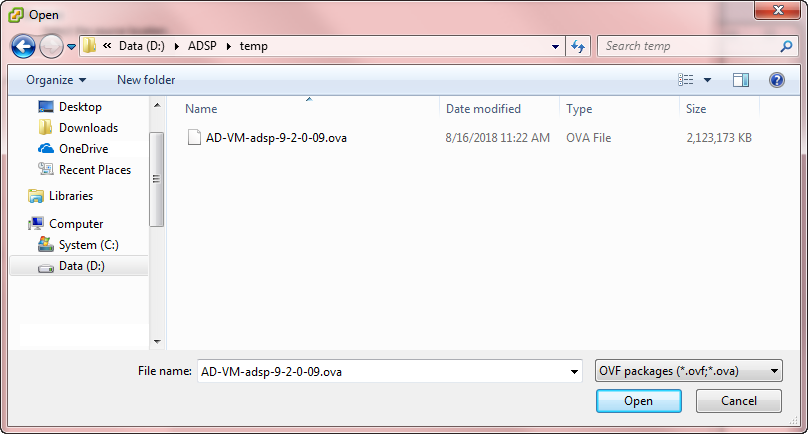
Click
Browse and select the VMware image for the
latest version of AirDefense. In the following example, you would
select the AD-VM-adsp-9-2-0-09.ova file from your
local PC.
Click
Next. The OVF template details window
displays.
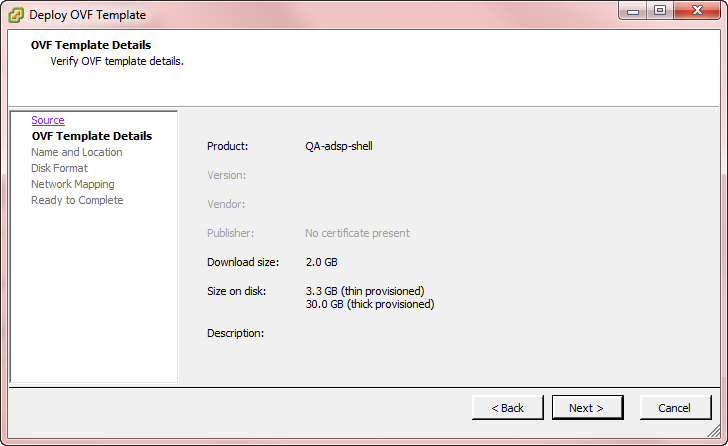
Verify the
OVF template details and then click Next. The Name and
Location screen displays.
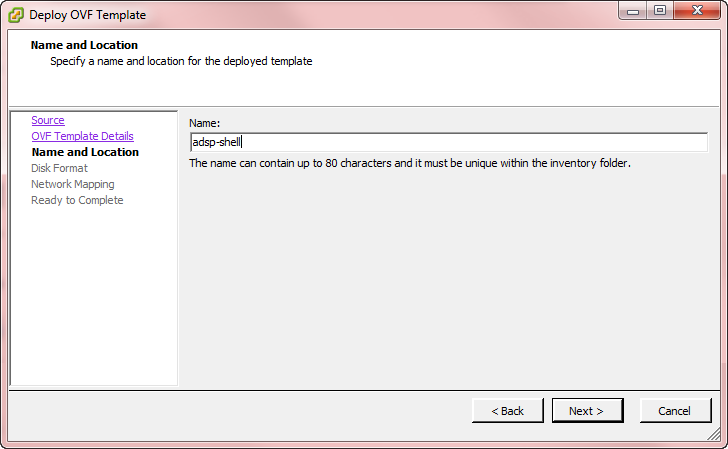
Enter a name
(for example, adsp-shell) and then click Next.
When
multiple installation destinations are available, you must
select a destination for storage of the VM files and then
click Next.
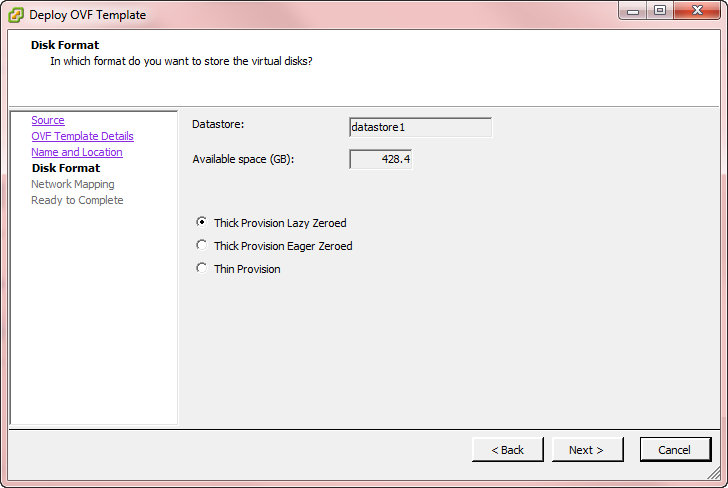
Select a
Disk
Format and then click Next.
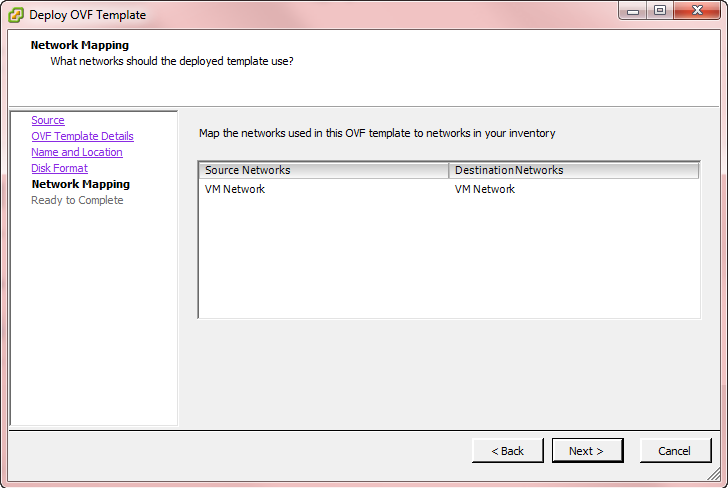
Map the
networks used in this OVF template to the networks available
in your inventory. Use the drop-down list under the
DestinationNetworks column to select the
correct network.
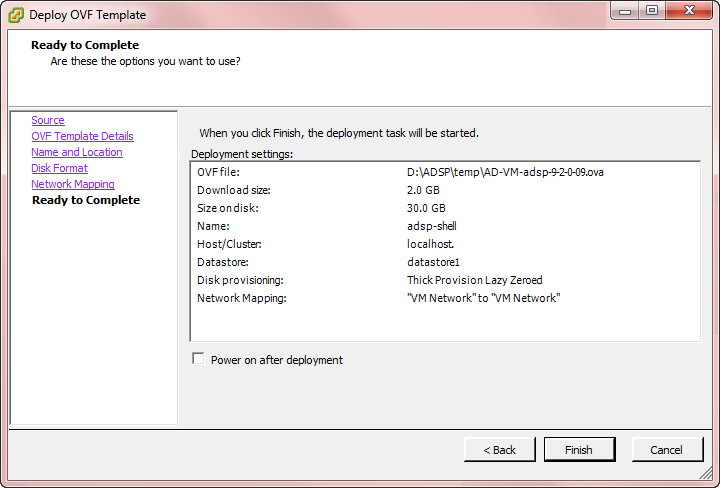
Verify the
information. Power on
after deployment should not be enabled by
default. If enabled, select the control to disable this
option. Click Finish to deploy.
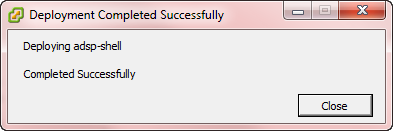
Wait until
the Deployment Completed Successfully dialog box
displays. This could take several minutes to hours depending
on the location (local or Internet) of the AirDefense image being deployed.
Click
Close.
Note
If you receive a deployment error, download
the zlib1.dllfile from the Extreme
Networks Support Center at Extreme Networks Support and
copy the file to your local hard drive.
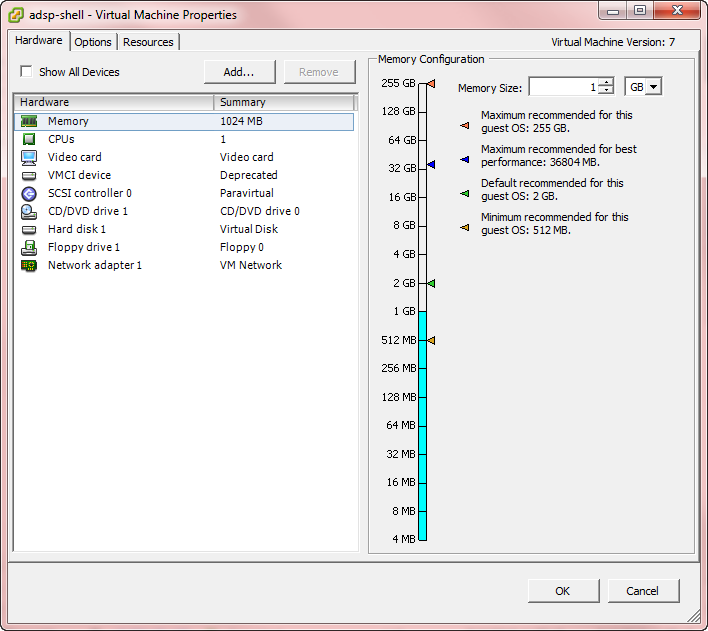
Right-click
on the VM and then select Edit
Settings.
The following window is displayed.
Set Memory,
CPUs and hard disk size as specified in Required System Configuration
section and also based on the network devices and clients to
be supported by AirDefense.
Click
OK.
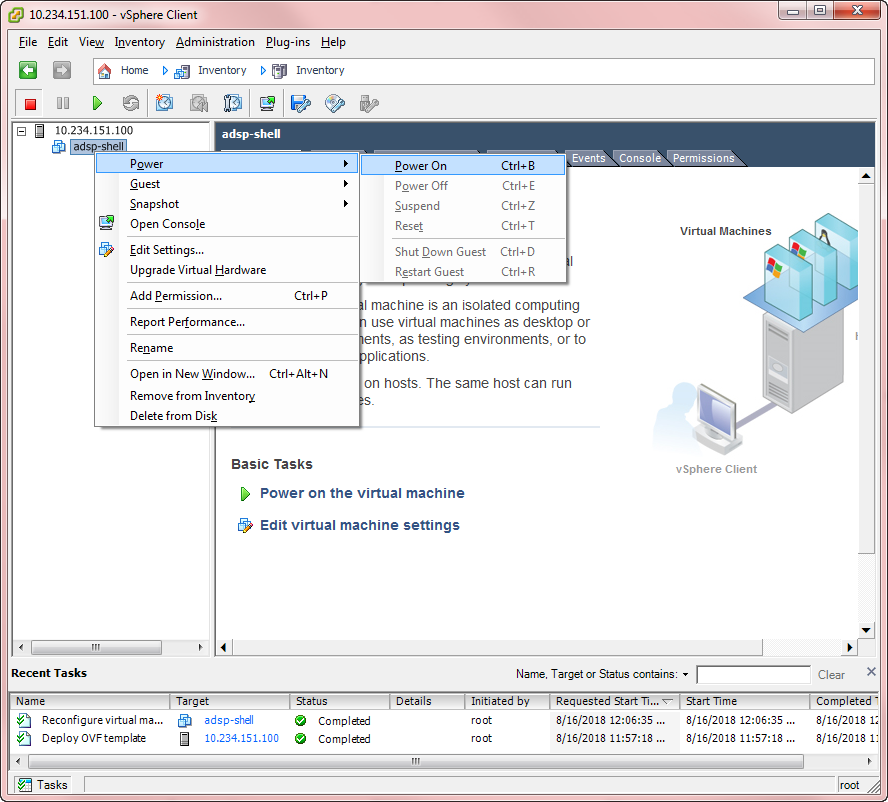
Right-click
on the AirDefense VM and then select Power > Power
On.
Double-click
the VM, then select the Console tab, and wait for login prompt.
While waiting, AirDefense VM configures automatically.
When login
prompt displays, log into AirDefense and configure just like you would any
AirDefense appliance.
Note
If you lose control of the cursor while
using the VM, press Ctrl-Alt key combination to regain
control.