Setup Prerequisites

  1. Enable SNMP Trap reception on the ADSP appliance:
    1. From the ADSPadmin utility on the appliance console, select C for Config then SNMP for Enable/Disable SNMP trap reception.
    2. Select E for Enable and save changes as shown below
    SNMP currently disabled 
                        
    (E) Enable SNMP 
    (Q) to quit (return to previous menu) -> E
                        
    Save the SNMP state as shown above? (yes/no): yes 
                        
    iptables: Flushing firewall rules:                      [ OK ] 
    iptables: Setting chains to policy ACCEPT: filter       [ OK ] 
    iptables: Uploading modules:                            [ OK ] 
    iptables: Applying firewall rules:                      [ OK ] 
    iptables: Loading additional modules: ip_conntrack_tftp [ OK ] 
                        
    (Press <CR> to return to previous menu)
  2. Verify Discovery SNMP Parameters:
    1. In the appliance GUI, go to Configuration > Appliance Platform > Communication Settings.
    2. Click on the Unplaced Devices folder.
      Note

      Note

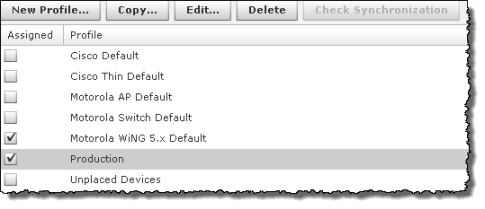
      When performing a discovery based on receiving a SNMP trap from a device, the system will use credentials based on the profile(s) set on the Unplaced Devices folder. The Unplaced Devices folder must have the default credentials for the device being deployed for the discovery to work successfully.
    3. Uncheck default profiles for device types which will not be placed on your network.

      For example, for deployments of just WiNG 5.2 devices, you would uncheck all default profiles but the WiNG 5.x Default.

      If more than one device type is being deployed, setting the unplaced device folder to inherit rather than override is sufficient.
  3. Verify Device Communication Settings:
    1. In the appliance GUI, go to Configuration > Appliance Platform > Communication Settings
    2. Click on the top level of the tree to show currently applied profiles.
    3. Uncheck default profiles for device types which will not be placed on your network.

      For example, for deployments of just WiNG 5.1 devices, you would uncheck all default profiles but the WiNG 5.x Default.

      Note

      Note

      Leaving all profiles checked will not prevent the zero touch feature from working but it will slow down the process.
    4. Add a new profile which uses the non default production credentials that the infrastructure will have after completion of the zero touch configuration.
      Click to expand in new window

      Once complete, profile assignment should look like below:

      Click to expand in new window
  4. Setup network device configuration action:
    1. The system must be enabled to allow configuration push to the new infrastructure devices. To set this up, go to Configuration > Appliance Platform > Polling.
    2. Enable the following settings:
      • Automatically Correct Configuration Compliance Violations
      • Device Configuration Management
      • Template Based Configuration Management
        Click to expand in new window
  5. Set up Relay Server:
    • Configure the relay server for use with configuration management. The relay server setup is not specific to the zero touch feature, instructions for setup can be found in Menu > Help > Search for Relay.
  6. Configure non default device credentials:
    1. Some infrastructure devices require changing the administrator password at first login. The ADSP system must be setup with the credentials to use for configuring the device. The credentials can be set by going to Configuration > Infrastructure Management > Device Access.
    2. Enable configuration.
    3. Add an admin user with password. Make sure this password is different than the default since most devices will reject resetting the password to the default value.
      Click to expand in new window
      Note

      Note

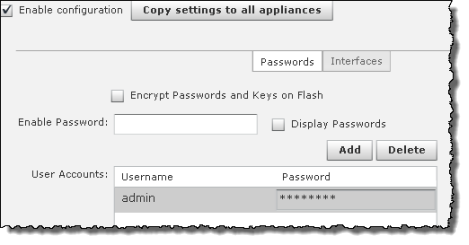
      For devices which require password change at first login, this is the password the system shall use when rotating the password. Also, it should match the console and the "http" password for the production communication profile.
    4. Specify the interfaces to be used. If using SNMP access, specify read and write community passwords.
      Click to expand in new window
    5. Click Apply to save changes.
  7. Set up CLI configuration push.
    1. Set up a CLI template to push the configuration to the device. This template can include just a few lines of code to set the device as a sensor or can include a complete configuration to set and configure all parameters on the device. To create a configuration template, go to Configuration > Infrastructure Management > CLI Configuration and select the specific device type of interest.
    2. CLI expansions can also be used but the corresponding profiles (WLAN, Radio, Channel, Device Access, RF-Domain, ...) need to be configured as well
      Note

      Note

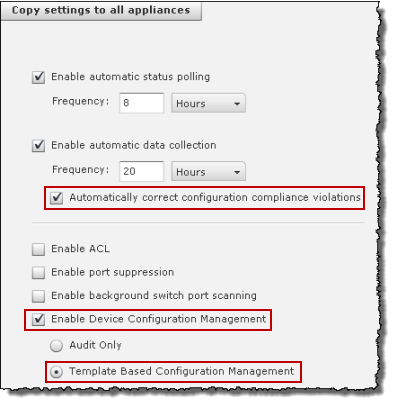
      Make sure that the configuration template and related profiles (WLAN, Radio, Channel, Device Access, RF-Domain, ...) are well tested and validated prior to using them in Zero Config. A poorly written CLI template has the potential to isolate the device from the network.
      Note

      Note

      After initial discovery, the process to fully import the device and place it in a compliant state may take up to 2 data collection cycles.