Add a Security Profile

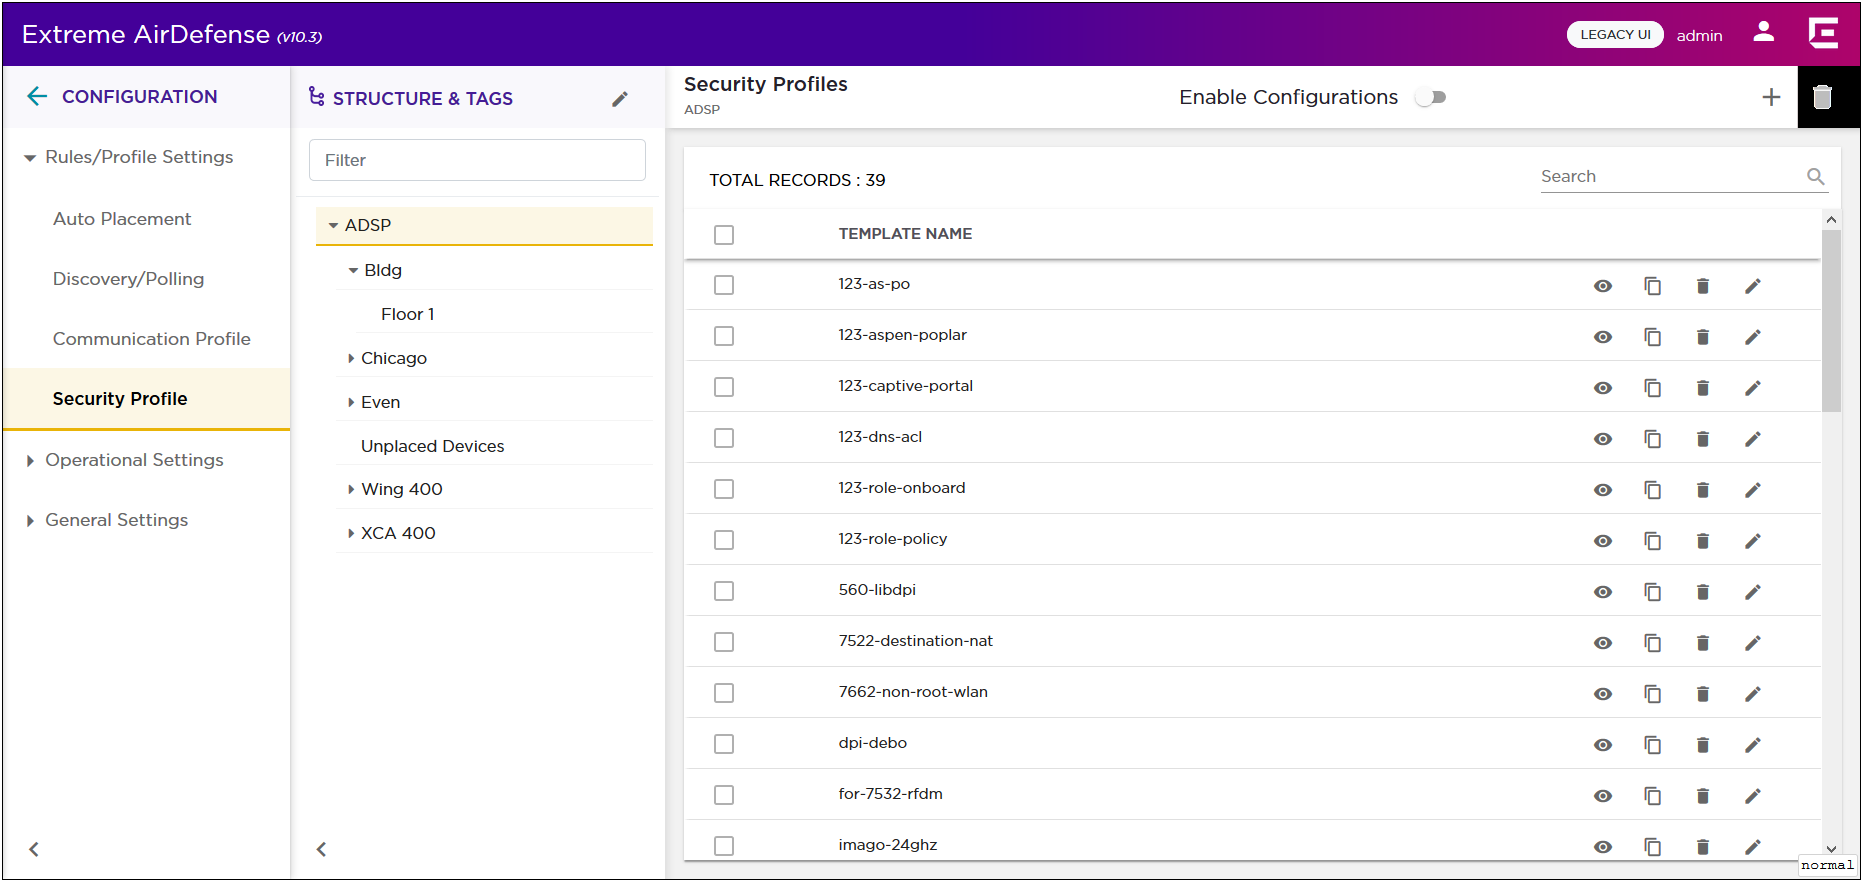
A Security Profile is set of configurations that control how your alarms are generated. Use the Security Profile screen to view a list of these profiles configured for you Extreme AirDefense managed system.

Click to expand in new window
Security Profile Screen

A complete security profile consists of the following configurations:

  • General Configuration - This set of parameters configure settings related to wireless clients.

  • Privacy Configuration - This set of parameters enable you to monitor privacy settings.

  • Rate Settings - This set of parameters select the specific rates that you need to monitor.

The Enable Configuration switch must be set to ON for security profiles to be applied throughout your Extreme AirDefense monitored network. This setting is only available at the topmost level of your Extreme AirDefense network tree.

To add a new security profile:

  1. From the Security Profile screen, select the icon. This icon is located to the top right of this screen.

    The Security Profile screen displays.

    Click to expand in new window
  2. Select the icon next to the General Settings field if the field is not expanded.

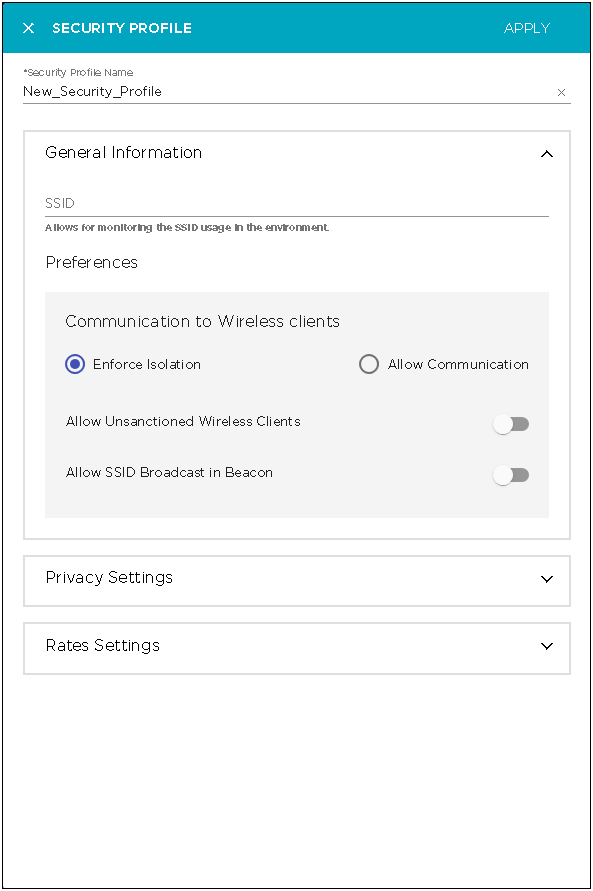
    In the SSID field, provide the SSID that the security profile applies to. This must be a valid SSID used in your Extreme AirDefense system.

    Configure the following preferences for this security profile:

    Field Description
    Communication to Wireless Clients

    Select one of the following options:

    Enforce Isolation
    Select this option to isolate wireless clients within your network.
    Allow Communication
    Select this option to enable communications between wireless clients in your network.
    Allow unsanctioned Wireless clients Select this switch to allow or prevent unsanctioned wireless clients access to your system.
    Allow SSID broadcast in Beacons Select this switch to allow the BSS SSID to be broadcast in its beacon. SSIDs are not passwords. Many BSSs allow their SSIDs to broadcast by default.
  3. Expand the Privacy Settings field using the icon if the field is not expanded.

    This field configures the settings related to transmission privacy.

  4. Select the Monitor Privacy Settings option to enable this feature.

    Provide the following additional configuration information:

    Field Description
    Extended 802.11 Authentication
    WPA
    Select to activate Wi-Fi Protected Access, which uses improved data encryption through the temporal key integrity protocol (TKIP). TKIP scrambles the keys using a hashing algorithm and, by adding an integrity-checking feature, ensures that the keys haven't been tampered with.
    WPA2
    Short for Wi-Fi Protected Access 2, this checkbox enables the follow on security method to WPA for wireless networks that provide stronger data protection and network access control. It provides enterprise and consumer Wi-Fi users with a high level of assurance that only authorized users can access their wireless networks. Based on the IEEE 802.11i standard, WPA2 provides government grade security by implementing the National Institute of Standards and Technology (NIST) FIPS 140-2 compliant AES encryption algorithm and 802.1x-based authentication.
    Symbol KeyGuard
    When this checkbox is selected, it activates Symbol KeyGuard authentication protocols, which is provided by Symbol Technologies.
    802.11 Encryption
    AES (CCMP)
    When selected, causes the BSS to advertise support for Advanced Encryption Standard (AES-CCMP).
    Unencrypted Allowed
    Select this checkbox to allow unencrypted wireless traffic.
    TKIP
    When selected, this enables the BSS to advertise support for Temporal Key Integrity Protocol (TKIP).
    Advanced Key Generation
    802.1x EAP-FAST
    When selected, it keys 802.1X EAP Flexible Authentication via Secure Tunneling.
    802.1x EAP-TLS
    When selected, it keys EAP Transport Level Security.
    802.1x EAP-TTLS
    When selected, it keys EAP Tunneled Transport Layer Security.
    802.1x EAP-GTC
    When selected, it keys EAP Generic Token Card.
    802.1x RSA/PKA
    When selected, it keys EAP RSA Public Key Authentication Protocol.
    802.1x RSA/SID
    When selected, it keys EAP RSA SecurID.
    802.1x PEAP
    When selected, it keys any 802.1X Protected Extensible Authentication Protocol (PEAP).
    802.1x LEAP
    When selected, it keys EAP Lightweight Extensible Authentication Protocol.
    802.1x Other EAP
    Keys any 802.1x EAP authentication/key distribution mechanism other than the types previously mentioned.
    PSK (preshared key)
    When selected, it activates the Pre-shared Key authentication.
    Base 802.11 Authentication
    Open
    When this checkbox is selected, open system authentication does not actually provide authentication; it only performs identity verification through the exchange of two messages between the initiator (Wireless Client) and the receiver (wireless controller).
    Shared
    When selected, shared key authentication provides authentication by verifying that an initiator has knowledge of a shared secret. Under the 802.11 standard, it is assumed that the shared secret is sent to the wireless controller over a secure channel that is independent of 802.11. In practice, the shared key authentication secret is manually distributed and typed.
    Other Encryption
    AirFortress
    When selected enables AP usage of Layer 3 AirFortress encryption.
    Other Ethertypes allowed
    When selected, enables AP usage of other Layer 3 encryption mechanism which is not specified within this list.
    Cranite
    When selected, enables AP usage of Layer 3 Cranite encryption.
    IP-Sec
    When selected, enables AP usage of Layer 3 IP security protocol as encryption.
  5. Expand the Rate Settings field using the icon if the field is not expanded.

    This field configures the transmit and receive data rates for BSSs to use.

  6. Select the Monitor Rate Settings field to enable it.

    The field expands to display a set of default rates.

    Click to expand in new window

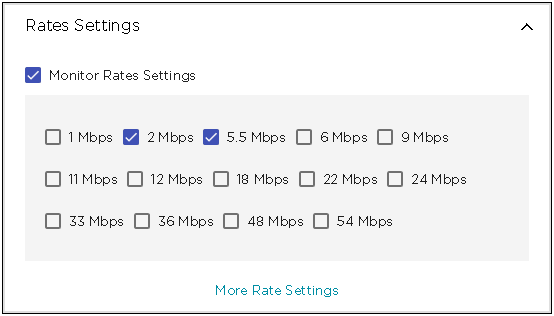
    From the list of rates, select the ones that you want to apply.

    Select the More Rate Settings button to expand this list to include more rates that you can apply.

    Click to expand in new window

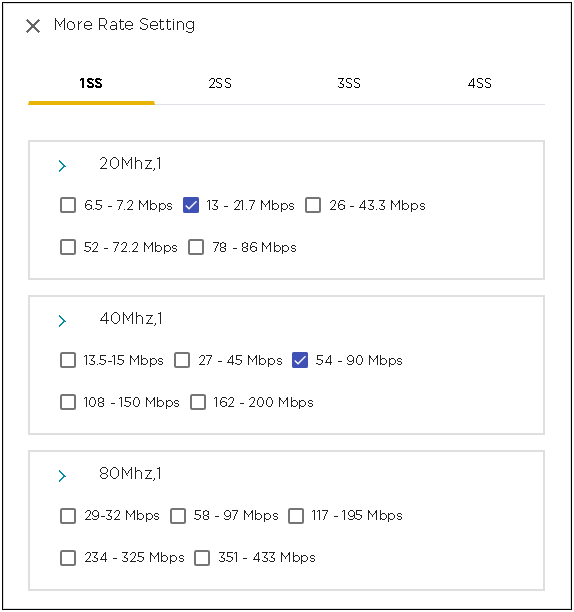
    Select the rates that you want to apply to this security profile.

  7. Select the APPLY button located to the top right of this dialog to save the security profile.
    The new security profile is added to the list of active profiles for this Extreme AirDefense monitored networks.
  8. Select the small X icon located to the top left of the dialog to close it. Your changes will not be saved when you use this method to close the dialog.