Adding a Slave Server

To add a Slave server to be managed from the Central Management Console:

  1. Use the Menu > Add Devices menu to add a new device.

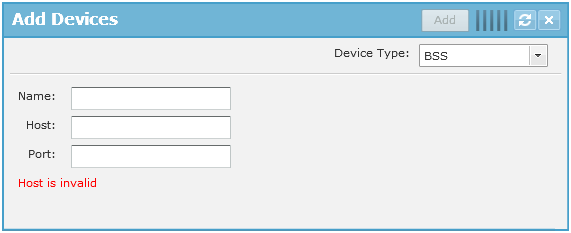
    The Add Devices screen displays.

    Click to expand in new window
  2. From the Device Type drop-down list, select Appliance.

    The Add Devices changes to display the parameters to configure an appliance.

    Click to expand in new window
  3. Provide the following information:

    Field

    Description

    Name

    Provide a friendly name for identifying this Slave server on the CMC console.

    Host

    Provide the IPv4 IP address of the Slave server to be managed by the CMC.

    Port

    Enter the port number for the Slave server. The default port number is 8543.

  4. Click the Add button to add the Slave server.

    The Slave server is added to the AirDefense CMC.

  5. To verify if the Slave server has been added successfully, select Dashboard from the main menu.
  6. Click the Scope drop-down list and select System as the scope.

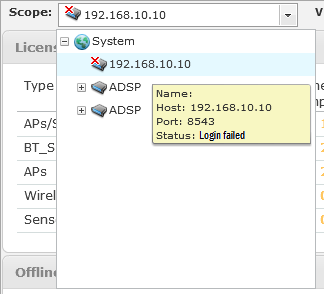
    If the Slave server is added successfully, you will see it's IP address in the Scope drop-down list.

    Note

    Note

    When a new Slave server is added, it cannot be accessed immediately from the Master server's Central Management Console. Hovering about the newly added Slave server entry in the Scope drop-down list displays the information that the login to the Slave server has failed. This is the default behavior as the credentials required for authentication have not been shared between the Master and the Slave servers.

    Click to expand in new window

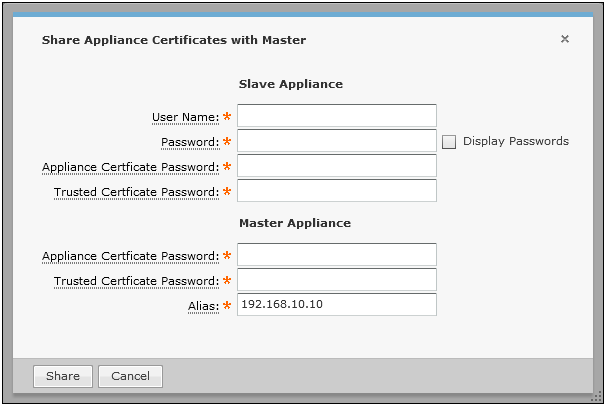
    To resolve this issue, certificates must be exchanged between the Master and the Slave servers.

  7. To exchange certificates between the Master and the Slave servers, select the newly added Slave server's IP address and click the icon next to it.
  8. From the menu, select Share Certificates.

    The Share Appliance Certificate with Master window displays.

    Click to expand in new window
  9. Provide the following information for the Slave Appliance fields:

    Field

    Description

    User Name

    Provide the user Name on the Slave server used for authentication requests from the Master server.

    Password

    Provide the Password for the User name configured on the Slave server used for authentication requests from the Master server.

    Appliance Certificate Password

    Provide the Appliance Certificate Password configured on the Slave server. Generally the default password of Security is used. Contact your server administrator for this password.

    Trusted Certificate Password

    Provide the Trusted Certificate Password configured on the Slave server. Generally the default password of Security is used. Contact your server administrator for this password.

    Provide the following information for the Master Appliance fields:

    Field

    Description

    Appliance Certificate Password

    Provide the Appliance Certificate Password configured on the Master server. Generally the default password of Security is used. Contact your server administrator for this password.

    Trusted Certificate Password

    Provide the Trusted Certificate Password configured on the Master server. Generally the default password of Security is used. Contact your server administrator for this password.

    Alias

    Enter the configured IPv4 address of the Master server. Usually, this field is already filled.

  10. Click Save to save the entered credentials. Click Cancel to exit without saving the changes made to this screen.

    When the Slave server is added successfully to the Master server's Central Management Console, the Slave server can be remotely configured and monitored from the Master server's console.