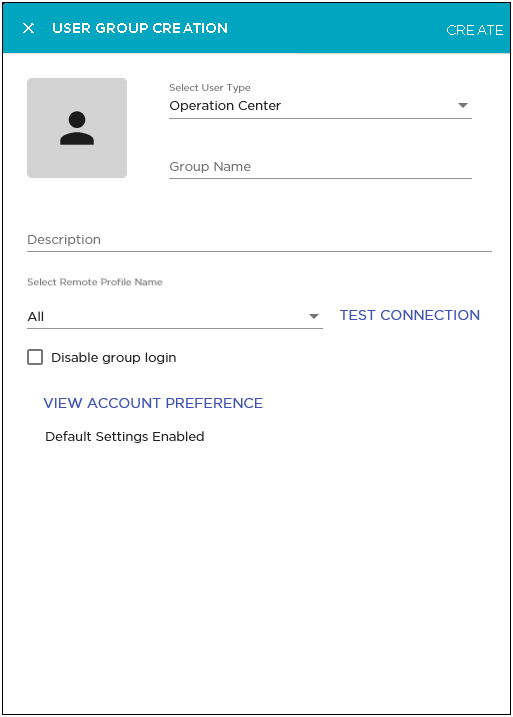
The User Group Creation dialog displays.
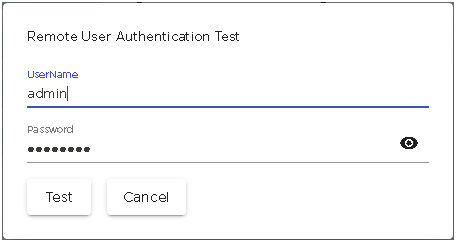
Provide the correct username and password for testing the remote connection and then select the Test button to test the connection.
The status of this test is indicated within this dialog.
The USER CREATION window expands to display additional fields.
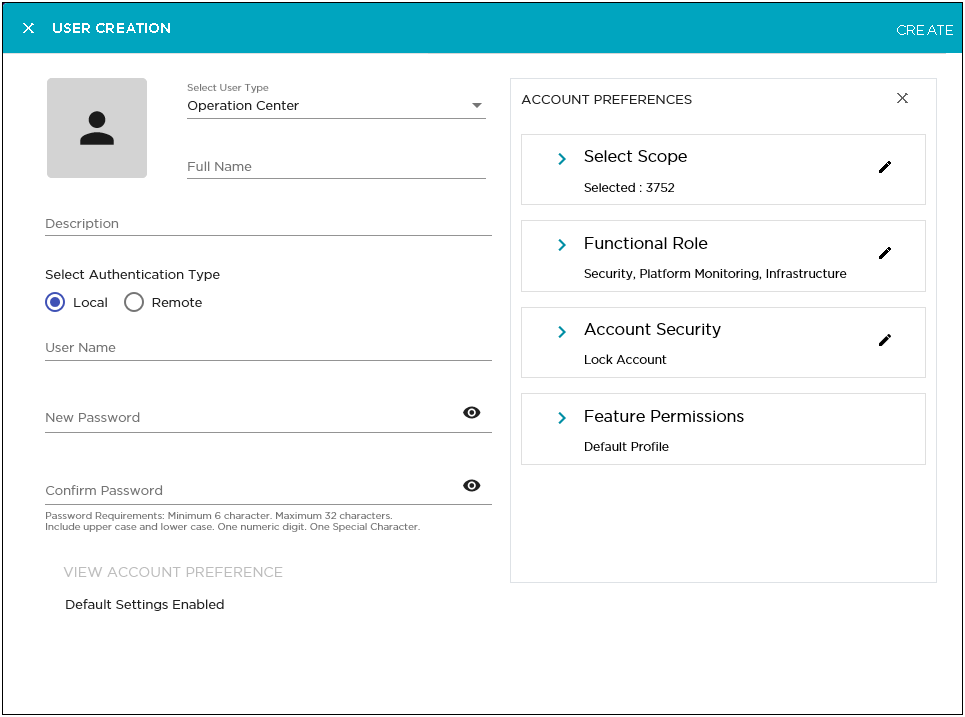
The following fields are displayed.
| Field | Description |
|---|---|
| Scope Permission | This field sets the scope in the AirDefense network tree where this user account is considered valid. Expand this field and select the scope for this setting. |
| Functional Role | This field sets the functional roles that can be performed. Expand this field to view and edit the various parameters for this setting. |
| Account Security | This field sets the user account's security settings. Expand this field to view and edit the various parameters for this setting. |
| Feature Permissions | This field sets the permissions that can be assigned. Expand this field to view and edit the various parameters for this setting. |
The Scope Permission field displays a selectable network tree for this AirDefense instance.
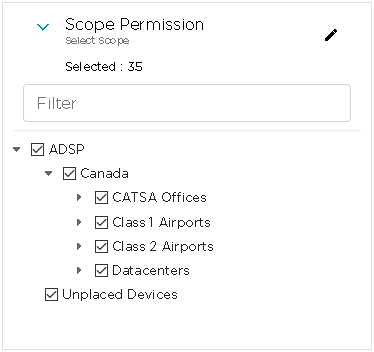
When you select or unselect any level in this network tree, all
sub-levels under the level are selected or unselected
respectively. A selected level is indicated by ![]() icon.
A unselected level is blank.
icon.
A unselected level is blank.
Use the option control next to each level to include or exclude that level when the user account is considered valid in this AirDefense instance. When a level is selected, the configuration is applied to all its sub-levels. Use the option controls for each level to apply or revoke the user's permission on that level.
Review the FUNCTIONAL AREA and the PERMISSION fields. This area lists all the functional areas of AirDefense and the permission that can be set to view or edit that area. If no permission is granted for that particular functional area, the value NO ACCESS is displayed for it.
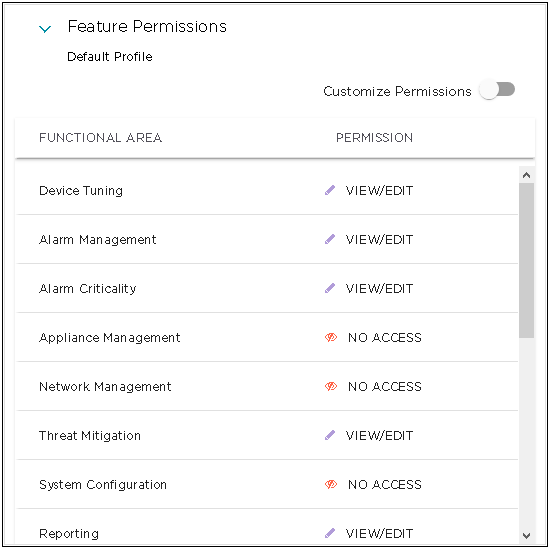
Permissions to view and edit particular areas of AirDefense is set based on the permissions configured in the User Profile selected when creating any user or user group.
Select the Customize Permissions control to enable
editing these permissions individually. After enabling
the Customize Permissions field, select the
![]() icon located next
to the current permission for the functional area that
you wish to modify permissions for. The drop-down
expands and lists the available permissions that can be
applied to the functional area.
icon located next
to the current permission for the functional area that
you wish to modify permissions for. The drop-down
expands and lists the available permissions that can be
applied to the functional area.

The following permissions can be applied to each functional area.