SCP the disk
image (AD-VM-adsp-9-2-0-09-dvd.gz) and the
configuration file (AD-VM-adsp-9-2-0-09-dvd.xm) to a location on
your Xen server. Let us assume that the location is: /var/lib/libvirt/images.
Unzip the
disk image using the following command: gunzip
AD-VM-adsp-9-2-0-09-dvd.gz.
Go to
/var/lib/libvirt/images and edit the
configuration file: vi
AD-VM-adsp-9-2-0-09-dvd.xm.
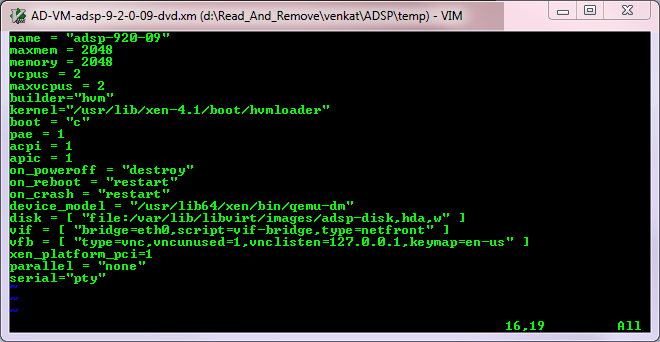
Edit the Configuration File
Change the
line beginning with disk to point to your the location of
your AirDefense image:
disk = [ file:/var/lib/libvirt/images/adsp-disk,hda,w
                        ]
Change the
values for name, maxmem, memory, and maxvcpus to match your
criteria. Refer to Required System Configuration for the recommended resource
configuration for AirDefense.
Increase the
disk size of your AirDefense
installation using the following command:
#
                        fallocate -l <new size in bytes>
                        /var/lib/libvirt/images/adsp-disk
By default, the size of the AirDefense
image is set as the size your AirDefense VM
disk. It is recommended that you increase the disk size
to match the system requirements as specified in Required System
Configuration.
Create an
AirDefense VM from
the new configuration file: xm new
AD-VM-adsp-9-0-2-09-dvd.xm
Start the
AirDefense VM:
xm start adsp-920-09
Note
The VM
name is the same as the one you specified in the
configuration file.
The AirDefense Console
can be started with the following command: xm
console <ADSP VM name>
Log in to
Virtual AirDefense and
configure it as you would any AirDefense
appliance.