You can view your network tree from the Structure Configuration panel wherever available.
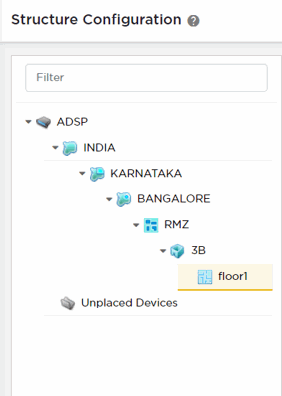
Use the icons next to each node on the network tree to expand or contract it. The inner most node for the network tree is the Floor node. You can create a detailed floor plan map from the Floor node. The topmost node is the Appliance node.
Use the Filter text area to filter the devices to view specific terms in the Structure Configuration pane.
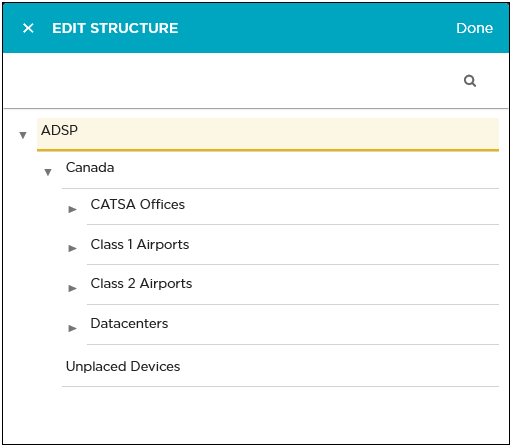
To edit the network tree, select the ![]() icon located to the top
left of the pane. The Edit
Structure dialog displays.
icon located to the top
left of the pane. The Edit
Structure dialog displays.
Place your cursor over a node on this tree to view the actions that can be performed at that level. The following actions can be performed:
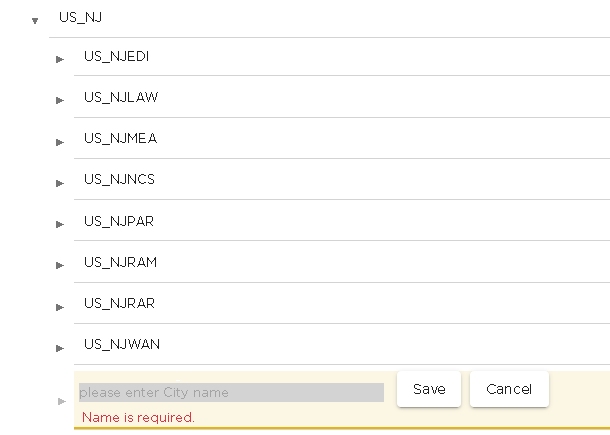
Add a tree node as a next level node (sub-node) in the
hierarchy. Use the ![]() icon to add a node
to the tree.
icon to add a node
to the tree.
When you add a node, it is always added as a sub-node of the node where this action was performed. If the main node has sub-nodes, the new node is always added as the last sub-node.
Edit the node. The only action that can be performed is
renaming the node. Use the ![]() icon to edit the
node.
icon to edit the
node.
The node name is edited in place. Use the Save button to save the edited node name. Use the Cancel button to retain the node's existing name.

Delete the node and if it has sub-nodes, then this
command deletes the sub-nodes too. Use the ![]() icon to delete the
node. The node and its sub-nodes are immediately
deleted.
icon to delete the
node. The node and its sub-nodes are immediately
deleted.